
Hello readers. Today our readers will learn about installing mate desktop in Kali Linux. You all know the first release of Kali Linux this year, Kali Linux 2020.1 has been released in the month of January. The latest version brought many changes like not giving root user by default and some new tools. The most distinct change it brought is a single installer image for installation. Earlier we had different installation images for different desktop environments which include GNOME, KDE etc.
With 2020.1 release, there will be a single installation image for all these and users would have to select the desktop environment he/she needs while installing. The information about different desktop environments and their pros and cons can be seen here.
Today we will see a tutorial on how to install MATE Desktop environment in Kali Linux 2020.1. MATE Desktop although looks old fashioned is light and has a simple interface. Here’s how to install MATE desktop environment in Kali Linux 2020.1. We have performed this tutorial from a X11 terminal but all these commands can be run from any other desktop environment’s terminal. Power on the Kali 2020.1 virtual machine and login (since there is no root user you should login as a user you created or the default user:password i.e kali:kali).
Open a terminal and using nano open the file /etc/apt/sources.list. with sudo
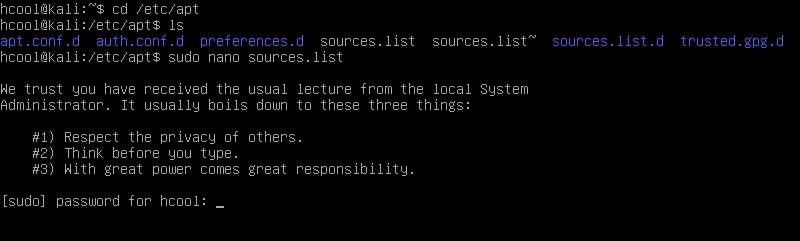
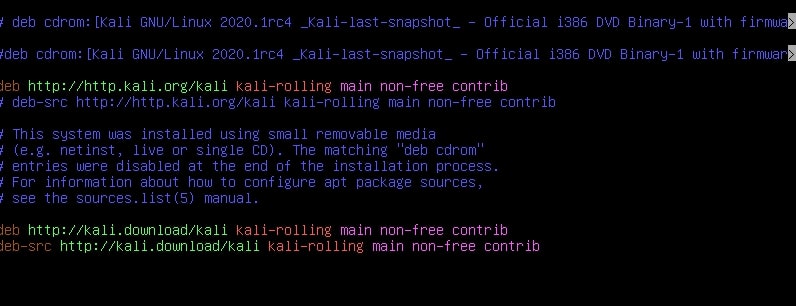
Add these two lines of code to the file and save it.
deb http://kali.download/kali kali-rolling main non-free contrib
deb-src http://kali.download/kali kali-rolling main non-free contrib
To save the file hit CTRl+X and when it prompts select “Yes”.Run command sudo apt-get update

Now everything is ready to install MATE desktop. Run the command given below.
sudo apt-get install mate-core mate-desktop-environment-extra mate-desktop-environment-extras

When the system prompts you for permission to install MATE and its related software, type “Y”.

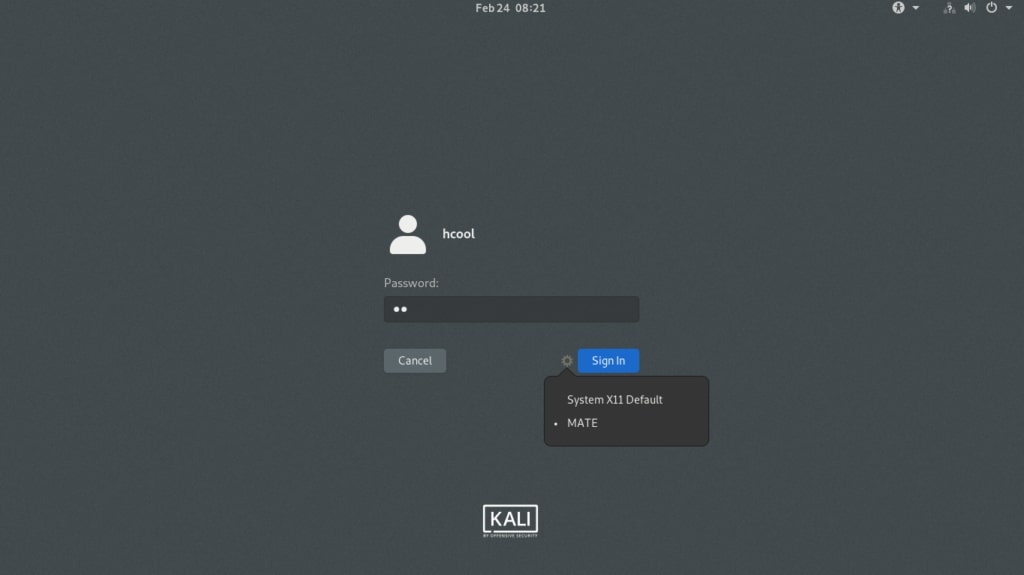
The installation will take some time to finish. After the installation is finished, restart the system (the command is sudo reboot or reboot if you are doing it from terminal). Once the system reboots and takes you to the login screen, before logging in click on the “settings” icon beside the “Signin” button. There you will see all the desktop environments present on the system right now. Select MATE and then login.
Installing MATE desktop has been successfully finished with this.
Liked this article? Learn advanced ethical hacking tutorials in our Monthly Magazine. Enjoy Free for 3 months.