Posted on

5 phases of ethical hacking for beginners

Hello, aspiring ethical hackers. In this blogpost, you will learn what is ethical hacking and the 5 phases of ethical hacking.

What is Ethical Hacking?

Ethical hacking is hacking that is performed while following the ethics and rules. It is a procedure of detecting vulnerabilities and weaknesses in the target organization’s network and exploiting them with the written permission of an individual or organization. It is performed to find out and fix the vulnerabilities in the network that can be exploited by bad hackers aka Black Hat hackers.

What are the 5 phases of ethical hacking?

Ethical hacking consists of 5 phases. They are,

1. Foot printing:

Also known as information gathering or reconnaissance, in this phase ethical hackers try to collect as much information as possible about the target organization or individual that may be helpful to them in the next phases of ethical hacking. Learn more about Footprinting.

2. Scanning & enumeration:

In this phase, the target organization’s network is probed to find any path of entry that can provide a way for ethical hackers into the network. It includes scanning for live systems in the network range, scanning for open ports on the LIVE systems and services running on them and scanning for any vulnerabilities in those services.

Then these services are enumerated to find any user accounts or other Information about the target networks. Learn more about scanning & enumeration.

3. Gaining access:

In this phase ethical hacking, ethical hackers exploit one of the vulnerability or weakness found in the second phase and gain a shell on the target system or network. Learn more about gaining access.

4. Maintaining access:

In this phase, ethical hackers after gaining initial access on the target system or network, try to maintain this access for future and continuous use. Learn more about various techniques used for maintaining access.

5. Covering tracks:

In this phase, ethical hackers try to hide or erase all their operations performed on the target system or network until now. This is to remove any evidence of their malicious activity. In Black Hat Hacking, they do this to prevent tracing of the hack back to them. This phase is also known as clearing tracks. Learn more about covering tracks.

Posted on

Gaining access in ethical hacking: Techniques

Hello, aspiring ethical hackers. This article is a beginner guide to gaining access. Gaining access is the third phase in ethical hacking after footprinting and scanning & enumeration. It should be noted that the earlier two phases will play a major role in gaining access. This blogpost will explain you about different ways in which hackers or pen testers gain access to a target system or network.

What is gaining access?

In our previous blogpost, you learnt what a shell is and types of shell in cybersecurity. When a hacker or pen tester gains a shell on the target system or network, it is called as gaining access. Gaining access is the first phase where a hacker or pen tester gains some control on the target system.

Methods of gaining access

There are multiple ways by which hackers can gain initial access. They are,

  1. Vulnerabilities in the operating system or firmware.
  2. Application vulnerabilities.
  3. Payloads & malicious software.
  4. Password’ cracking.
  5. Misconfigured services.
  6. Social- engineering.
  7. Wi Fi hacking

1. Vulnerabilities in the operating system or firmware:

An operating system is the core of any computing device. Enterprises around the world use different operating systems for different purposes. Some of the popular operating systems used by enterprises around the world are Windows, Linux, MacOS, Android, IOS, chrome OS, Red Hat Enterprise Linux, Solaris, Centos, Ubuntu, IRIX and FreeBSD etc. No matter what operating system it is, it is a software consisting of programs. So, any vulnerability exposed in the operating system can be exploited by hackers to gain initial access. For example, ms08-067 and EternalBlue.

2. Application vulnerabilities:

An operating system is by itself not useful. So, a lot of application or programs are installed over the operating system to perform certain functions. Any vulnerabilities in these installed programs can be exploited successfully gain initial access. For example, Macros or Excel Macros.

3. Malicious payloads:

Hackers just don’t use vulnerabilities to gain access. They also use malicious payloads like malware and virus to gain access. Learn more about payload generators.

4. Cracked passwords:

Sometimes enterprise systems are enabled with remote access so that employees can connect to them remotely for the purpose of their work. The protocols enabling remote access like SSH, FTP, Telnet and RDP etc. Cracking the credentials of these services give hackers a way to gain access to the servers and subsequently to the entire system or network. Learn more about password cracking.

5. Misconfigured services:

Sometimes, services being used by the target network can be misconfigured either by mistake or on purpose. Hackers can exploit these misconfigurations to gain initial access.

6. Hacking Wi-Fi network:

Wi Fi hacking is often sometimes ignored as a factor that can provide initial access to the hackers. Hacking WiFi (especially if the password is not complex) is very easy compared gaining access through the above explained methods. It also provides easy access to hack. Learn more about WiFi hacking.

7. The human factor:

No matter how strong the firewall on the network is or how secure the devices are in a network, if the employees of the organization are not well trained, they can eventually give hackers access into the network or devices. Social-engineering is often very underrated as a factor that allows hackers to gain access. Learn more about social engineering.

Posted on

Beginners guide to a web shell

Hello, aspiring ethical hackers. In this blogpost you will learn about web shell. In our previous blogpost you learnt what is a shell, what it does and the types of shell. A web shell is a type of shell but it is used in relation to websites and web server.

What is a web shell?

A web shell is a type of shell that gives attacker access to a website or web server. It is usually uploaded after already the website is compromised as a means to have persistent access to the website in future.

Web shells have various features. Most important of them are,

  1. Persistent access.
  2. Uploading additional files to the web server.
  3. Downloading files from the web server.
  4. Executing additional scripts on the web server.
  5. Dumping databases of the web server.
  6. Pivoting to other devices on the network.
  7. Privilege escalation etc.

We can say that once a web shell is uploaded to the website, it gives complete control over the website to the attackers.

How are web shells uploaded?

Some vulnerabilities and attack allow hackers to upload web shells to the website to keep having persistent access. Some of these vulnerabilities are.

1. File upload vulnerabilities:

File upload or Remote file inclusion (RFI) vulnerabilities allow attackers to upload arbitrary files to the web servers. These arbitrary files are most probably web shells.

2. Path traversal vulnerabilities:

In some cases, path traversal or Local File Inclusion (LFI) vulnerabilities also allow attackers to upload web shells.

3. XSS vulnerability:

Not just file inclusion vulnerabilities, even cross site scripting (XSS) vulnerabilities in some cases allow uploading of web shells.

4. Password cracking:

After the password of the website is successfully cracked, attackers can upload web shells to a website for future access.

Types of web shells

Web shells are easily available on internet. There are various types of web shells with variety of features in various languages. Needless to say, the web shell being uploaded to the website should be of same languages as the server-side scripting language used on the web server or website. Now, let’s study about some web shells.

1. Weevely:

Weevely is a web shell designed for POST-exploitation with almost 30 modules to assist in administrative tasks, maintaining access, elevate privileges and spreading over the network. Learn more about it here.

2. Web shells in Kali Linux

Kali Linux itself has some web shells ready to be deployed. Although their functionality is simple, they are quite good for beginners. Learn about them here.

3. Metasploit/MSFvenom

Is there anything Metasploit can’t create? Yes, you can create your own web shell with msfvenom. Learn how.

4. C99 shell

Peering to the Black Hat side, C99 shell or its variants are still being used by Black Hat Hackers in real world. Learn more about C99 shell here.

Posted on

Beginners guide to shells in hacking

Hello, aspiring ethical hackers. In this blogpost, you will learn about the most basic BUT most important concept in ethical hacking. What is it? What else, SHELLS. Shells in hacking or ethical hacking are a very important topic because any hack or pen test is not considered complete without acquiring a shell. But what exactly is a shell?

What is a shell?

In world of computing, a shell is a program or a tool that allows users with an interface to interact with the operating system directly. Shell is not an alien concept to you as you have might already used it at least once in your life no matter what operating system you use. If you are a Windows user, CMD and PowerShell are two examples of a shell.

Linux users almost use shell in their daily life to perform each and every operation. You are familiar with it as “terminal”. In Kali Linux, zshell is the default shell.

There are other types of shells in Linux like Bourne again shell (BASH) etc.

Now, you may ask what does this have to do with ethical hacking. In ethical hacking, a hacker or pen tester gains access to a machine, the first thing he tries to gain access to on the target system is a shell.

Types of shells in hacking

There are two types of shells in hacking and cyber security. They are Bind shell and Reverse shell.

1. Bind shell

A bind shell is a shell in which the connection is initiated by the attacker machine towards the target system. When a payload is executed on the target system, it opens a port to which the attacker system connects to. Let us demonstrate this. To do this, we will be exploiting the ms08_067 vulnerability using metasploit. Here, I will just focus on payloads we have already discuss about the ms08_067 vulnerability in our previous blogpost. First, we set a bind_tcp payload with LPORT option.

This payload when executed opens a port 4444 on the target system to which our attacker system would connect.

2. Reverse Shell

In a reverse shell, the shell is initiated from the target system and connects to a listening port on the attacker system. This type of shell is generally used by hackers to bypass Firewals. Let’s see an example. For this, I turn on the Firewall on the target system. When we try to use the same bind shell payload we used earlier, you can see that it fails to grab a shell.

This is because Firewall is dropping the packets. Let’s try to exploit it with a reverse shell now.

As you can see, this time we successfully got a shell.

Posted on

Cewl wordlist generator: Complete guide

Hello, aspiring ethical hackers. This blogpost is a complete guide to Cewl wordlist generator. Cewl stands for Custom Word List generation. It is written in ruby language. Unlike crunch that takes input from us to generate a wordlist, this tool spiders a given website to the depth specified by us and then creates a dictionary or wordlist from it. This wordlist can then be used for password cracking with tools the Brutus, Hydra, Medusa and John The Ripper. It was designed by Robin Wood based on a discussion on PaulDotCom about creating wordlists by spidering a target website.

Cewl can be downloaded from here. Kali Linux has cewl installed by default and for this tutorial we are using the same. Metasploitable 2will be used as target since it has lot of applications installed that can be used for testing it.

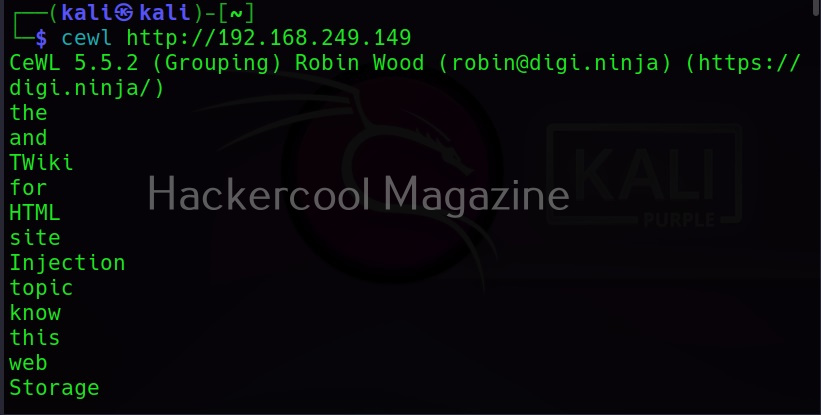
To use cewl, all we have to do is simply supply the URL you want to spider for as shown below.

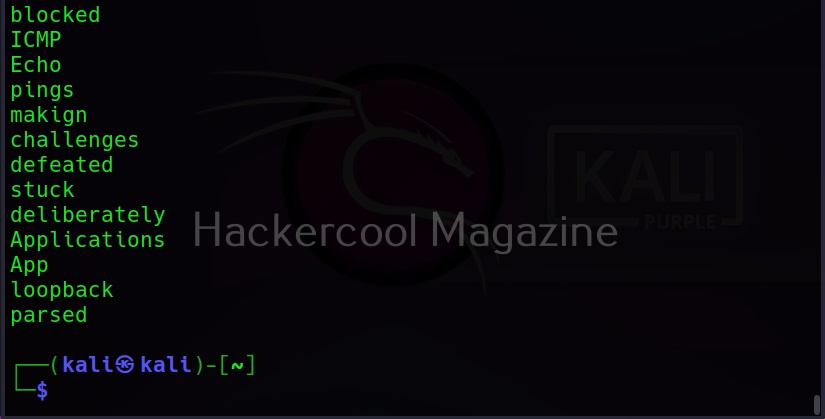
Then it will create the wordlist for you as shown below.

Keeping the downloaded file (-k)

Specifying the ‘-k’ option the downloaded file can be saved.

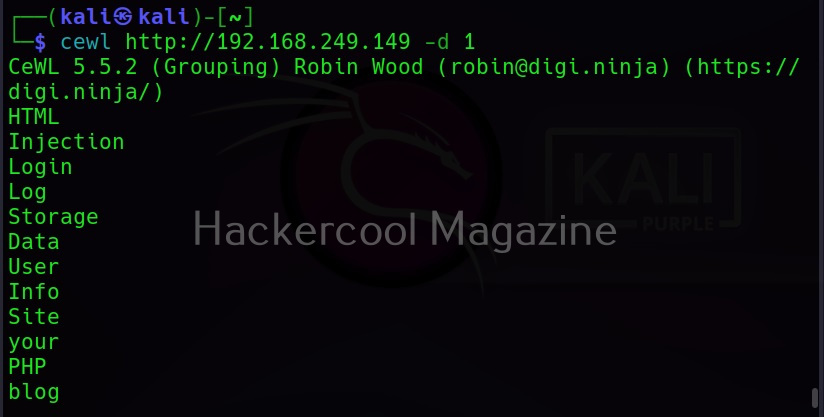
Depth of spidering (-d)

When you specify a target to Cewl, it spiders to the dept of 2 by default. You can change it using this option. For example, let’s set the depth to 1.

Or 3 may be.

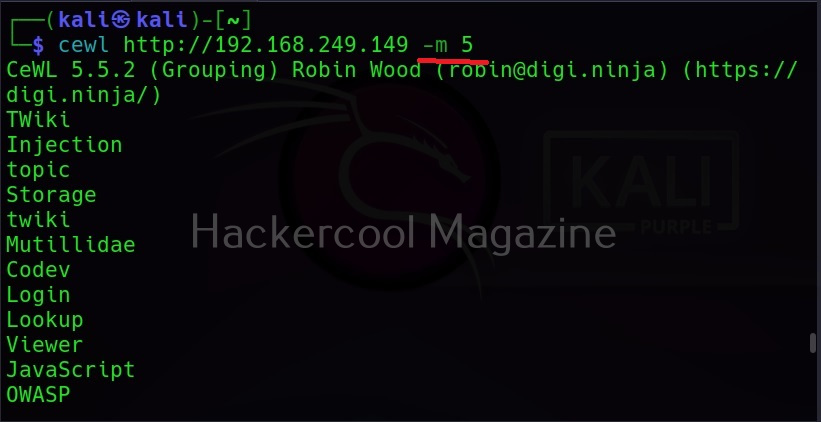
Minimum word length (-m)

This option can be used to set the minimum length of the passwords cewl creates. For example, nowadays, most services set the minimum length of the password to at least 5. So there’s no use creating passwords with length less than the minimum length your target has set, If you have noticed the above results, the default minimum length for cewl is 3. Let’s set it to 5 for example.

As you can see in the above image, there are no longer passwords of length less than 5.

Spidering other sites (-o)

Setting this option allows cewl to spider another external sites during spidering of the target.

Don’t scan specified paths (–exclude)

If the target website is too large, you may want to skip some paths or maybe you just want to skip some paths as they may not have any passwords. You can use this option what cewl to exclude the paths you don’t want to scan. Then paths should be supplied in a file.

–allowed

This option is used to specify regex patterns of the path to be followed. If the pattern doesn’t match, it drops the scan.

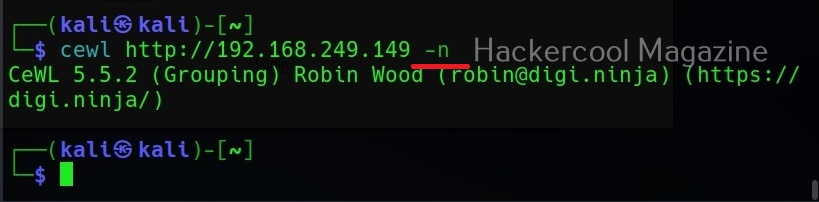
No wordlist please (-n)

If you don’t want the wordlist to be printed, you can use the “-n” option.

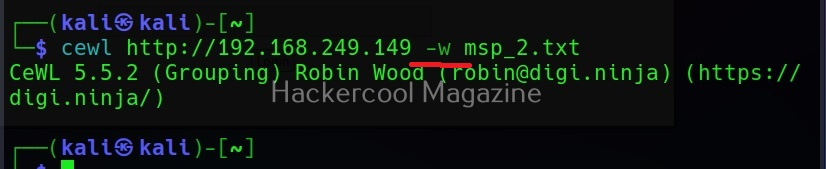
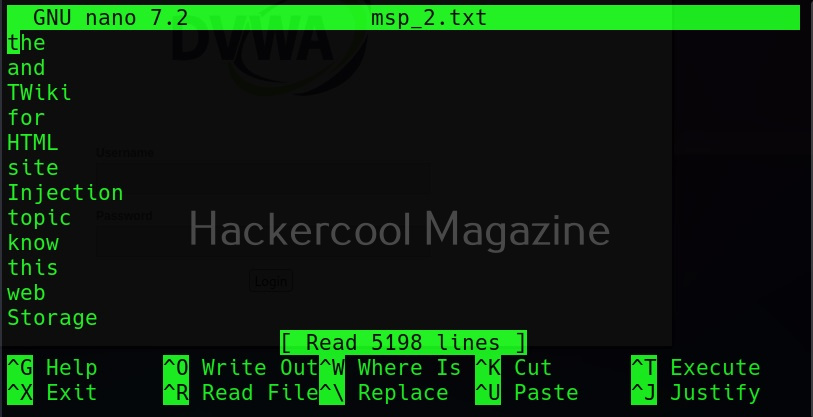
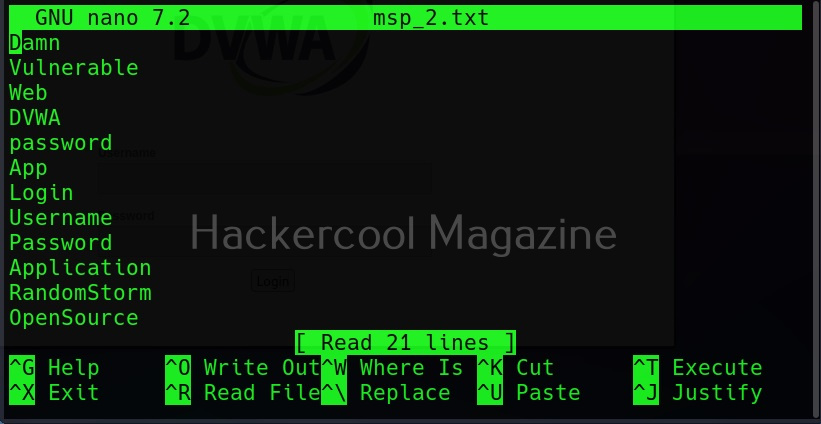
Saving the output (-w)

Till now, you have seen that Cewl has been printing the wordlists it creates to the terminal. The output can be copied and pasted in another file to be saved from using as a wordlist. But why take all this effort when we can just save the output to file, using the ‘-w’ option.

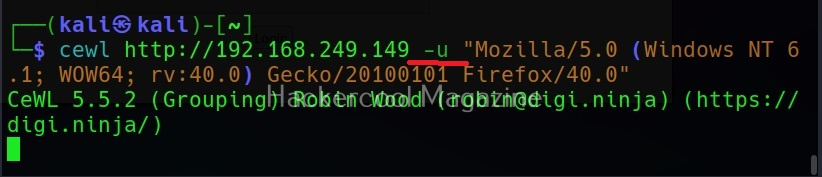
Use User agent (-u))

A user agent is a characteristic string that allows web server to identify the browser and operating system and we are using. You can see your user agent here. Using the (-u) option, cewl allows you to be get a specific user agent while spidering the website.

Groups of words (-g)

Setting this option allow cewl to return group of words along with single words.

Turn all generated passwords to lowercase (–lowercase)

Setting this option allows us to 16 turn all the passwords cewl generates into lower case.

Here is the result.

Include words with numbers too (–with-numbers)

While spidering, if cewl finds any words with numbers in them, it just ignores them. But many passwords contain numbers too. By setting this option, cewl collects numbers as well.

–convert-umlauts

Setting this option to while using cewl converts common ISO-8859-1 umlauts.

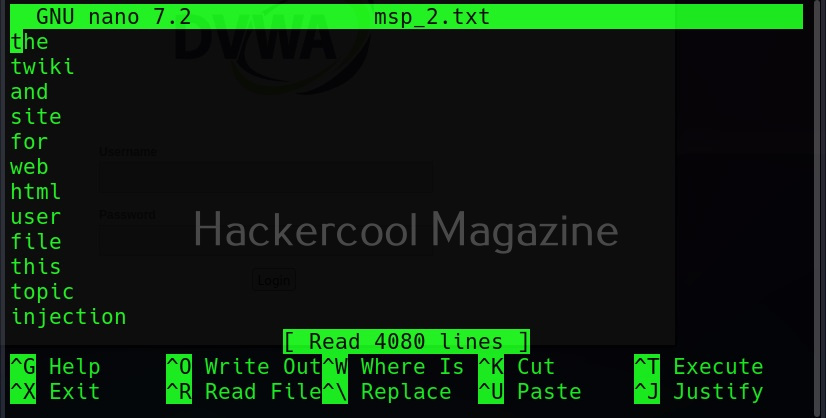
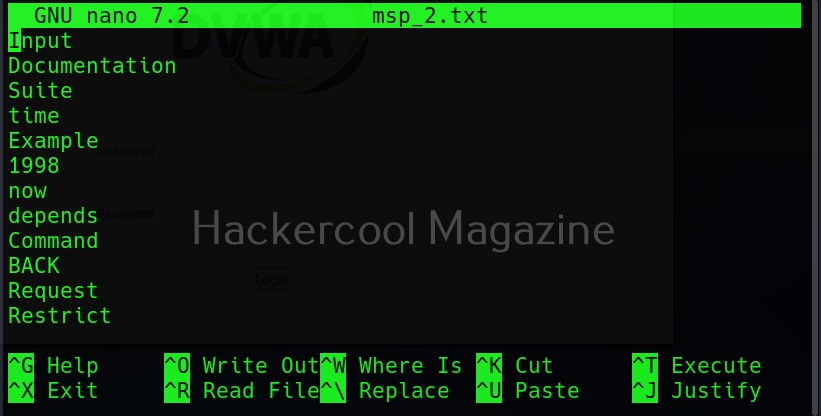
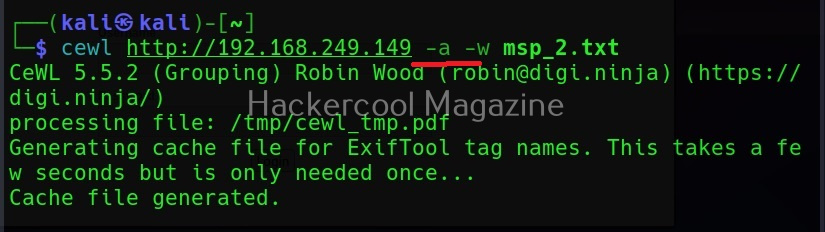
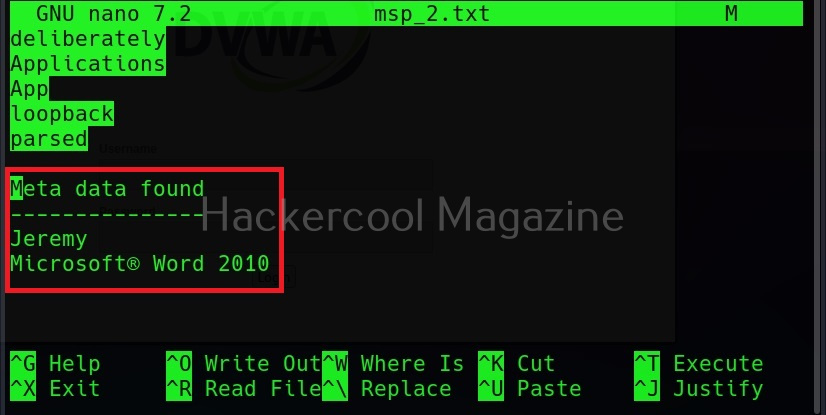
Include meta data too (-a)

When we set this option, Cewl includes metadata found while spidering the website apart from the words.

This metadata found is included at the end of the output files as shown below.

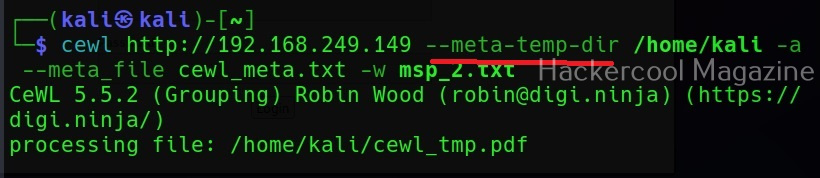
Save metadata found to a different file (–meta-file)

You can even save all the metadata found on the target site to a different file as shown below using the “–meta-file” option.

In the above image, you can see that cewl, while processing metadata creates a temporary file. This file known as cewl-temp.pdf is created in the /tmp directory by default. We can change the location of this file by using the “—meta-temp-dir” option as shown below.

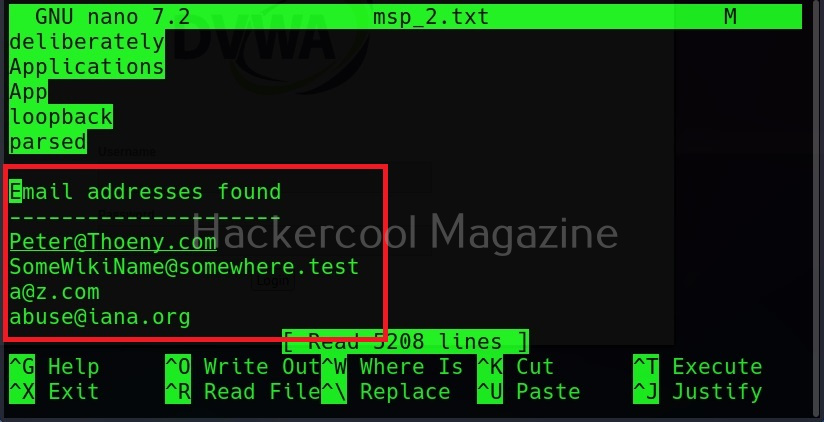
Gather emails too (-e)

Not just metadata, you can even process emails using cewl with the ‘-e’ option.

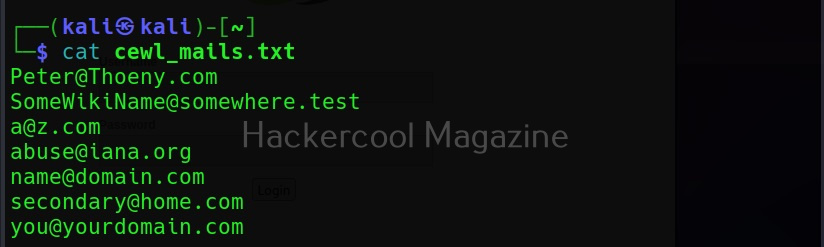
Save collected emails in another file (–email-file)

These collected emails can also be saved in another file using the “–email-file” option.

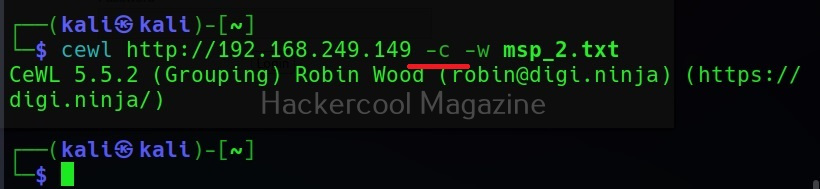
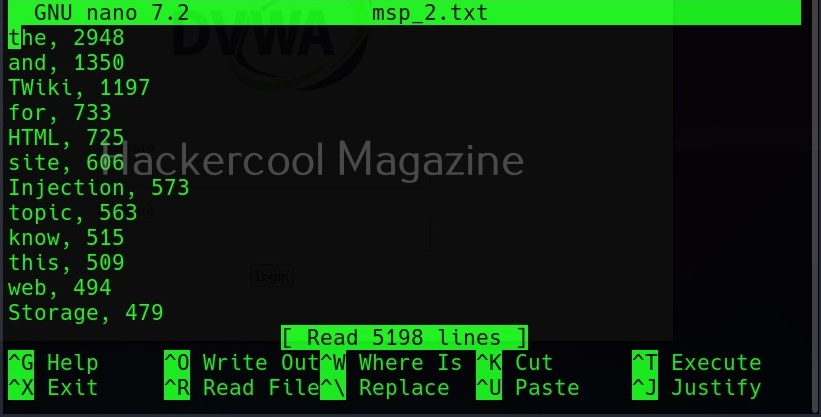
Show the count for each word (-c)

Setting this option shows the count for each word.
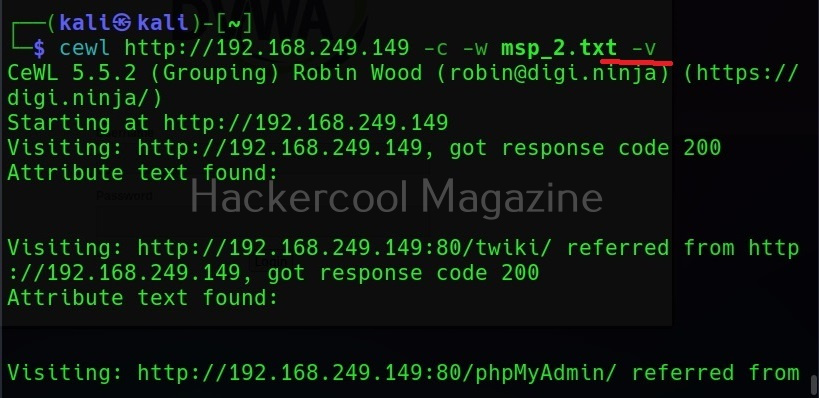
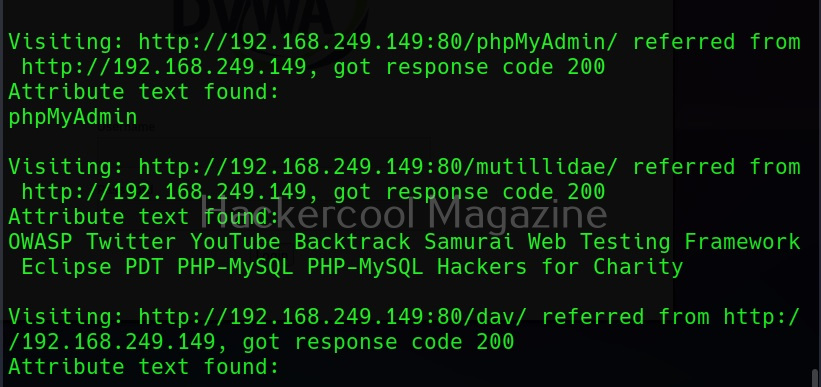
Verbose mode (-v)

Just like every other tool, this tool to has verbose mode that gives detailed information.
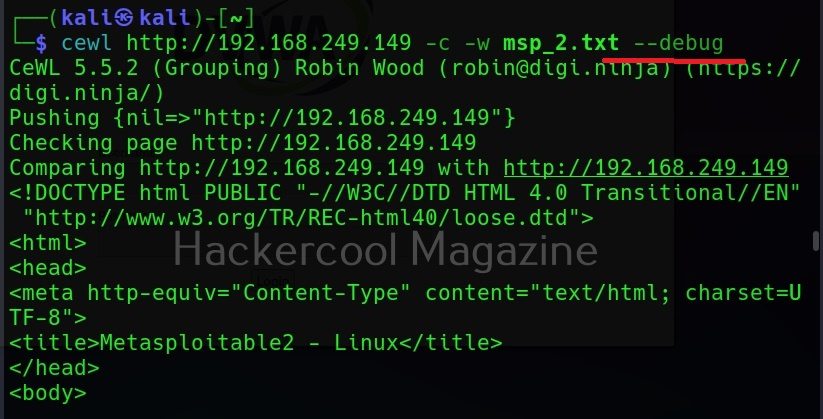
Debug mode (–debug)

Similarly, the “–debug” option gives detailed debugging information too.

Authentication

Some sites need authentication to spider it. Cewl allows authentication of websites too.

It supports both basic authentication and digest authentication. The “auth_type” option is used to set the type of authentication. The “–auth _user” and “–auth_pass” option can be used to set username and passwords respectively.

Here’s the output.

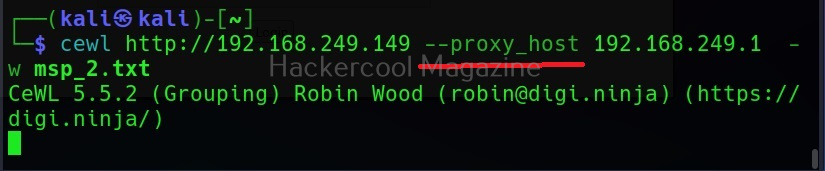
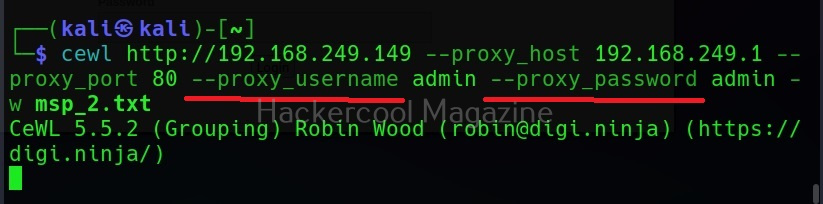
Spidering through proxy

Spidering, no matter what the purpose is very noisy. Cewl has an option to spider through a proxy using the “–proxy_host” option.

You can even specify the port of the proxy using the “–proxy-port” option.

Cewl even has feature of authenticating to the proxy server using the “–proxy_username” and “–proxy_password” options.