Posted on

Setup Vulhub Lab For hacking practice

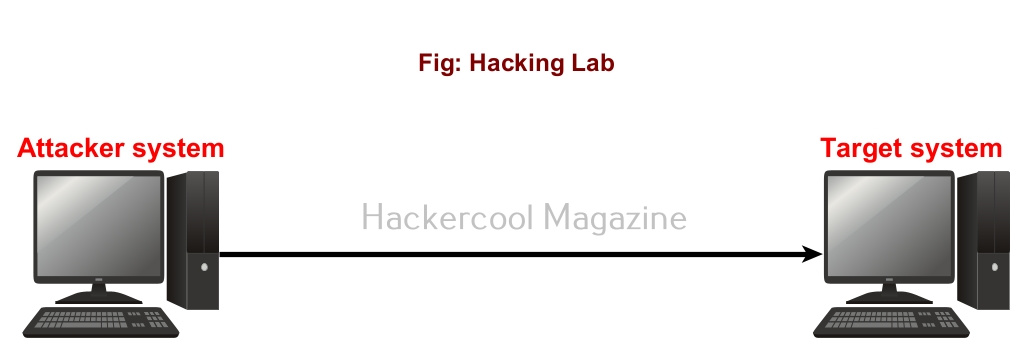
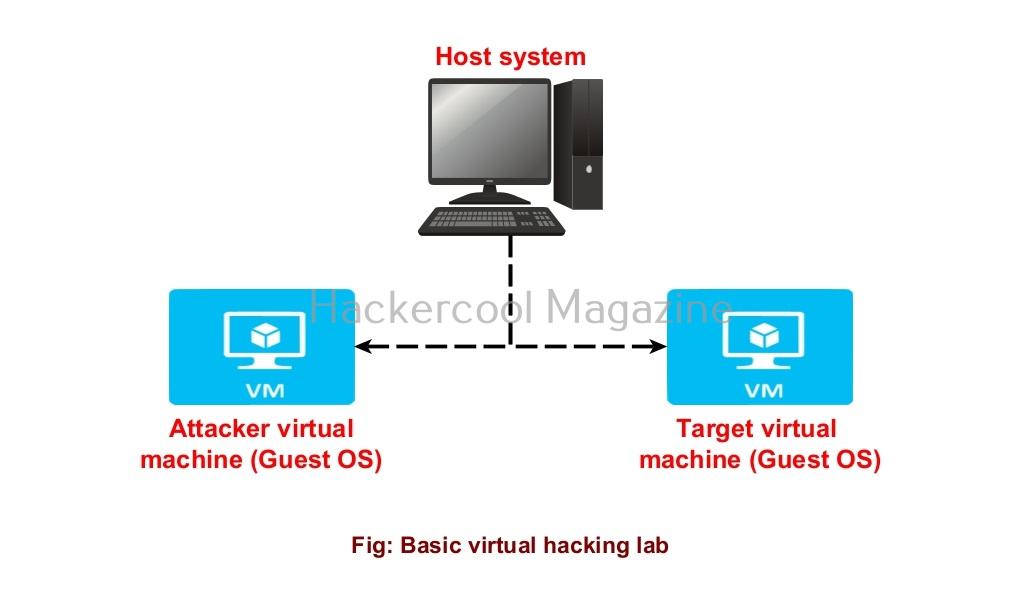
Hello aspiring ethical hackers. In this article you will learn how to setup a Vulhub lab for pen testing practice. Getting instances of vulnerable software is one of the most important requirement for practicing penetration testing. Vulhub provides an open-source collection of pre-built vulnerable docker environments. The best thing about Vulhub is that readers don’t need any pre-existing knowledge of dockers and their operation. The only requirement is Docker should already be installed on the system to be able to use Vulhub.

Let’s see how to setup Vulhub Lab. We will do this in Kali Linux on which we already installed Docker earlier. In Kali Linux, open a Terminal and use wget or Git to download the zip archive of Vulhub as shown below.

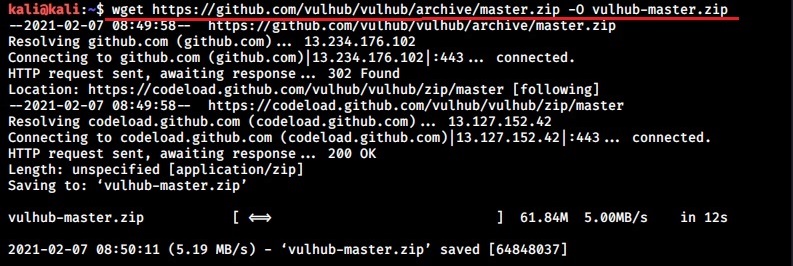
Once the download is finished, extract the contents of the vulhub-master.zip using unzip command.

This will create a new directory named vulhub-master.

Start the Docker service.

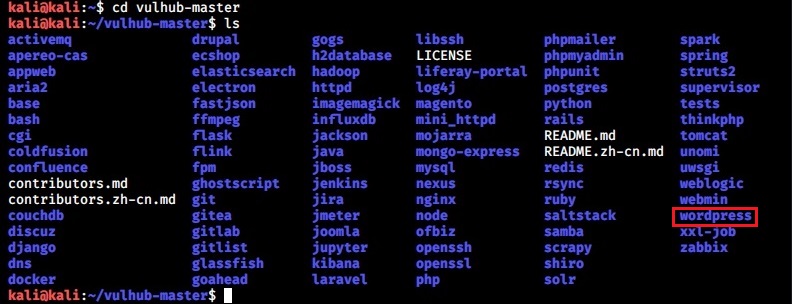
Once the Docker service is started, navigate into the vulhub-master directory and you should see many vulnerable docker images.

vulhub

Let’s start the WordPress Docker container for testing. Although this container is vulnerable with a different vulnerability, we will use it for showing exploitation of a different vulnerability. Navigate into the WordPress directory and start the docker container as shown below.

Once the container is started, use command “docker ps” to see all the docker processes running

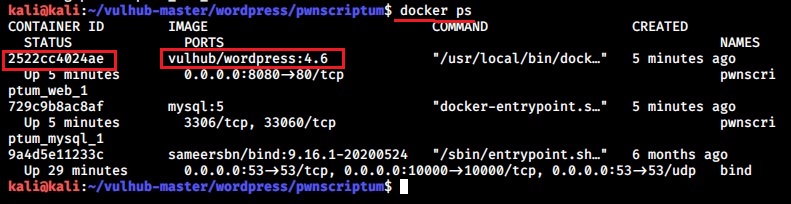
Every docker container has a container ID. The one with container ID 2522cc4********* is our WordPress docker container. We can use command “docker inspect <container id>” to get more information about the particular Docker container.

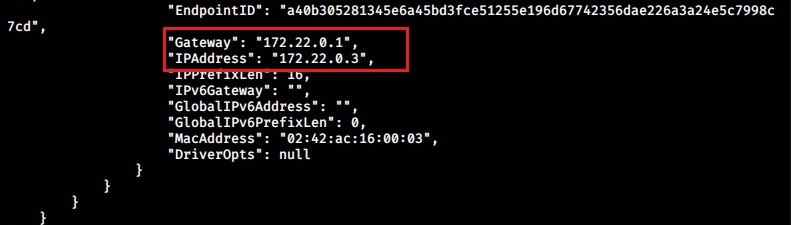
The IP address of the WordPress Docker container is 172.22.0.3. The Gateway address is that of the Kali host machine (172.22.0.1). Enter the IP address of the docker container in the browser and you will be prompted to set the password for the WordPress instance.

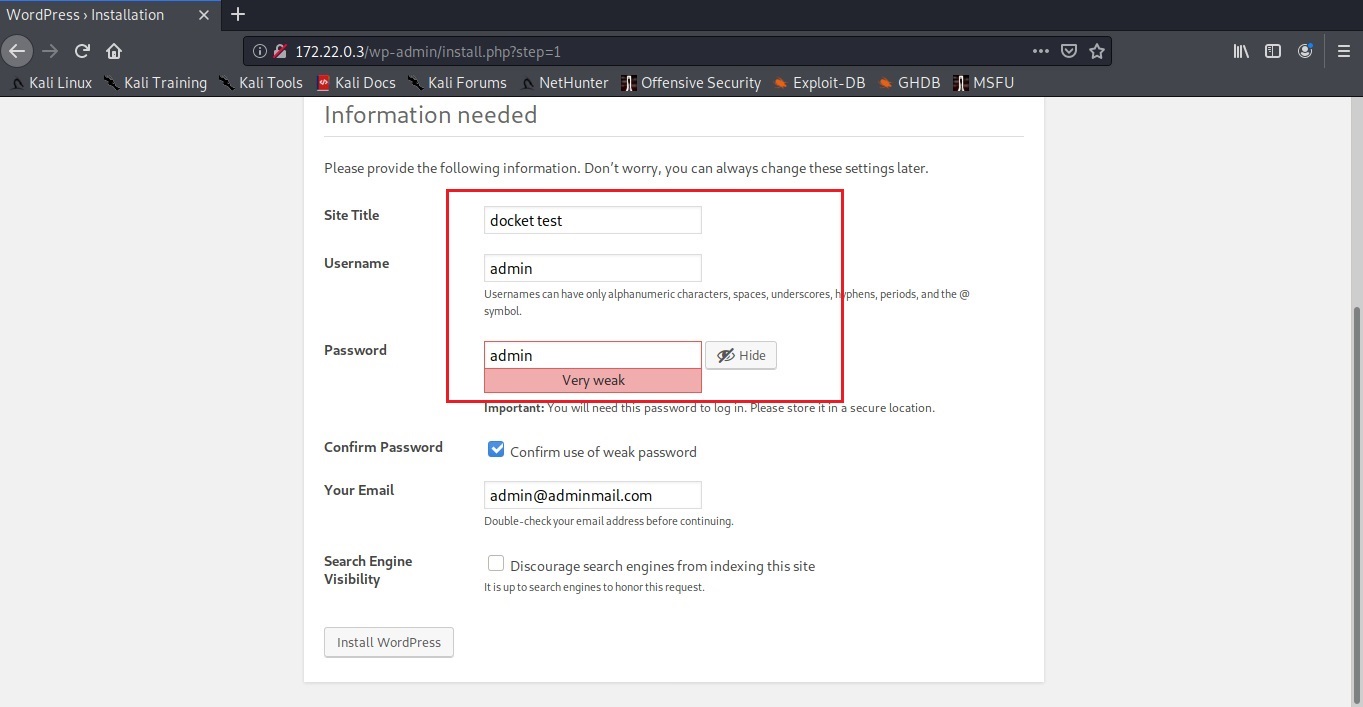
Here is the WordPress website we just created (we wanted to set the site title as docker test but misspelled it to docket test).

Go to Exploit Database and download the vulnerable wp-responsive-thumbnail-slider plugin. The plan is to install this vulnerable plugin in WordPress.

Login into the WordPress dashboard with the credentials you set up.

Upload the plugin and activate it.

Now, start Metasploit and load the wp_responsive_thumbnail_slider_upload module.

Set the docker container IP address (172.22.0.3) and check if the target is vulnerable.

The “check” command confirms that the target is indeed vulnerable. It’s time to exploit it. Set the LHOST option to the IP address of the gateway (172.22.0.1). Set the WPusername and WPpassword options to the credentials you have set in the beginning and then execute the module.

The target we set on docker is exploited successfully. The Vulhub Lab we set up is working successfully.

Posted on 1 Comment

Create a web application penetration testing lab

Good Evening friends. Today we will see a step by step guide on how to create a web application penetration testing lab .

For creating this lab, I am using a host machine with Windows 7 installed on it. We also need the following software.

1. Wamp server ( Download here)

2. Vulnerawa ( Download here )

3. Vmware Workstation or Oracle Virtualbox ( Download here )

4. Kali Linux ( Download here )

Download the above software to your system. Install Wamp server. For this WAPT lab, we will use Vulnerawa as a vulnerable website or target website. Extract the contents of the vulnerawa.zip folder to the root folder of the Wamp server. Now open a browser and and type localhost in the URL bar to see if you can see the victim webapp as shown below.

Click on “Create Database” to create some data which we will use in our future howto’s.

Now let’s change the permissions of the Wamp server to access it from our attacker machine. Go to Apache>httpd.conf as shown below.

You should see the httpd.conf as shown below. Type CTRL+F and search for word “stuff”. After you find it, make changes as shown below in the red box. Save the file by typing CTRL+S and restart the Wamp server.

Now install Kali Linux in Vmware Workstation or Oracle Virtualbox (see how ). Set the network adapter to NAT. Now open command line in your host machine and check the IP address assigned to your host machine as shown below by typing command “ipconfig”. Since I am using Vmware Workstation my network adapter is Vmware network adapter vmnet8. The IP address assigned to my host machine is 192.168.64.1.

Now start your attacker machine( Kali Linux ), open browser and type the address 192.168.64.1 in the url bar and see if you can access the victim web application as shown below.

web application pentest lab

Your web application penetration testing lab is ready. Happy hacking practice.

Posted on 26 Comments

Virtual hacking lab for beginners

Hello, aspiring ethical hackers. In this blogpost, you will learn how to create a virtual hacking lab for practicing hacking. No matter how many articles or blogposts you read or how many hacking courses you take, you cannot truly understand the concept of hacking until you perform those hacking tutorials practically. To practice hacking effectively, you need a secure environment without the risk of compromising the security of a safe network or systems and attract legal consequences due to your actions.

What is a Hacking lab?

A hacking lab is a lab that provides a safe environment to practice hacking without the above-mentioned risks. The most basic hacking lab consists of two machines: attacker system (the system from which you hack) and target system (the system which you hack).

What is a virtual hacking lab?

Just now, you have learnt that a basic hacking lab needs to have one attacker system and target system. They can be installed on separate hardware but this may prove expensive especially as you upgrade your hacking lab in future. Luckily, hacking labs can be created on a single system itself using virtualization solutions. Virtualization allows you to install multiple operating systems on a single machine. Some of the popular virtualization solution are Oracle VirtualBox, Parallels Desktop, VMware vSphere, Hyper-V, QEMU etc.

The hacking labs created using this method is called virtual hacking lab. They are inexpensive compared to the cybersecurity lab and easily adaptable. Of all the solution mentioned above, I will be using Oracle Virtual Box as it is FREE and also rich in features. Oracle VirtualBox can be downloaded and installed on Windows, Linux, macOS, Solaris etc. Here, I have installed virtual Box on a Windows machine.

How to create a virtual hacking lab?

Let’s create a simple hacking lab with an attacker system and target system on VirtualBox. The operating system on which Oracle VirtualBox (or any another virtualization software) is installed is known as the Host machine. The operating systems that are installed in Oracle VirtualBox as called as GUEST machines. So here, in VirtualBox, we are going to install two guest machines: one is Kali Linux (attacker system) and Metasploitable 2 (target system).

What do we need?

1. Oracle VirtualBox. (Download)

2. Kali Linux. (Download)

3. Metasploitable 2. (Download)

Install Kali Linux and Metasploitable 2 in VirtualBox.

See how to install Kali Linux in VirtualBox.

See how to install Metasploitable 2 in VirtualBox.

Once both the virtual machines are installed, turn on both the machines. Login into the Metasploitable 2 VM. Default username and password are “msfadmin / msfadmin”.

Type the command “ifconfig”to find out the IP address of your target system.

Similarly login into the Kali Linux machine and in the terminal, type command “ip a” to find out its IP address.

Test whether the attacker system can communicate with the target system by pinging the target system from the attacker system as shown below.

The connection is successful. Our virtual hacking lab is ready. Happy practicing hacking.

Various networking modes of VirtualBox

Above, we created a simple virtual hacking lab successfully. Go to “settings” of any of the above GUEST machines and go to “Network settings”, you will see that this Guest machine is attached to a NAT adapter.

When you install a GUEST machine in VirtualBox, the default network mode is NAT. Apart from NAT, there are other network modes on VirtualBox.

Each networking mode plays a different role in hacking. So, it’s good to learn about each of them.

1. NAT:

NAT stands for Network Address Translation (NAT). This is the default networking mode of VirtualBox. This mode allows web access, downloading of files from internet, etc. Our simple lab above is NAT. This is used to create a hacking lab when both attacker system and target system need internet access.

2. NAT network:

This is useful in creating hacking lab on a separate internal network that uses outbound connections.

3. Bridged adapter:

When you use a Bridged adapter, the virtual machine uses the network adapter of the Host machine and acts as a separate machine in the LAN network of the Host machine.

4. Internal network:

This creates a different kind of network separated from the host system. This network doesn’t have access to the outside internet.

5. Host-only network:

This creates a network in which the virtual machines have access to the Host machine.

6. Not attached:

In this type of network, the virtual machine is disconnected from everything. This might be useful in creating a malware analysis lab.

Posted on 2 Comments

Virtual pentesting lab : Step by Step guide

Virtual pentesting lab is a lab created on a single system using any virtualization software. It can be very helpful for people practicing for CEH or similar certification. Any penetration testing lab has two machines, attacker and victim. In this lab we will set up Kali Linux as the attacker and Windows XP( most favorite victim machine ) as the victim. I am going to set up this lab in Vmware Workstation 9. Hope this will be helpful.

First of all install Kali Linux and Windows XP in Vmware Workstation.

Shut them down. In the Vmware Workstation menu, Select Edit”and click on Virtual Network editor.

The window below will open showing the virtual network adapters. Click on “Add network”.

Vmware provides nine virtual networks from 0 to 9. Vmnet0, Vmnet1 and Vmnet8 are automatically assigned for bridged, Host-only and NAT types of network respectively. Select the network “Vmnet3″.

We can see that our network is added as Host-Type with a automatically assigned subnet IP.

virtual pentesting lab

Click on our network. We can see its settings below.

Deselect the option ‘Connect a host virtual adapter to thenetwork’. This’. This‘.This will make our network a custom type. Change the subnet IP to 10.10.10.0( choice is yours). Select the ‘Use local DHCP service to distribute IP address to VMs‘ option. This will automatically assign IP addresses to our machines. Click on ‘DHCP settings‘.

You will see the below window. Make changes if you like. I am going to leave it default. Click OK twice to exit.

We have successfully created our custom network. Now let’s add our machines to the network. Open the tab of Kali Linux and click on ‘network adapter‘ setting.

In the settings, select the ‘custom radio button and select the network Vmnet3 from the dropdown menu. Click on OK.

Do the same for Windows XP. Then let’s boot up our victim machine and check it’s IP address by typing ‘ipconfig‘ in the command line. The DHCP server has automatically assigned it the IP address 10.10.10.129.

Boot the attacker machine and check it’s IP address by typing ‘ifconfig’in the terminal. It has been assigned the address 10.10.10.128.

Ping the victim IP machine (10.10.10.129) to see whether the two machines can communicate.

We have successfully created a virtual pentesting lab. Happy testing.