
Virtual pentesting lab is a lab created on a single system using any virtualization software. It can be very helpful for people practicing for CEH or similar certification. Any penetration testing lab has two machines, attacker and victim. In this lab we will set up Kali Linux as the attacker and Windows XP( most favorite victim machine ) as the victim. I am going to set up this lab in Vmware Workstation 9. Hope this will be helpful.
First of all install Kali Linux and Windows XP in Vmware Workstation.


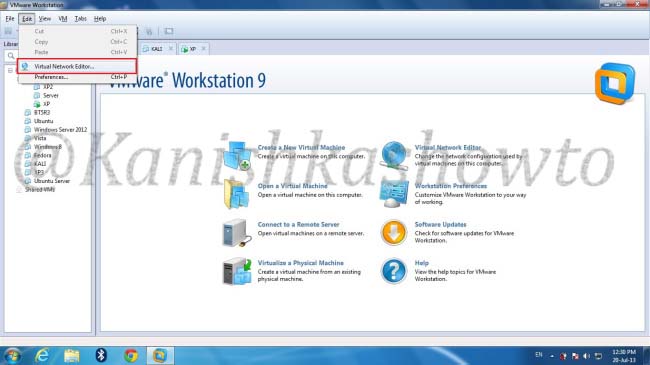
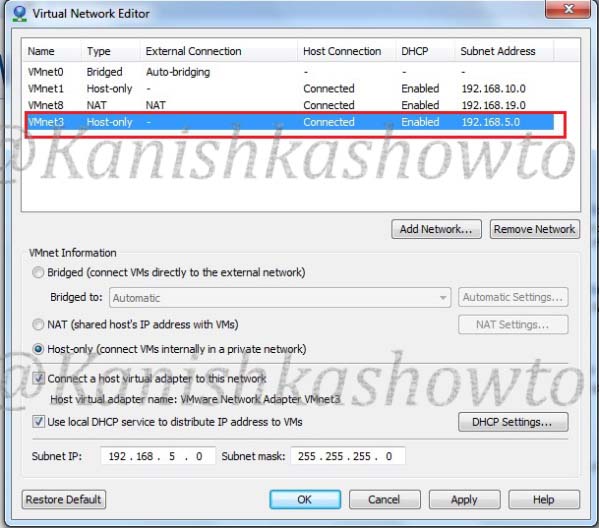
Shut them down. In the Vmware Workstation menu, Select “Edit”and click on Virtual Network editor.
The window below will open showing the virtual network adapters. Click on “Add network”.
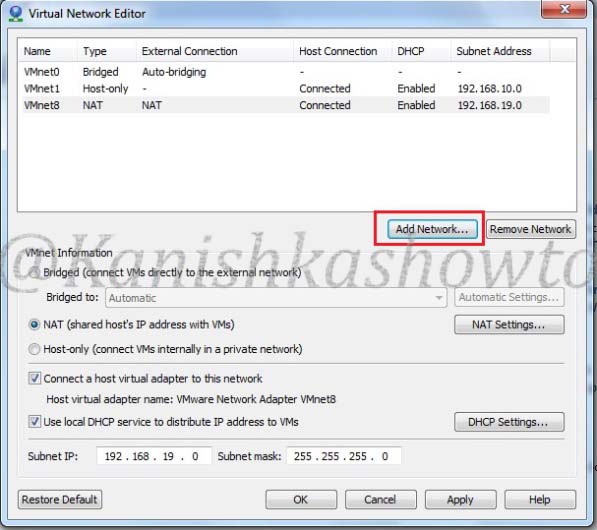
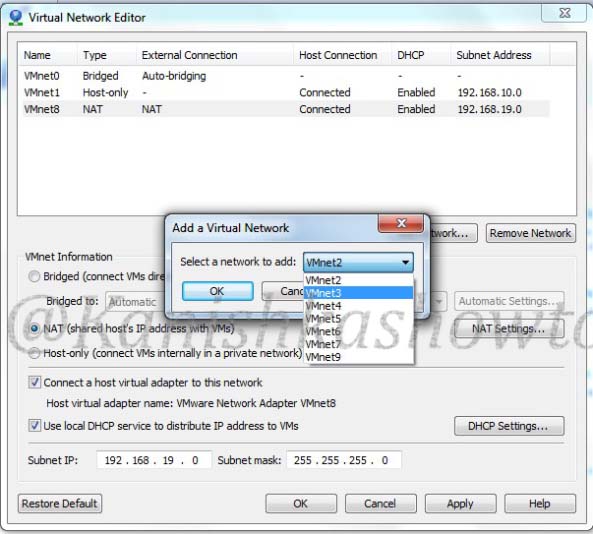
Vmware provides nine virtual networks from 0 to 9. Vmnet0, Vmnet1 and Vmnet8 are automatically assigned for bridged, Host-only and NAT types of network respectively. Select the network “Vmnet3″.
We can see that our network is added as Host-Type with a automatically assigned subnet IP.
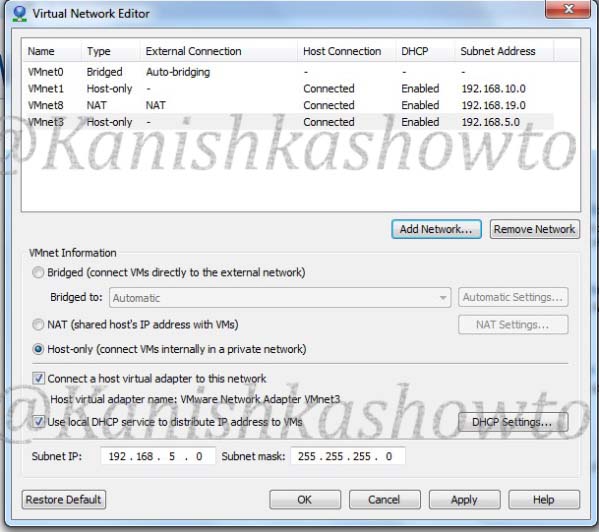
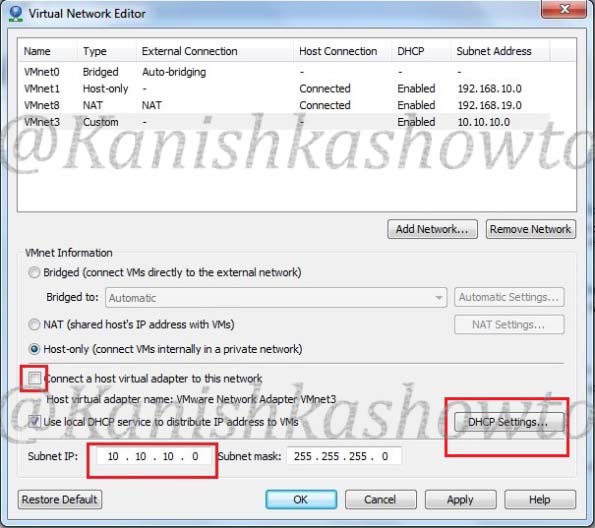
Click on our network. We can see its settings below.
Deselect the option ‘Connect a host virtual adapter to thenetwork’. This’. This‘.This will make our network a custom type. Change the subnet IP to 10.10.10.0( choice is yours). Select the ‘Use local DHCP service to distribute IP address to VMs‘ option. This will automatically assign IP addresses to our machines. Click on ‘DHCP settings‘.
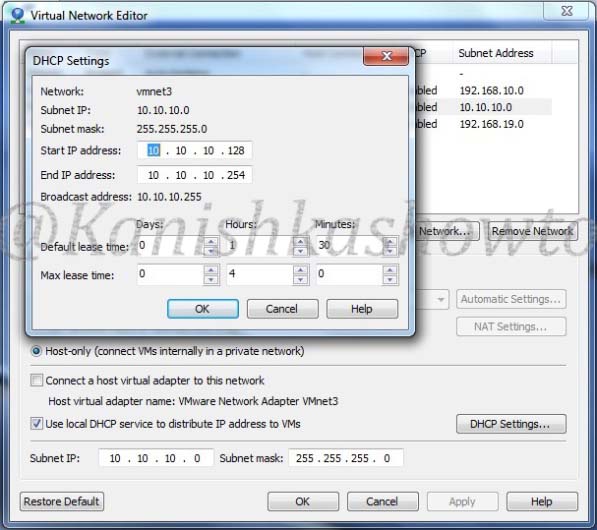
You will see the below window. Make changes if you like. I am going to leave it default. Click OK twice to exit.
We have successfully created our custom network. Now let’s add our machines to the network. Open the tab of Kali Linux and click on ‘network adapter‘ setting.

In the settings, select the ‘custom‘ radio button and select the network ‘Vmnet3 from the dropdown menu. Click on OK.
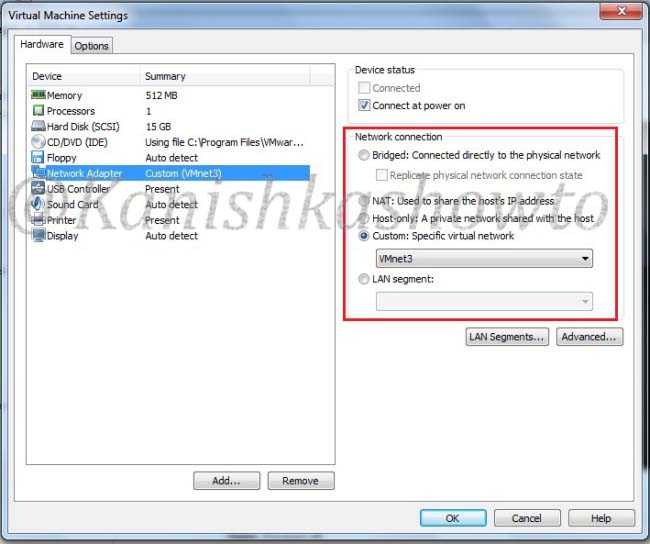
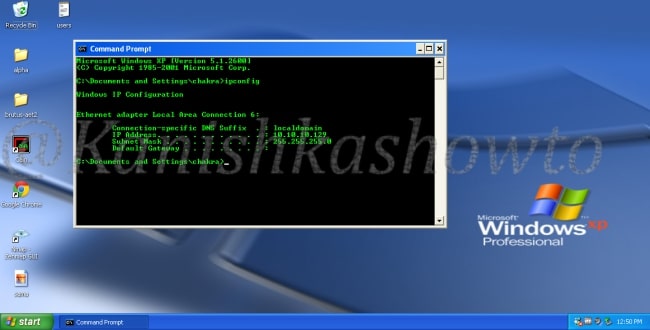
Do the same for Windows XP. Then let’s boot up our victim machine and check it’s IP address by typing ‘ipconfig‘ in the command line. The DHCP server has automatically assigned it the IP address 10.10.10.129.
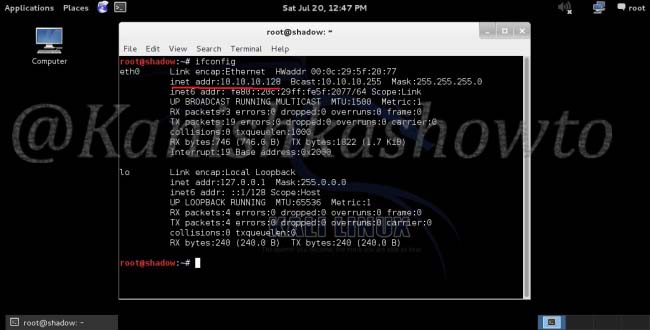
Boot the attacker machine and check it’s IP address by typing ‘ifconfig’in the terminal. It has been assigned the address 10.10.10.128.
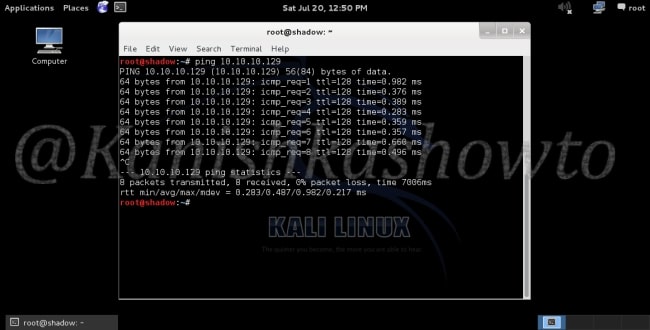
Ping the victim IP machine (10.10.10.129) to see whether the two machines can communicate.
We have successfully created a virtual pentesting lab. Happy testing.
Follow Us
[…] how to create a virtual pentest lab both in Oracle VirtualBox (see here) and Vmware Workstation(see here). Although both penetration testing labs were almost similar, there is a small difference between […]
[…] http://kanishkashowto.wordpress.com/2013/07/20/how-to-setup-a-virtual-penetration-testing-lab-step-b… […]