Posted on 1 Comment

Donut shellcode generator: Beginners guide

Hello, aspiring ethical hackers. In our previous blogpost, you learnt what shellcode is and why pen testers use it. In this blogpost, you will learn about Donut, a shellcode generator. Although there are many tools that can generate shellcode, Donut does this with position independent code that enables in-memory execution of the compiled assemblies. This compiled shellcode assembly can either be staged from a HTTP server or embedded directly in the file itself. After the compiled shellcode is loaded and executed in memory, the original reference is erased immediately to avoid memory scanners.

The features supported by the Donut shellcode generator are,

  1. Compression of the generated files with aPLib and LZNT1, Xpress, Xpress Huffman.
  2. Using entropy for generation of strings 128-bit symmetric encryption of files.
  3. Patching Antimalware Scan Interface (AMSI) and Windows Lockdown Policy (WLDP).
  4. Patching command line for EXE files.
  5. Patching exit-related API to avoid termination of host process.
  6. Multiple output formats: C, Ruby, Python, PowerShell, Base64, C#, Hexadecimal.

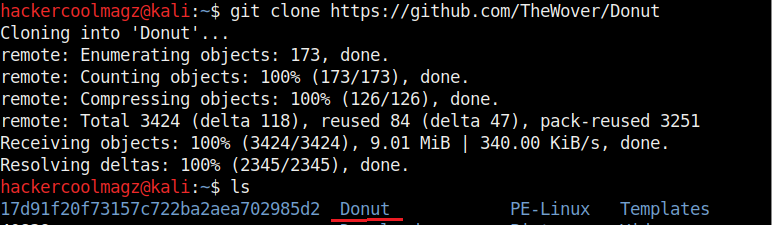
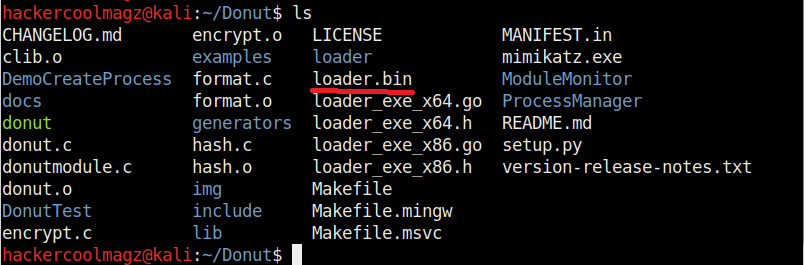
    Donut can be installed in Kali Linux by cloning it from GitHub as shown below. This will create a new directory named “Donut”.
donut1

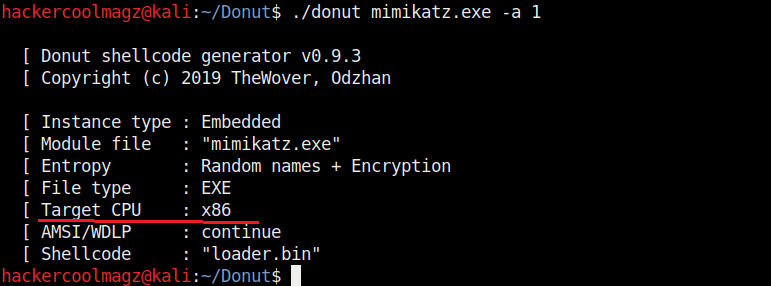
Navigate into the newly created directory. Let’s create the shellcode for mimikatz.exe as shown.

How to use donut shellcode generator

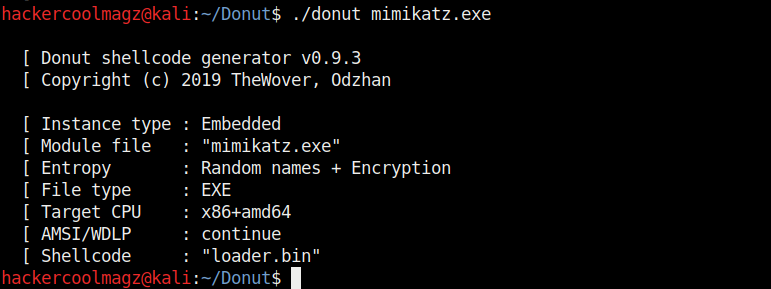
Mimikatz.exe is a simple tool that is used to play with windows security. If you take this executable of Mimikatz into a Windows system, any antivirus or Windows Defender will detect this as malware. Just try it on your machine first before turning it into shellcode. It is found in Kali Linux. Here we copied it into the Donut folder.
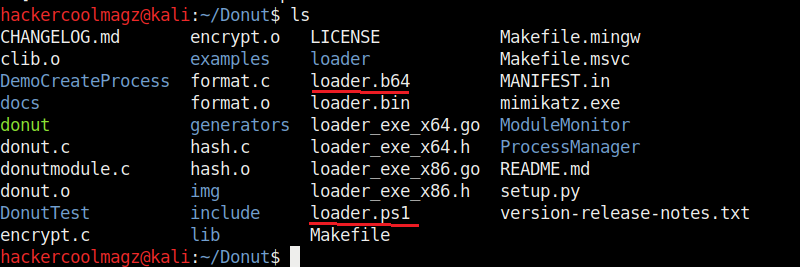
When we run above command, shellcode is created as a file named “loader.bin” in the same directory of Donut.

By default, Donut creates shellcode for both x86 (32bit) and amd64 (64bit). To create only x86 shellcode, the command is as shown below.

The “-b” option is used to set the shellcode’s behavior when faced with AMSI/WLDP. Anti Malware Scan Interface (AMSI) and Windows Lock Down Policy (WLDP) are security features. Both these features protect the Windows system from malware.

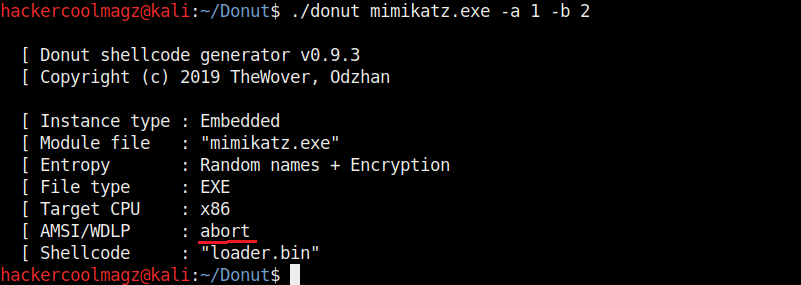
By default, Donut sets the shellcode to bypass AMSI/WLDP. By setting the “-b” option to “2” as shown in the above image, it can be set to ABORT once it encounters AMSI/WLDP. Setting “1 ” will do nothing.

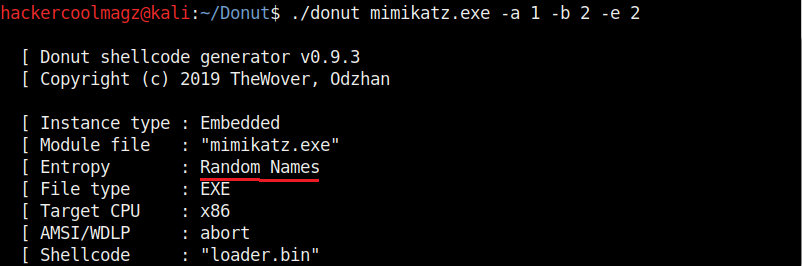
Entropy in general terms means the degree of randomness. It is used by malware to make detection of its code harder by Anti malware. This is called obfuscation. The more the entropy the least chances of detection of malware. Donut, by default sets random names and also encrypts the shellcode to obfuscate the code from anti malware. It can be changed using the “-e” option. Setting it to “2” just sets random names to the payload and setting it to “1” does nothing.

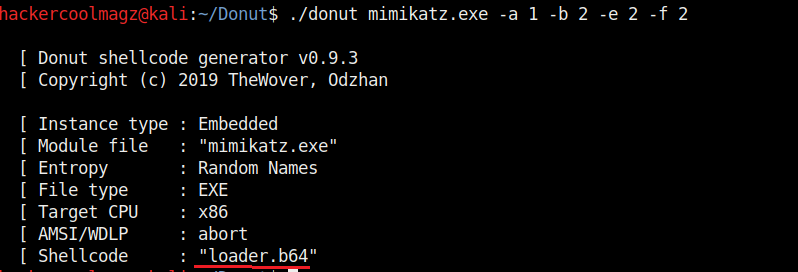
Not just binaries, we can create different output formats with Donut though by default it creates a binary payload. The “-f” option is used to set different output formats. For example, set -ting “-f” option to “2” gives a base64 format. 3 creates C, 4 creates Ruby, 5 creates Python, 6 creates PowerShell, 7 creates C# and 8 creates Hexadecimal shellcodes respectively.

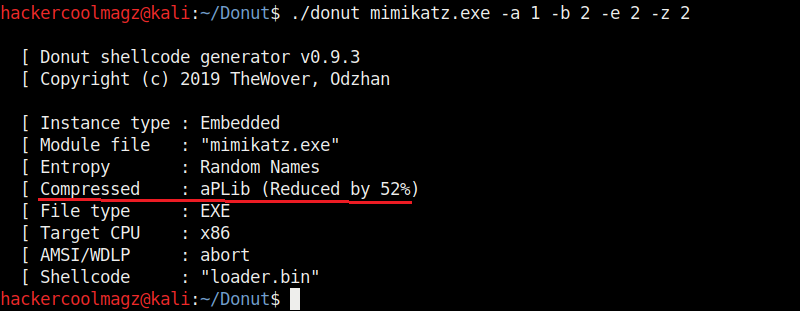
The “-z” option is used to set packing and compressing engines. Donut doesn’t use any compression by default. However it supports four compression engines. 2=aPLib, 3=LZNT1, 4=Xpress, 5=Xpress Huffman. Only the aPlib compressor works in Linux. Rest of them work on Windows. Compression reduces the size of the payload whereas packing is used to avoid detection by anti malware.

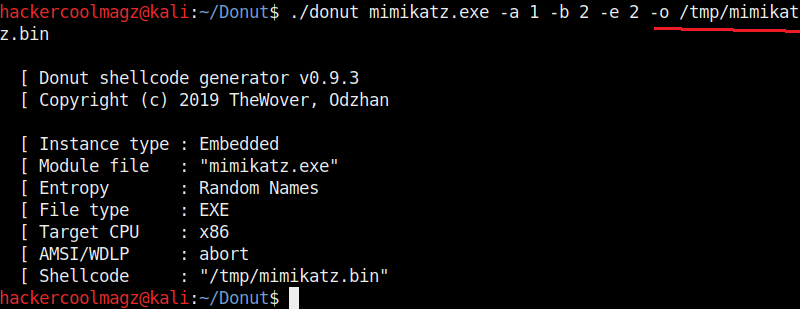
We have seen that by default, Donut saves the payloads it creates in the same directory. The location as to where the payload is saved can be changed with the “-o” option.

That’s all about the Donut shellcode generator. Next, learn how to inject shellcode using Metasploit.

Posted on

How to install Parrot OS in VirtualBox

Hello aspiring ethical hackers. In this article, you will learn how to install Parrot OS in VirtualBox. Parrot Security OS, also popularly known as Parrot OS is an operating system specifically designed for pen testing similar to Kali Linux. It is a free and open source GNU/Linux distribution based on Debian designed for security experts, developers and privacy aware people. It includes a full portable arsenal for IT security and digital forensics operations.

In this article, we will show you two methods to install Parrot OS in VirtualBox. They are,

  • 1. Using a OVA file
  • 2. Using an ISO file

1. Using a OVA file

The makers of Parrot OS are providing pre-built images for hypervisors like VMware and VirtualBox. You can download the OVA file of Parrot Security OS from here. Once the OVA file is finished downloading, Open VirtualBox and click on “Import”.

Naviagte to the OVA file we just downloaded and click on “Next”.

All the settings applied to the virtual machine are displayed. Change any settings if necessary and click on “Import”.

When Software License Agreement is displayed, Click on “Agree”.

VirtualBox will start importing the Parrot Security OS virtual appliance as shown below.

After the import is complete, it will be displayed in the list of virtual machines as shown below.

We just need to power it up and the our Parrot OS is ready for pen testing.

2. Using iso file

Now, readers will see how to install Parrot  Security OS in VirtualBox using ISO file. Download the Parrot security ISO file from here. Once ISO file is finished downloading, open VirtualBox, go to Machine > New or hit CTRL+N.

A  new window will open as shown below.

Click on “Expert mode”.

How to install parrot os virtualbox

Fill up the details. Configure the machine folder, type of OS, version etc and allocate the RAM (RAM should be minimum 2GB). Once everything is configured, Click on “Create”.

Allocate the hard-disk size (minimum 16 GB is the minimum requirement but keep it at least 20 GB). Set the other options as shown below. Click on “Create”.

The virtual machine is created. Start the newly created virtual machine. It should start as shown below.

     Browse to the ISO file we downloaded earlier and add it as shown below. Then, click on “Start”.

  The interface changes as shown below. Click on “Install”.

Once you are at the OS interface, click on “Install Parrot “. The Calamares Installer opens.

Click on “Next “.  Select Location and click on “Next”.

Select the keyboard mode and click on “Next”.

Set the partition. Select “Erase disk” and click on “Next”.

Create a user and set credentials to the newly created user.

Review all the settings and click on “Install”.

Click on “Install Now.”

The system starts installing as shown below.

Once the system has finished installing as shown below, click on “Done” .

This will restart the system and will take you to the Login screen. Login using credentials of the newly created user and you are good to go. Happy ethical hacking. Next, see how to install Parrot OS in VMware.

Posted on

Installing MATE Desktop in Kali Linux

Hello readers. Today our readers will learn about installing mate desktop in Kali Linux. You all know the first release of Kali Linux this year, Kali Linux 2020.1 has been released in the month of January. The latest version brought many changes like not giving root user by default and some new tools. The most distinct change it brought is a single installer image for installation. Earlier we had different installation images for different desktop environments which include GNOME, KDE etc.
With 2020.1 release, there will be a single installation image for all these and users would have to select the desktop environment he/she needs while installing. The information about different desktop environments and their pros and cons can be seen here.

Today we will see a tutorial on how to install MATE Desktop environment in Kali Linux 2020.1. MATE Desktop although looks old fashioned is light and has a simple interface. Here’s how to install MATE desktop environment in Kali Linux 2020.1. We have performed this tutorial from a X11 terminal but all these commands can be run from any other desktop environment’s terminal. Power on the Kali 2020.1 virtual machine and login (since there is no root user you should login as a user you created or the default user:password i.e kali:kali).

Open a terminal and using nano open the file /etc/apt/sources.list. with sudo

Add these two lines of code to the file and save it.
deb http://kali.download/kali kali-rolling main non-free contrib
deb-src http://kali.download/kali kali-rolling main non-free contrib

To save the file hit CTRl+X and when it prompts select “Yes”.Run command sudo apt-get update

Now everything is ready to install MATE desktop. Run the command given below.
sudo apt-get install mate-core mate-desktop-environment-extra mate-desktop-environment-extras

installing mate desktop in kali

When the system prompts you for permission to install MATE and its related software, type “Y”.

The installation will take some time to finish. After the installation is finished, restart the system (the command is sudo reboot or reboot if you are doing it from terminal). Once the system reboots and takes you to the login screen, before logging in click on the “settings” icon beside the “Signin” button. There you will see all the desktop environments present on the system right now. Select MATE and then login.

Installing MATE desktop has been successfully finished with this.

Liked this article? Learn advanced ethical hacking tutorials in our Monthly Magazine. Enjoy Free for 3 months.

Posted on

Hacking ProFTPd on port 2121 and hacking the services on port 1524

In our previous article, we have seen how to exploit the rexec and remotelogin services running on ports 512 and 513 of our target Metasploitable 2 system. In this article, we will be hacking proftpd on port 2121 and the service running on port 1524 which are next in the Nmap scan report as shown below. On running a verbose scan, we can see that the service running on port 1524 is Metasploitable Root shell.

hacking proftpd

What is this Root shell? In our Metasploitable Tutorials, we have seen a number of ways to gain a shell or meterpreter session on the target system. But those shells were obtained by hacking some software present on the system. This shell is deliberately left on the system. But why would someone leave a shell deliberately on a system?
In cyber security, there is a concept called trapdoors or backdoors. As soon as hackers gain access to a system by hacking something on it, they plant an easy and quick method to once again come back into the system. This is known as trapdoor or backdoor.

The shell on port 1524 is a shell like that. Usually to prevent other hackers from gaining access to the system through their backdoor they use protection like passwords etc. Here it seems the hacker forgot to secure it. Normally backdoors like these are enabled on some common ports which evoke less suspicion from cyber security personnel. But how do we gain access to this shell? Although there are a number of ways to do this, the easiest way is telnet.
Open telnet and telnet to the port 1524 as shown below. As you can see highlighted below, we got a shell with Root access without doing much.

Try out some linux commands to verify we got a shell with some interaction.

As you can see in the above image, we have shell with ROOT privileges. We can even change the target system’s password now. Now let’s move on to hacking ProFTPd.
Verbose scan has reported that a FTP server named ProFTPd server version 1.3.1 is running on port 2121. I googled for any vulnerabilities present in the particular version but got none. If you remember, we already hacked one FTP server running on port 21.
I used banner grabbing method of telnet (we showed you in detail about this method in of our Hackercool magazine) to see if the service will reveal any more information about itself. It gave nothing except the usual one.

The usual banner grabbing was not working. But maybe we don’t require a banner.We already have it. So this time, I just tried to connect to the service using telnet (although you can also use FTP for this). When “Escape character is ‘^]’ ” message is displayed, I type command “help”. As expected, it gives me all the commands that can be used. So it seems we already have access to the target server.

To confirm this, I tried one command. It prompted me for username and password. But thanks to an excellent phase of enumeration we performed, we already have the username and password. I decided to try the username/password msfadmin/msfadmin. Voila, it worked and we have access to the system now. Typing PWD command gives me the confirmation that I am inside the system. That’s all with hacking ProFTPd.

Liked this article? Learn advanced ethical hacking tutorials in our Monthly Magazine. Enjoy Free for 3 months.

Posted on

Malware analysis with PEframe

Hello, aspiring ethical hackers. In our previous blogpost, you learnt about malware analysis and difference between static analysis and dynamic analysis of malware. In this article, you will learn about peframe, a malware analysis tool.

PEframe is an open source tool to perform static analysis on portable executable malware and malicious MS Office documents. Let’s see how to perform analysis of portable executable files using this tool. For this, we will be using Kali Linux.

In static analysis, the malware sample is analyzed without executing it whereas in dynamic analysis the sample is executed in a controlled environment. Static analysis is performed on the source code of the sample portable executable. PEframe reveals information about suspicious files like packers, xor, digital signature, mutex, anti debug, anti virtual machine, suspicious sections and functions and much more. PEframe can be installed in Kali Linux as shown below.

Open a terminal and type the command as shown below to clone PEFrame from Github.

After PEFrame is cloned successfully, a new directory is formed with name peframe. You are automatically taken into this directory. This tool requires simplejson (a subset of JavaScript). So install it using pip command. Next, we need to run the setup.py file from the directory. Since it is a python file, we need to run the command “python3 setup.py” install to install PEframe.

Once the installation is finished, type command “peframe -h” to see its simple usage

Before we analyze the portable executables, let us analyze some files we created for tutorials of our magazine. The first one is msf.pdf we created using Metasploit.

As you can see in the above image, we found not only an IP address but also an url hosting some executable file. It can be assumed that as we open this pdf file, another executable will be downloaded from the IP address and executed in our system. Let us now analyze a hta file created with Metasploit next. This file is analyzed as a HTML document with IP address and it has a library called kernel32.dll. This file probably opens a payload when clicked upon. Given below is another similar file in visual basic format.

Given below is a macro file. You can see all these files have an IP address where probably a listener is running.

Now let us analyze a portable executable file. Kali Linux has some exe files already stored in its windows-binaries folder. We will analyze the plink.exe file.

Plink.exe is a command line utility file similar to UNIX ssh. It is mostly used for automated operations. As you can see in the image given above, the program is giving more detailed information to us than the other files. The plink.exe has four sections and none of them appears to be suspicious. But the file has a packer, mutex and antidbg. The packer it used is Microsoft Visual C++ which is normally used for genuine programs.

Given above is its Antidbg and Mutex information. The dynamic link libraries it imports is also given. Given below are the apis (application programming interfaces) used by the file.

The filenames found in the portable executable are given in the image below. As you can see it has a big list of filenames.

Metadata is data about the data. Metadata reveals a lot of information about a file. Given below is the metadata of our portable executable. We can see that it is a part of Putty Suite.

Even the description of the file is given. Normally malware does not contain so much information about itself like this Plink file. Only genuine files contain so much information because they have no use to hide themselves. Now let us analyze another file. This file is also present in Kali Linux and it is a keylogger. It is klogger.exe present in the same windows-binaries folder.

As you can see in the above image, the file which has five sections has two suspicious sections and the packer it uses is ASPack v2.11. Let us have a look at its suspicious sections once.

Given below in the image are its api alerts and filenames. As you have observed, this file reveals very less information than the previous analyzed file. This in itself does not mean that the file is malicious but it gives a general idea about it. That’s all about Forensics using static analyzer PEFrame. We will be back with a new tool in our next howto.

Next, learn about Ollydbg, a debugger.