Posted on

Vulnerability scanning for beginners

Hello aspiring Ethical Hackers. In this blogpost, you will learn about vulnerability scanning. Before you learn what a vulnerability scan is, you need to know what a vulnerability is? A vulnerability is a weakness, flaw, error or a misconfiguration in a software or network that allows hackers to gain unauthorized access to the organization by exploiting it.

What is vulnerability scanning?

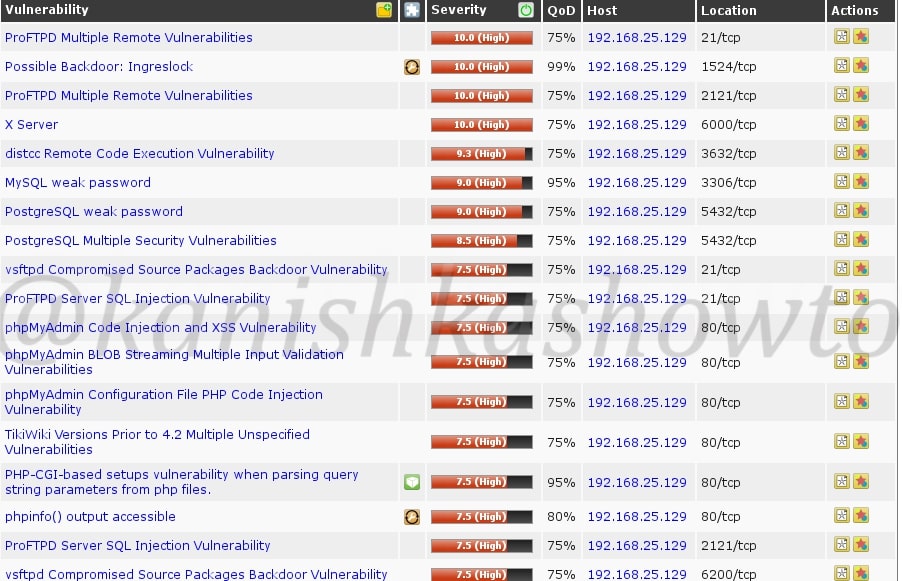
Now that you have understood what is a vulnerability, let’s see what is scanning. Vulnerability scanning is the process of identifying the security vulnerabilities in a software or a network of the organization. Vulnerability scanning is usually performed to protect the organization from hackers although it is also performed by hackers to gain access to the organization.

Types of vulnerability scans

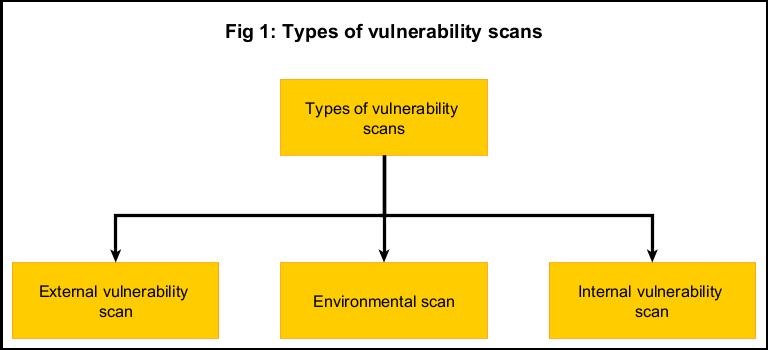
Vulnerability scanning can be categorized into different types. They are,

  1. External Vulnerability Scan
  2. Internal vulnerability scan
  3. Environmental scans
  4. Intrusive Scans
  5. Non-Intrusive scan.
  6. Credentialed scan
  7. Non-credentialed scan

1. External vulnerability scan:

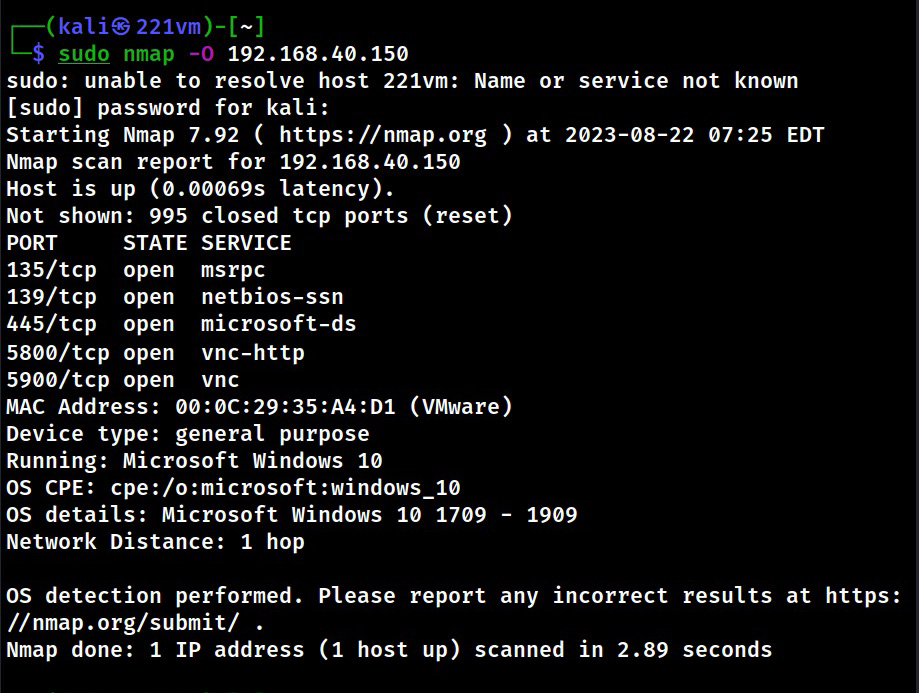
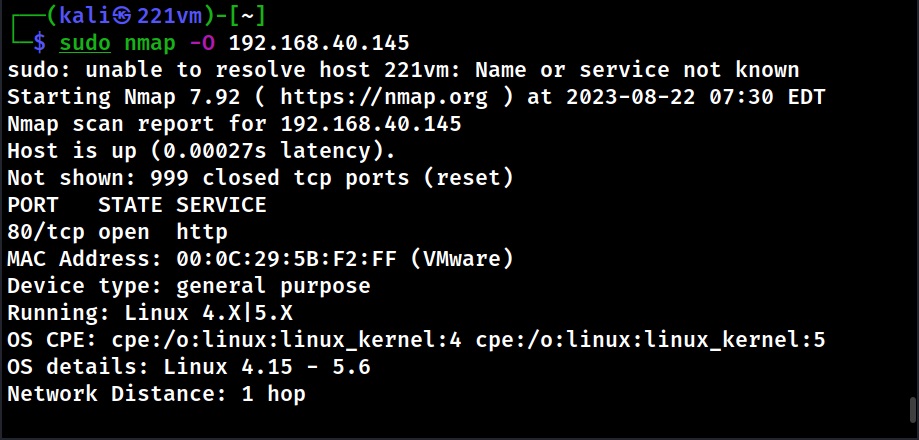
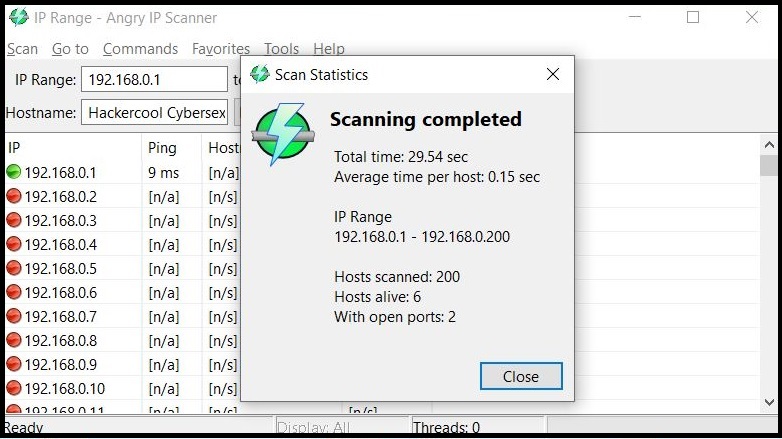
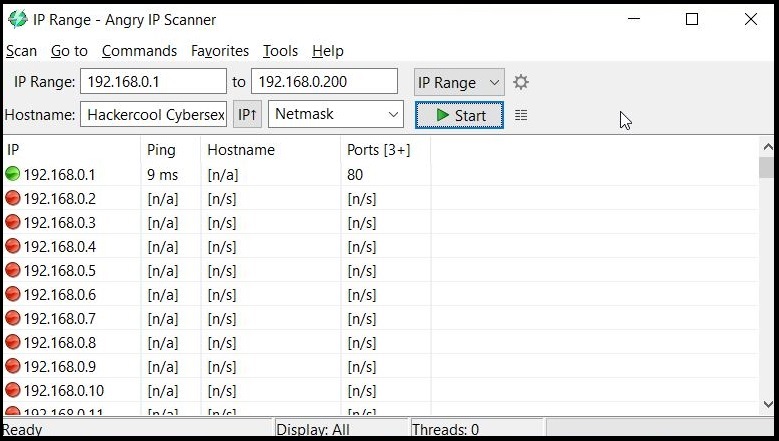
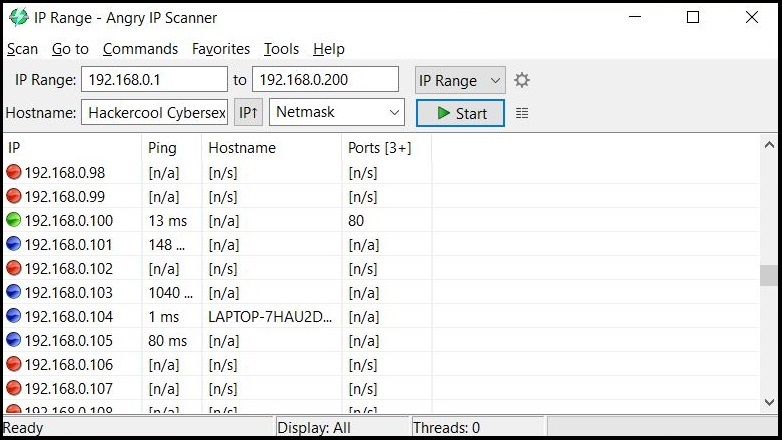
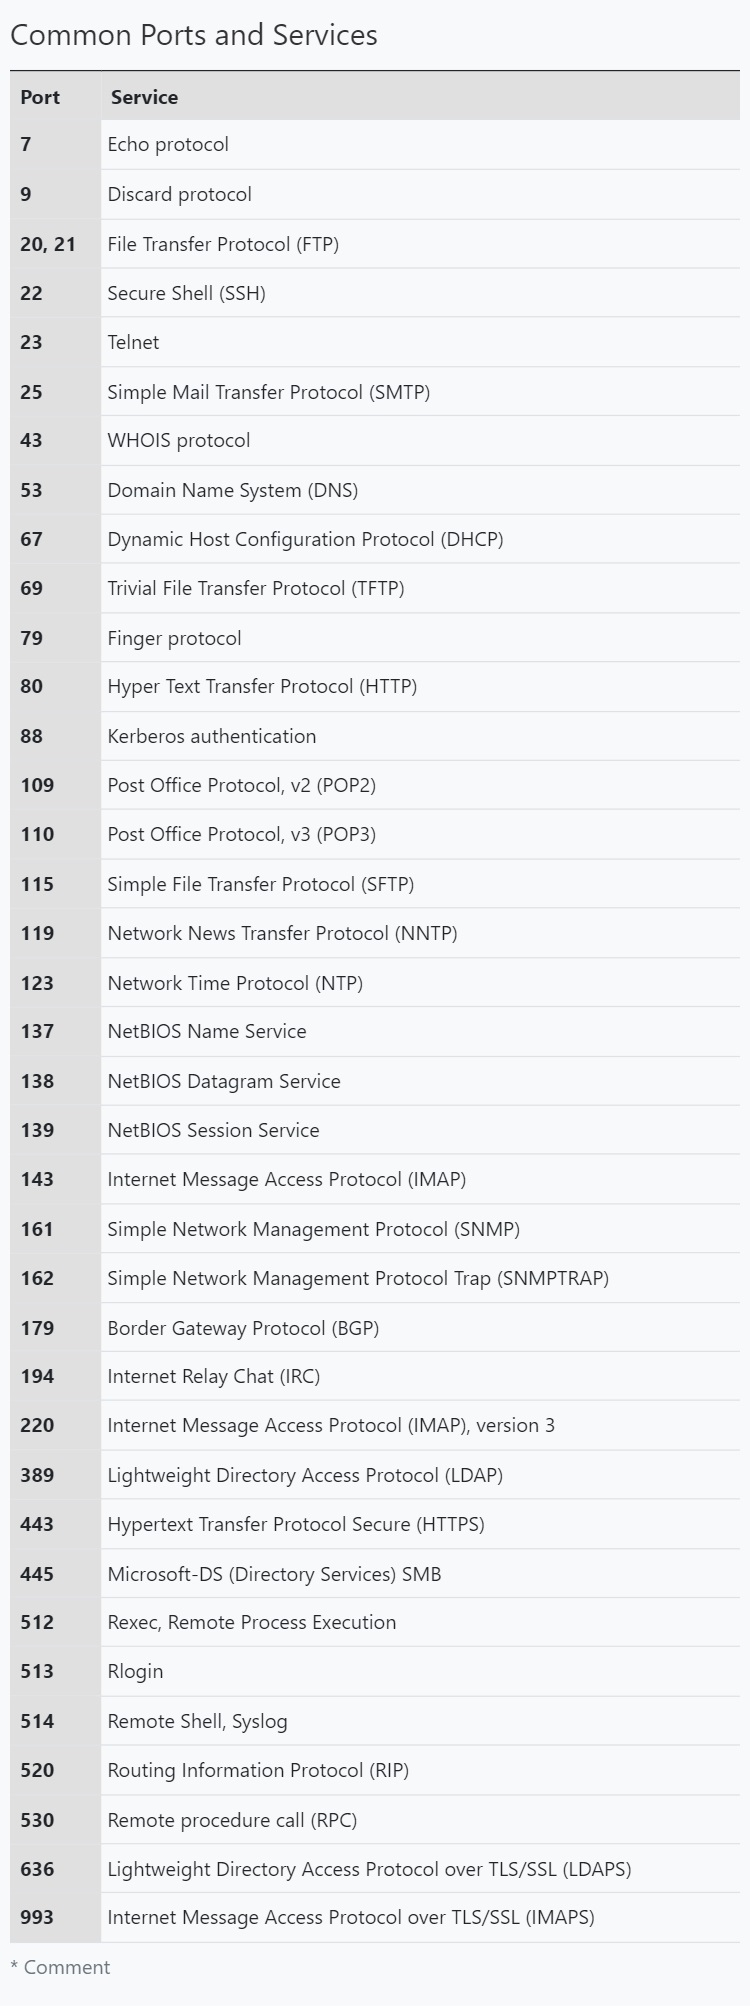
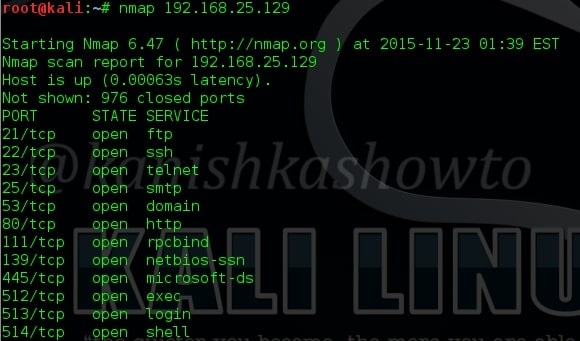
In an external vulnerability scan, the external facing resources of an organization are scanned. These include, websites, systems, ports and services.

2. Internal vulnerability scan:

In this type of scan, the vulnerability scan is performed on the internal network of the organization or on resources to which the users or employees of the organization have access to. This scan is performed to get information about the vulnerabilities which employees or malware which gained access to the network can exploit.

3. Environmental scan:

Environmental vulnerability scans are performed based on the target environment. For example, target environment can be cloud based, IOT, mobile devise, websites etc.

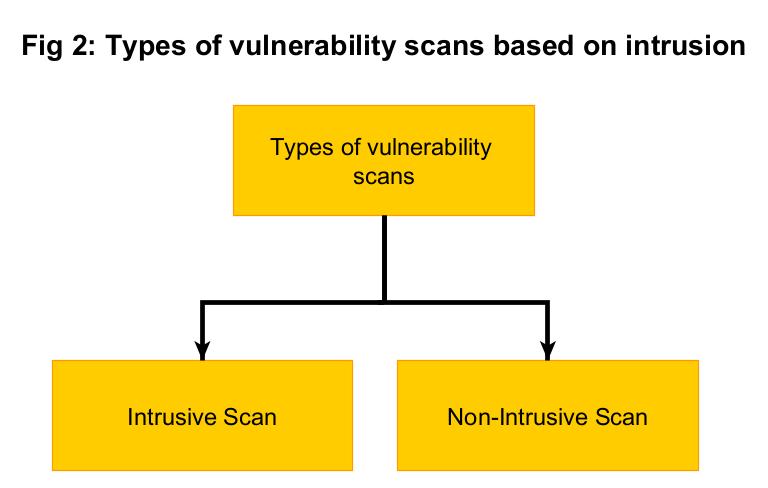
Vulnerability scans can also be classified as either Intrusive or Non-Intrusive.

4. Non- Intrusive scan:

In a non-intrusive vulnerability scan, vulnerabilities are just identified and reported.

5. Intrusive scan:

In an intrusive vulnerability scan, vulnerability is not just identified but also exploited.

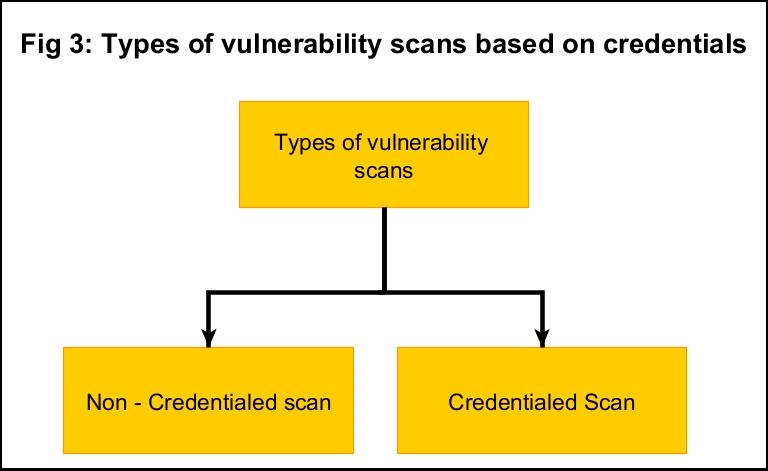
Apart from these categorizations, vulnerability scan is also classified as credentialed scans and non-credentialed scans.

6. Credentialed scan:

Also known as authenticated scan, this vulnerability scan in performed using a set of credentials. This type of scan gives the trusted users view of the organization.

7. Non-credentialed scan:

Also known as non-authenticated scan, this vulnerability scan gives the external user’s view of the network or revenue of organization.

Uses of vulnerability scans

Vulnerability scanning can help cyber security personnel of the organization to get an idea about the vulnerabilities in the organization beforehand and to prevent them from being exploited by attackers. As hackers also perform vulnerability scans, vulnerability scanning gives an idea to the organization as to what hackers can see.

How are vulnerability scans performed?

Vulnerability scans can be performed manually or using tools (vulnerability scanner). See how to perform vulnerability scanning with Nikto and Nessus.

Vulnerability scan vs Vulnerability assessment

In vulnerability scanning, vulnerabilities are scanned and reported whereas in vulnerability assessment, apart from identifying vulnerabilities the impact of the vulnerabilities when exploited is also assessed. Learn more about vulnerability assessment.

Posted on

OS fingerprinting for beginners

Hello, aspiring Ethical Hackers. In this blogpost you will learn about OS Fingerprinting. Before you learn about OS fingerprinting, you should know what exactly is Fingerprinting. Fingerprinting is a form of biometrics that identifies a person with their fingerprint. Why Fingerprint? Because GOD has created humans in such a way that two people (no matter how much population rises) have same fingerprints.

What is OS Fingerprinting?

Just like every human has his own fingerprint, operating systems too have a unique fingerprint. Windows systems have a unique fingerprint whereas Linux systems have their unique fingerprint. The process of determining this fingerprint to determine the operating system of the target is known as Operating System fingerprinting.

What is this required?

If a hacker or pen tester can find out the operating system of the target system, he/she can know which vulnerabilities to exploit or which payloads to design to gain access to the target system (For example, Windows need EXE payloads whereas Linux systems require .sh payloads.

Types of OS Fingerprinting

os fingerprinting

Active OS Fingerprinting

In Active OS Fingerprinting, specially crafted packets are sent to the target system and its responses are analyzed to determine the operating system of target computers. This interaction can be as simple as a ping or a scanner like Nmap. Using ping, we can detect a target operating system by observing the Time To Live (TTL) values as shown below.

Time To Live (TTL) is the amount of time or “hops” that a packet is set to exist inside a network before discarded by a router. In simple words, it is the period of time that a packet or data should exist on a network before being discarded. This value differs from operating system to operating system. Here are the default TTL values of some operating systems. You can know about the default TTL values of more operating systems here.

Another way to perform Active Foot printing is by sending specially crafted packets to the target system. Among all Ethical Hackers use Nmap for OS fingerprinting.

Passive OS Fingerprinting

Although Active Fingerprinting is very effective and accurate at determining the target’s operating system, it is very noisy and can be easily spotted by Cyber security teams. Passive fingerprinting is a more effective way of detecting target system’s OS. Moreover, there is no chance of Firewalls blocking this type of fingerprinting. How is it possible?

In passive OS fingerprinting, a sample of packets coming from the target we are interested in are analyzed. For this purpose, we use a Packet Capture API. It relies on guessing the target OS by observing their TCP/IP implementation. Apart from TTL, this type of fingerprinting will observe window size, Don’t Fragment (DF) bit and Type Of Service (TOS).

Posted on

Port scanning techniques for beginners

Hello aspiring Ethical Hackers. In our previous blogpost you learnt what is a port? what is port scanning etc. In this blogpost, you will learn about different port scanning techniques that are be used to determine if a port is open or not. Ethical Hackers and Penetration Testers use different port scanning techniques to determine if a port is open or not. Unless a port is open, you cannot enumerate the service running on it for further exploitation. So, using a wrong port scanning technique can give you a wrong result.

In order to understand the various port scanning techniques, readers need to first understand how TCP communication takes place between programs and applications. You have read in our article on OSI model that the Transport Layer is responsible for reliable data transfer between end systems. You have also read two protocols are used for data transfer between devices and applications. They are Transmission Control Protocol (TCP) and user Datagram Protocol (UDP).

Transmission Control Protocol is a reliable connection-oriented protocol that ensures that data is transmitted accurately and completely between programs and applications.

How TCP communication takes place?

To make sure that data is transmitting correctly and completely, Transmission Control Protocol (TCP) uses various flags in the headers. These flags are given below.

TCP Three-Way Handshake

Before sending data using TCP, two devices establish a connection using a Three-Way handshake which is shown below.

  1. A client sends a TCP packet to the Server with SYN flag set.
  2. The Server responds with a TCP packet with both SYN and ACK flags set.
  3. The client replies to the packet with a TCP packet with ACK flag set.

After this 3-way handshake, both client and Server start sending and receiving data. Now, that you understood how a TCP communication works it’s time to see different port scanning techniques.

1. TCP Connect Scan (-sT)

In this type of scan, NMAP sends a TCP packet to a port with the SYN flags set. If the port is open, the target responds with a SYN/ACK flag set to packet. Then Nmap sends ACK packet. If the port is closed, the target sends a RST packet. If the target doesn’t respond, the port can be considered filtered.

2. SYN or Half-Open Scan (-sS)

In a SYN scan, Nmap sends a SYN packet to the target port. If the port is open, the target sends a “SYN/ACK” set packet. Then Nmap instead of sending a packet with ACK flag set, sends a packet with RST flag set to terminate the connection. Since the Three-way handshake is not complete, it is known as “half-open” scan. Similarly, since the TCP connection is not complete it is not logged and hence considered a stealthy scan. Also, unlike TCP connect scan this scan is fast.

3. ACK Scan (-sA)

Unlike the above two scans, this scan is not used to determine if a port is open or not. In fact, it is used to determine firewall rulesets. In this scan, Nmap sends a packet with ACK flag set to the target port. Here, both open and closed ports send a packet with RST flag set. These ports are labelled as unfiltered. If the ACK packet is dropped, the port is labelled as filtered.

4. NULL Scan (-sN)

In this scan, Nmap doesn’t set any flags while sending a packet to the target. If no response is received, the port is assigned as open/filtered. If an RST flag is received from the target port, the port is considered closed and if any ICMP unreachable error 3, code,1,2, 9,10 or 13 is received, it is considered as filtered.

5. FIN Scan (-sF)

In this scan, Nmap sends a packet with FIN flag set to the target. The result is same as that of NULL scan.

6. XMAS Scan (-sX)

In this type of scan, NMAP sets FIN, PSH and URG flags to the packet and sends it to target port. The result is same as that of Null scan & FIN scan.

Since the packet is lighted up like a Christmas tree when these 3 flags are set, it is known as XMAS scan. Learn about different port scan results.

Posted on

Network scanning guide for beginners

Hello, aspiring Ethical Hackers. In this blogpost, you will learn about Network Scanning. Network Scanning is the second stage in a Penetration Test and is the first step where an Ethical Hacker directly interacts with the target network.

What is Network Scanning?

Network scanning is the technique in which the target network is scanned for LIVE systems (Active Systems), open ports and vulnerabilities. Network Scanning is of three types.

They are,

  1. LIVE Host Scanning or Host Scanning.
  2. Port Scanning.
  3. Vulnerability Scanning.

LIVE Host Scanning

In LIVE Host Scanning, a range of IP addresses (obtained earlier from Network Footprinting) are scanned for LIVE systems or active systems (systems that are turned on) as a system that is shut down is safe from hacking. Network Scanning can be done manually but when we have to scan an entire range of IP addresses, it is best to use a network scanner.

How do network scanners detect if a system is LIVE or not? Although, they use a variety of methods to scan for LIVE systems, one of the most common method any network scanner uses is Ping.

Ping is a network diagnostic tool that helps users determine if a destination system is active or not. Ping works by sending a “echo request” to the target destination IP. If the destination system is LIVE, it will send a “echo reply” message. Ping is available in both Windows and Linux systems. It works by using ICMP (Internet Control Message Protocol).

In LIVE Host Scanning, a range of IP addresses (obtained earlier from Network Footprinting) are scanned for LIVE systems or active systems (systems that are turned on) as a system that is shut down is safe from hacking.

Network Scanning can be done manually but when we have to scan an entire range of IP addresses, it is best to use a network scanner.

How do network scanners detect if a system is LIVE or not? Although, they use a variety of methods to scan for LIVE systems, one of the most common method any network scanner uses is Ping.

Ping is a network diagnostic tool that helps users determine if a destination system is active or not. Ping works by sending a “echo request” to the target destination IP. If the destination system is LIVE, it will send a “echo reply” message. Ping is available in both Windows and Linux systems. It works by using ICMP (Internet Control Message Protocol)

Apart from Ping, Network scanners also use ARP scanning to determine if a system is LIVE or not.

2. Port Scanning

A port is a virtual point where all network connection start and end. Ports are software based virtual addresses where all network connections start and end. Each service is given one separate port and it is managed by the computer’s Operating System. Given below are some important port numbers and services associated with them.

Just like Host scanners, Port scanners are used to perform port scanning. NMAP is the most popular and versatile port scanner. But how does port scanning work. A port scanning sends a TCP or UDP network packet to a specific port to enquire about its status. Learn about Port scan results here. Attackers use various techniques of port scanning before coming to a conclusion about a particular port of interest. Learn about various port scanning techniques here.

3. Vulnerability Scanning

Vulnerability scanning identifies vulnerabilities in network, applications and services. A Vulnerability scanner use a database to compare details about version of software running on target system to detect and identify vulnerabilities. This database used by vulnerability scanner has common programming bugs, default credentials, default configurations, common username & passwords etc.

Posted on 2 Comments

Complete guide to Nmap port scanner

Hello, aspiring ethical hackers. This blogpost is a complete guide for using Nmap (Network Mapper). It is a popular and open source utility used for port scanning and network discovery by network administrators and pen testers. It uses real IP packets in novel ways to determine the LIVE hosts on the networks, open ports, the services they are running, type of firewalls in use etc. It is available for all major operating systems like Linux, Windows and Mac OSX.

We are using it on Kali Linux where it is installed by default. Let’s begin with how to specify targets while scanning.

Target specification

1. Provide input through a list:

nmap -iL <input filename>

This option reads targets from a specific file. Let’s create a file named alpha with a few newline separated or tab-limited or space separated IP addresses using vi on Desktop.

Then, move to Desktop directory and type the command as shown below. It scans the four IP addresses listed in our file.

2. Specify random hosts to scan:

nmap -iR <number of hosts>

This option is used to specify random hosts to scan. Nmap generates its own targets to scan. The <number of hosts>argument tells nmap the number of IP’s to generate. Let’s type command as shown below.We can see that it generated five random targets to scan. The scan failed to determine route to the generated IP addresses because my system is not connected to Internet. Why didn’t it generate any internal IP addresses? Because in this scan private, multicast and unallocated address ranges are automatically skipped.

3. Scan the entire subnet:

nmap <IP address/dir>

This option is used to scan the entire subnet. Assuming you know CIDR let’s type the command as shown below to scan eight IP addresses from 10.10.10.1 to 10.10.10.8 and see the result below.

4. Exclude some hosts and networks:

nmap [targets] -exclude [targets]

This option specifies a comma separated list of targets to be excluded from the scan even if they are part of overall network range we specify. For example, in our previous scan we saw that one host 10.10.10.2( which is the system I am working on) is alive. Now I decided to exclude that host and another host from the scan. So I type the command as shown in the image given below and press “Enter”. We can see that nmap has only scanned six IP addresses.

5. Take the exclusion list from a file:

nmap [targets] -excludefile [file name]

Now what if the subnet was very big and there are more number of hosts to be excluded from the scan. The above option helps us to achieve this. Remember the file “alpha”( with four IP addresses) we created. Now let’s specify nmap to quit scanning the hosts listed in the file. Type the command as shown below. We can see that it scanned only four hosts in the subnet.

6. Scan specific targets:

nmap [target1 target2 target3]

This option specifies nmap to scan multiple targets separated by space. Type the command shown below . We can see the result below.

Scan types

Nmap is equipped with a variety of scans to detect open ports and services on the target system. Learn about Nmap’s various port scan techniques here.

Scan results

Nmap classifies the ports it scans into six categories. They are open, closed, filtered, unfiltered, open/filtered and closed/unfiltered. In which cases does Nmap classify a port as one of the above. Learn in port scan results of Nmap.