Hello, aspiring ethical hackers. In this blogpost, you will learn about banner grabbing. Banner grabbing plays a very important role in ethical hacking for penetration testers and hackers alike. To understand what is banner grabbing, you need to understand what is a banner first.
What is a Banner?
A banner is the information displayed by software or service running on a specific port. This information involves the type of software running, version of the software running etc. This information is displayed by default by every software running for marketing purposes.
What is Banner grabbing?
Banner grabbing as its name implies, is grabbing this banner. A banner when displayed to a common user may provide information to the user. In the same way, by grabbing this banner, hackers and penetration testers can get information about the software running on it and the version of the software running. This allows them to search or research for any vulnerabilities in the software.
Types of Banner grabbing
Banner grabbing can be performed in two ways: Active & passive.
- Active banner grabbing: In active banner grabbing, a hacker or penetration tester interacts with the software & target services to grab the banner.
- Passive banner grabbing: In passive banner grabbing, a hacker or penetration tester doesn’t interact with the target service while grabbing the banner. This can be done by packet sniffing on the network traffic of the network.
Although banner grabbing can be performed on almost all services running on all ports, the most common services that are used for banner grabbing are,
FTP-Port 21
SSH-Port 23
SMTP-Port 22
HTTP-Port 80
Tools used for Banner grabbing:
- Telnet, wget, curl etc
Apache:
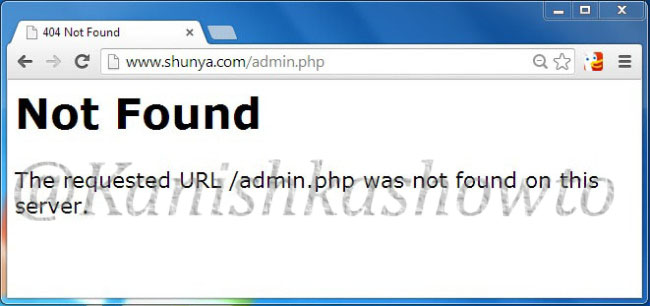
Imagine I have set up a website named www.shunya.com on an Apache server. A hacker can easily find Information about the web server in different ways. For example, a hacker can visit the website and and try to open a webpage which is not existent on my server, like below.
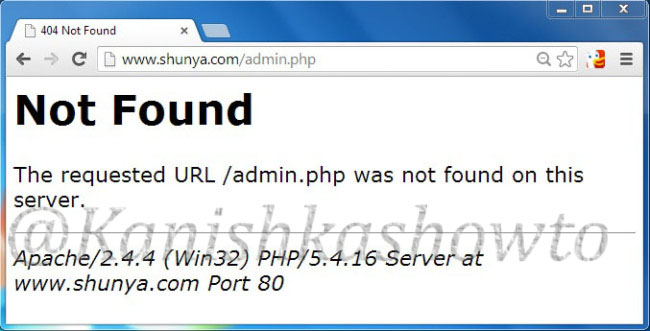
In the above example, hacker tried to open page named “admin.php” which was not available on my server and in turn the server responded with a type of web server, the target OS and the scripting language. This is giving out too much information.
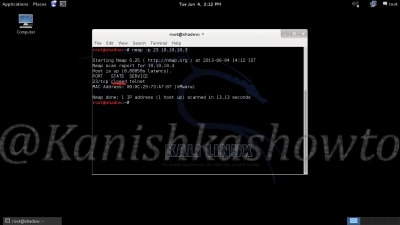
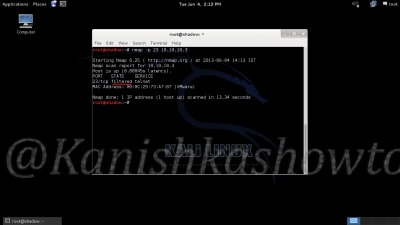
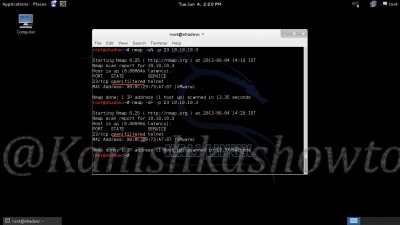
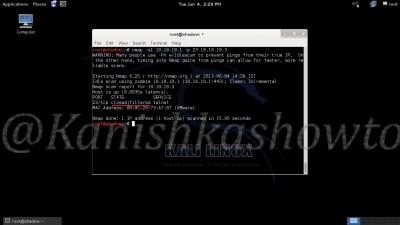
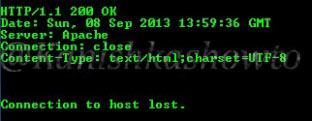
The traditional and popular way of fingerprinting is through telnet. A hacker opens command line or terminal. and types the command “telnetwww.shunya.com 80″. When the screen goes black, type “HEAD / HTTP/1.0″and this will give the server information.
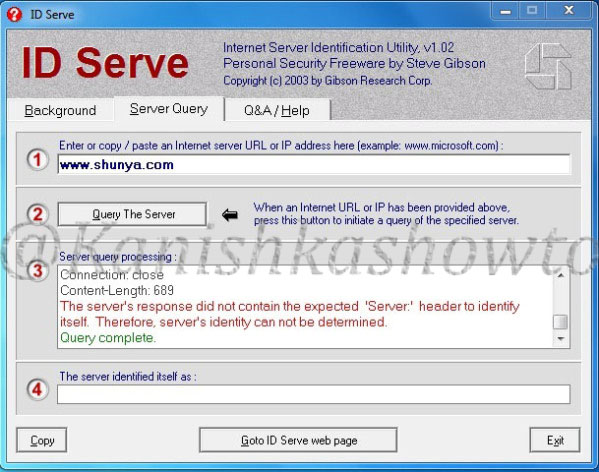
There are also many fingerprinting tools available. I am gonna show you only one, Id serve. Let’s see how to banner grab using Id serve.
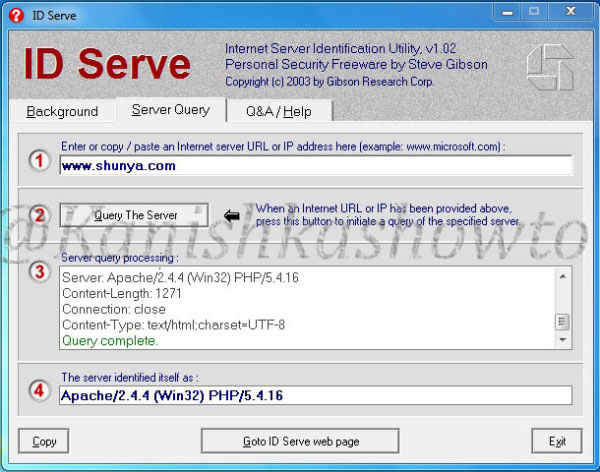
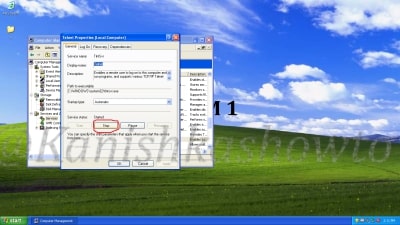
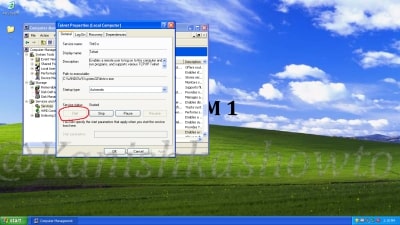
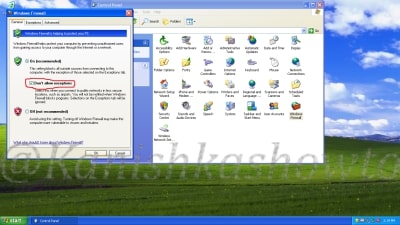
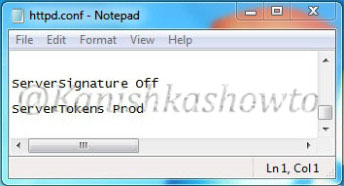
Now what are the preventive measures we can take in Apache server to disable or atleast prevent fingerprinting to some extent. Apache web server has a configuration file called “httpd.conf” where we can make changes to fight fingerprinting. Go to httpd.conf and change the value of the option “Server Signaturetooff”.This will not display any information about server when an nonexistent page has been accessed.
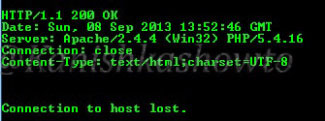
In the httpd.conf file, changing the value of “Server Tokens”from “Full” to “Prod” will only show the minimum server information as shown below.
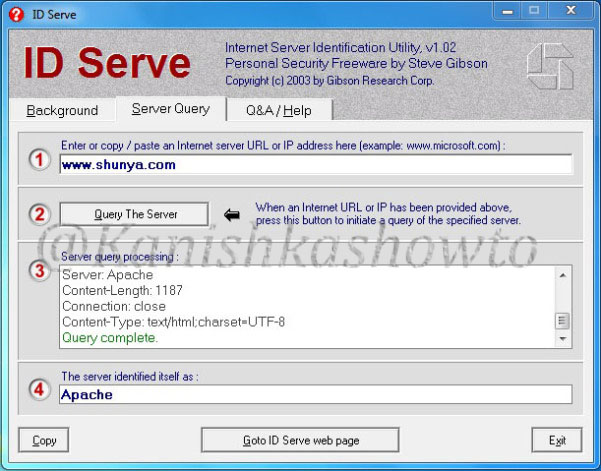
This still discloses that our web server is Apache but it doesn’t show the version. In Kautilya’s words this is delaying the march of enemy. Here are the options we set.
IIS 8:
Now imagine we changed our www.shunya.com website from Apache server to the latest version of Microsoft web server, IIS 8. To prevent error pages form revealing any information in IIS server, we can set custom error pages. Now let’s use IDserve tool to fingerprint the IIS 8 server.
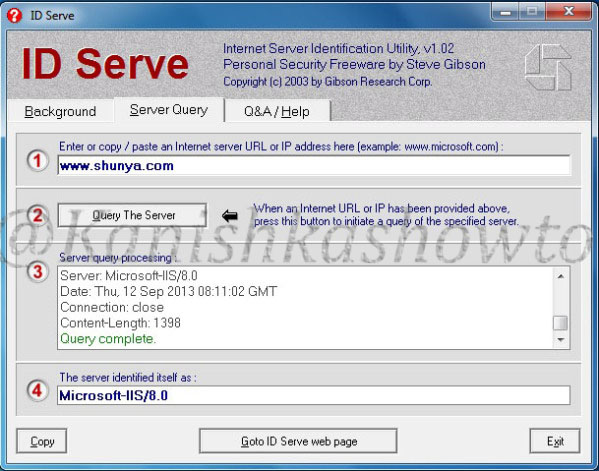
It shows the server version. Now how can we prevent this. Microsoft provides a tool named UrlScan freely available for download which can be used easily to process HTTP requests. Download this tool and install it. ( See how to configure Urlscan for IIS 7.5 and IIS 8 ). Then go to the configuration file of UrlScan, “UrlScan.ini” located at “C:WindowsSystem32inetservUrlscan”by default and change the value of “RemoveServerHeader’ from “0″ to “1″.
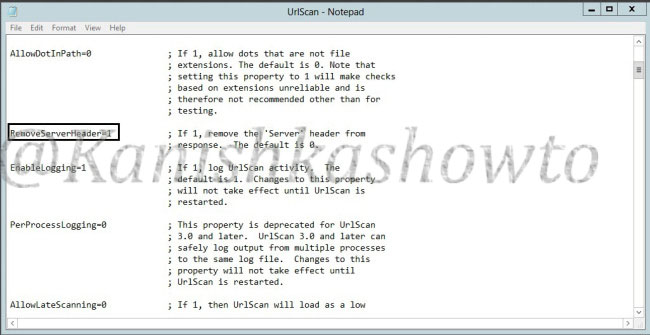
This will not reveal the server version information as shown below.
We can further mislead the attacker by setting our server name to some other value different than our original one. This can be done by setting the value of “RemoveServerHeader” to “0 “and changing the value of “AlternateServerName” to the value we want to specify ( in our example Nginx ).
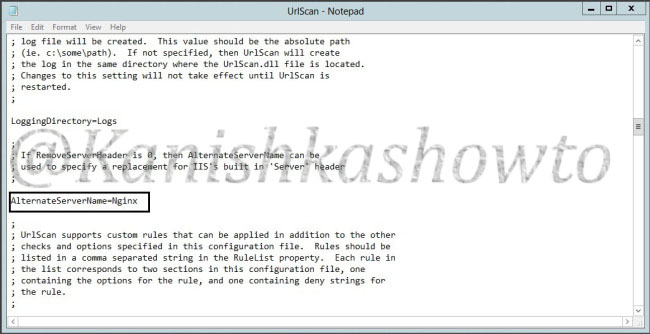
So when the attacker tries to fingerprint our website, he will be misleaded.

Note: Taking this preventive measures will not stop a determined hacker to find out our server information.
That’s all in webserver banner grabbing and countermeasures.