Posted on

Gophish: Setup a Phishing Campaign

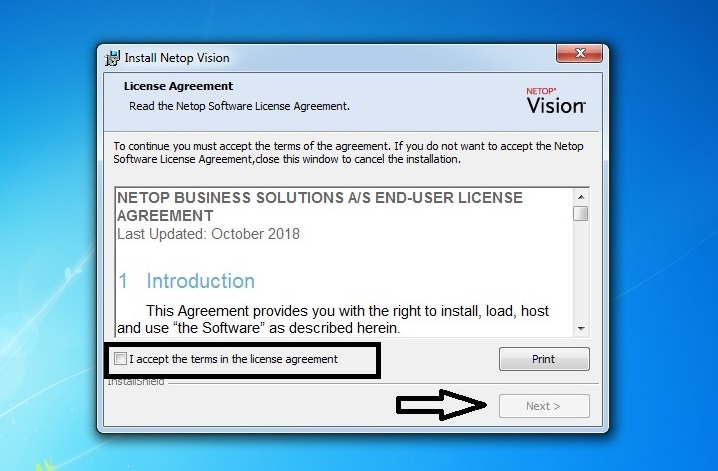
Hello aspiring ethical hackers. In this article you will learn how to setup a phishing campaign. Readers have learnt what is phishing and various phishing techniques in our previous blog posts. It is a fitting conclusion that the next article in our phishing series should be about creating a phishing campaign. Phishing campaign or Email phishing campaign or Spear Phishing campaign is the campaign that sends emails to the victims to lure them to the Phishing site.

Although, this tutorial is similar to phishing campaigns run by malicious hackers, this campaign can also be used to test the security of a company by assessing how vulnerable are the employees of the company to a phishing attack. There are many tools to simulate phishing attacks which are used by Red Team professionals. Gophish is an open-source phishing toolkit designed for businesses and penetration testers. It provides the ability to quickly and easily setup and execute phishing engagements and security awareness training. It is available for both Windows and Linux operating systems.

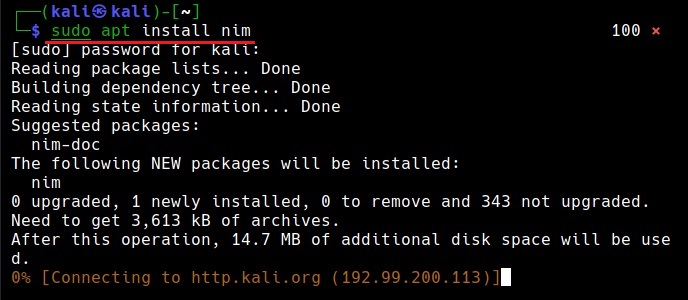
I will be using a Windows version of Gophish as I want to install it on Windows. Installing Gophish on Windows is damn easy. Just download Gophish for Windows, extract the contents of the zip archive. open Windows command line and navigate into the extracted directory and execute the Gophish executable as shown below. This executes some commands as shown below.

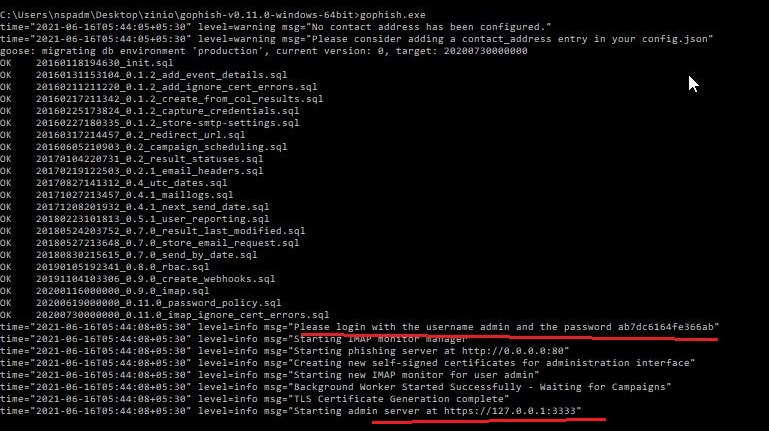
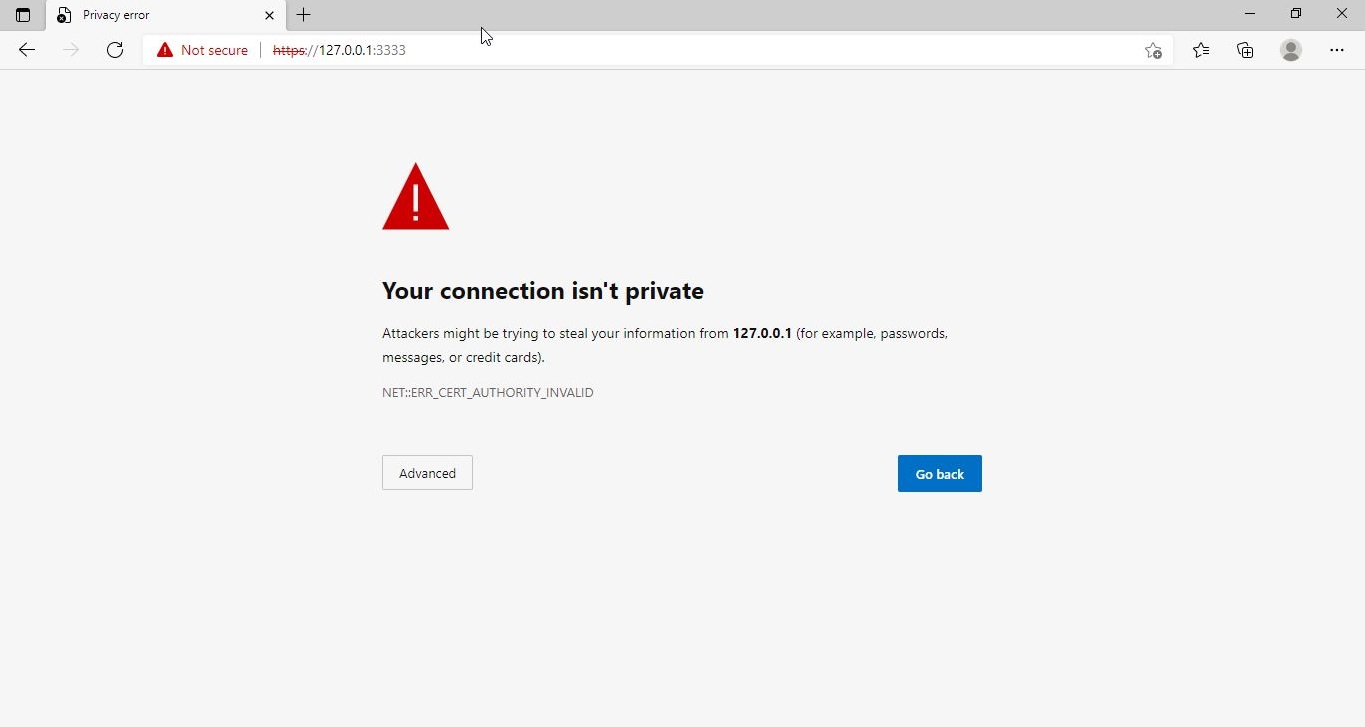
If you observe the CMD window, you will find the username and password for the Gophish dashboard. This part is highlighted in the image above. These credentials are needed to login into the Gophish dashboard. Keep the CMD window open, Open Browser and enter address https://127.0.0.1:3333. This is the default port on which Gophish runs. If you get any certificate error, click on advanced to bypass it and then enter submit the above mentioned credentials.

gophish

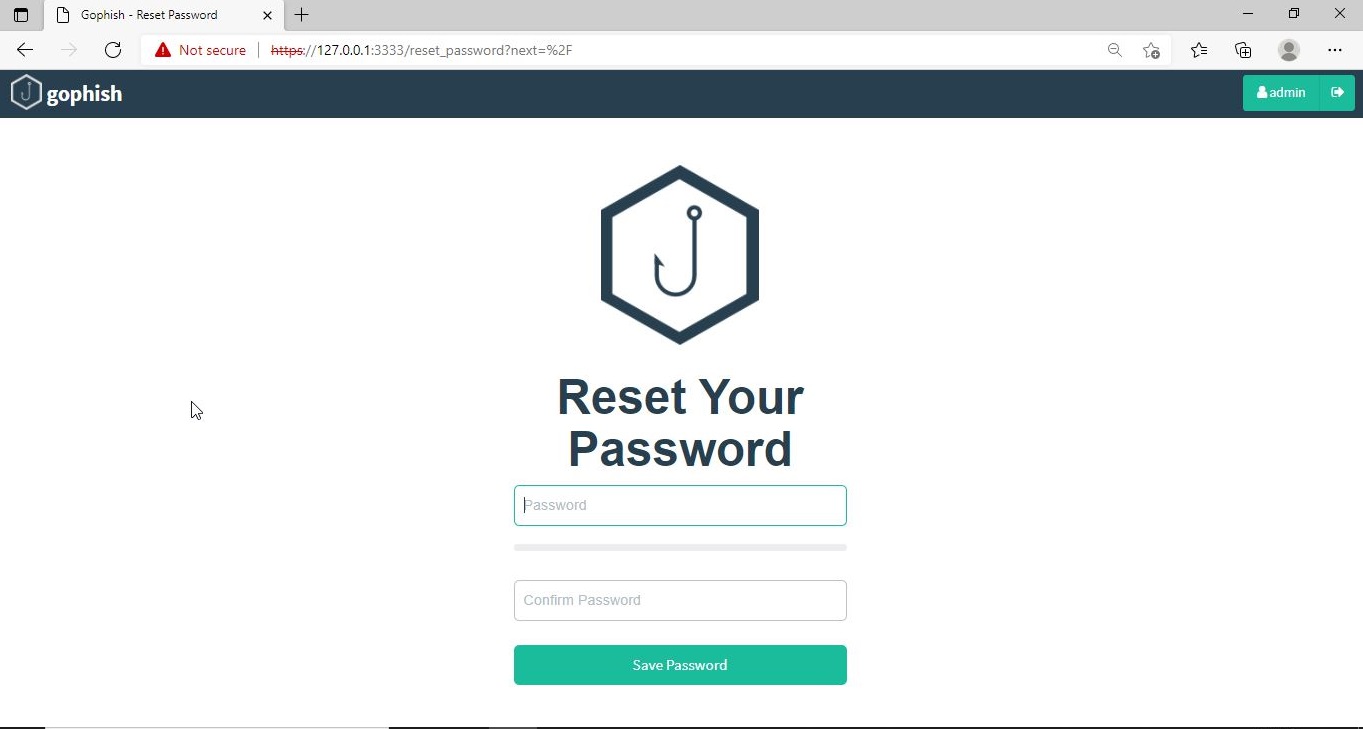
The first thing you will see after logging in is that the system prompts you to reset your password. Reset the password.

Now, you can access the Gophish dashboard.

The first thing we need to do is create a sender profile. This is the mail address from which the spear phishing email comes from.

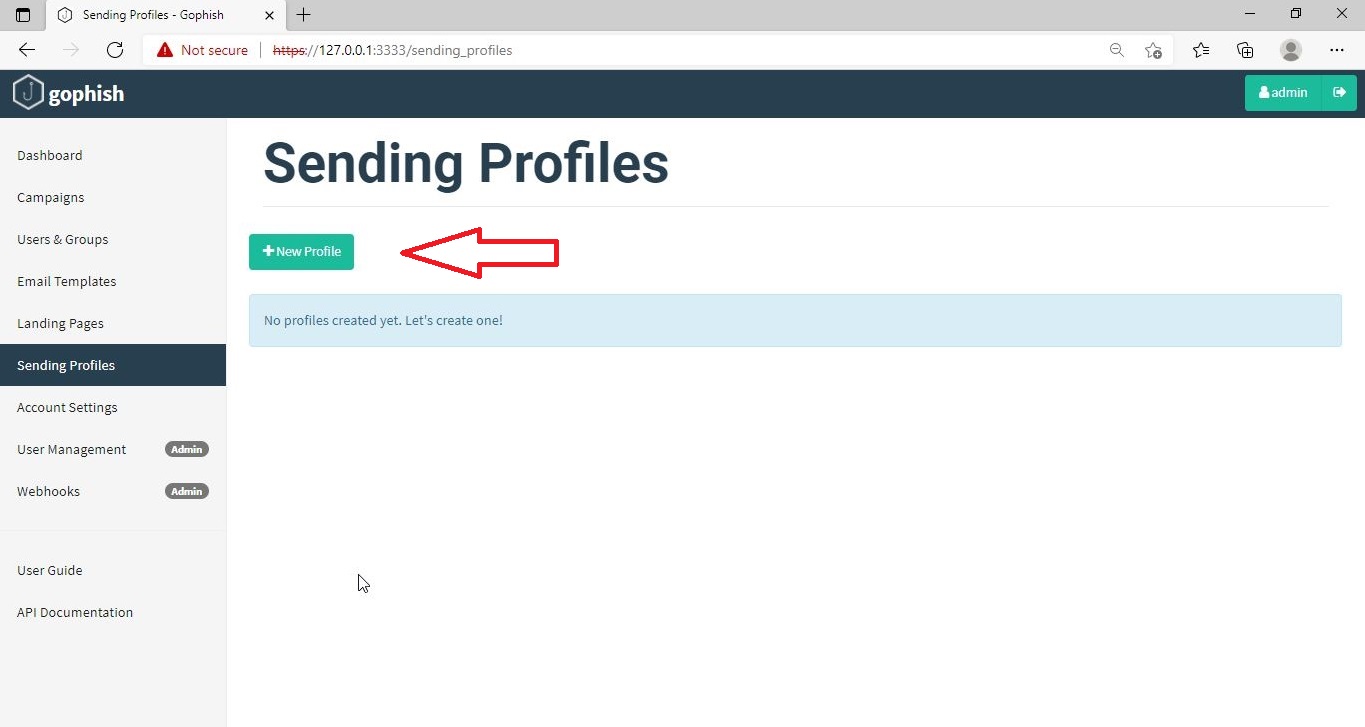
Click on “Sending profiles” tab and then click on “New profile” to create a new Sending Profile. Set the options for the sending profile. For example, we set the name for this as “phishing campaign 1”. To send any type of email, we’ll need a SMTP server. For this tutorial, I will be using the SMTP server of Gmail as I will be sending an email from Gmail. In Real world phishing attacks and even in many phishing simulations, a new domain is created and the email is sent from that domain’s mail to make the phishing email appear genuine. The username is the Gmail username and password is Gmail password.

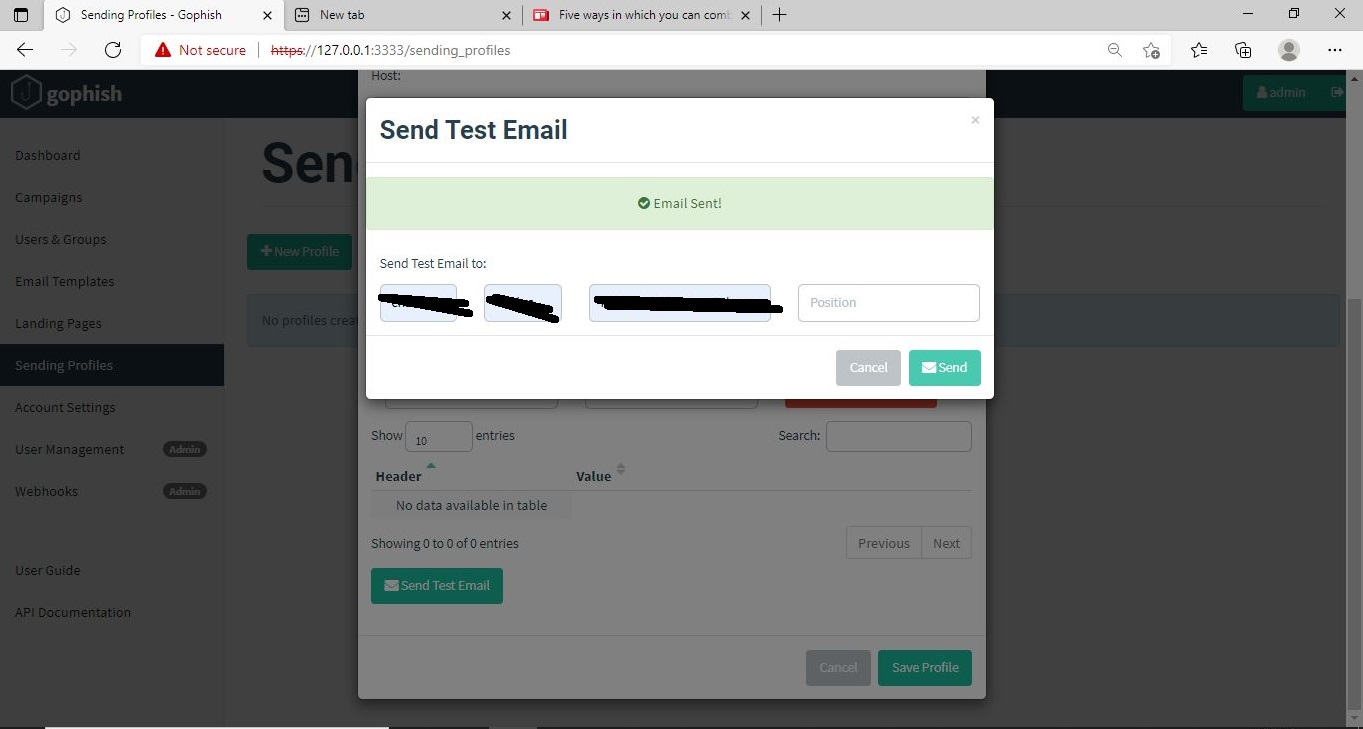
Save the changes. Send a test email to the email of your choice to see if the Phishing email appears as you want it to be.

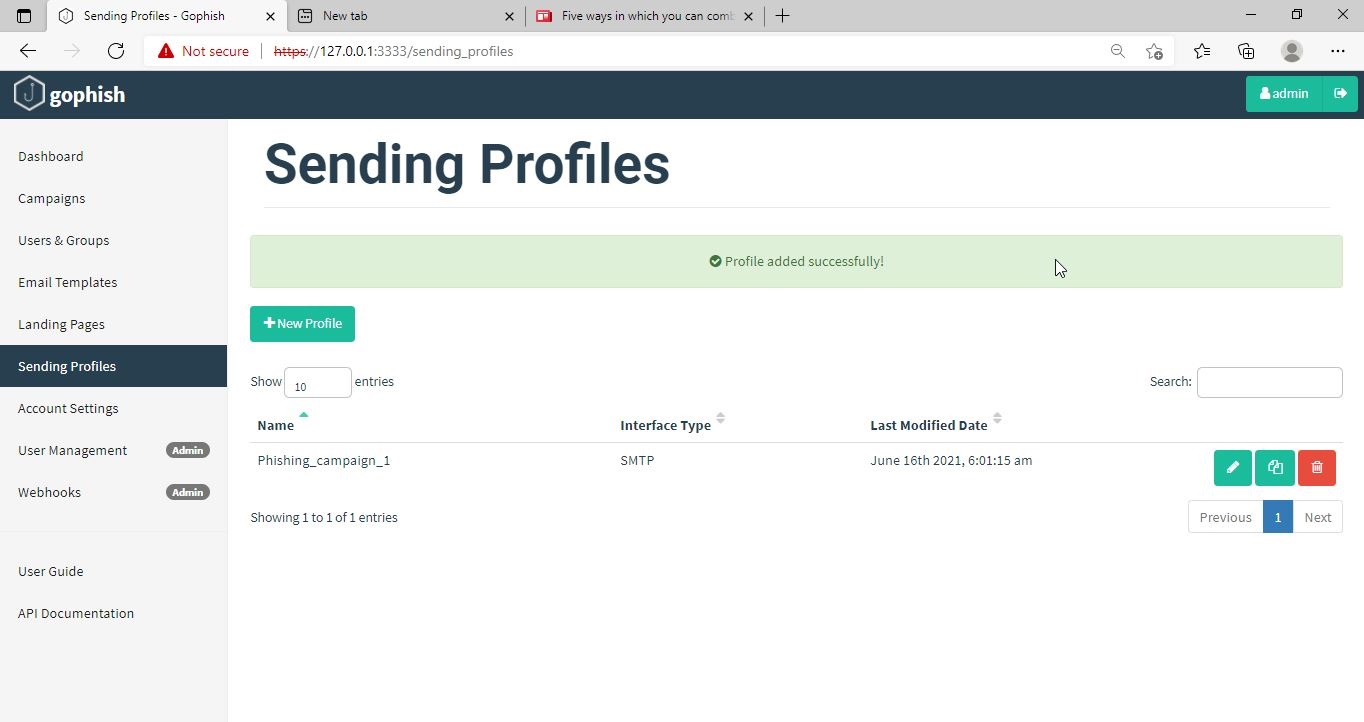
The username we specify is very important here as it will be displayed. So it has to be made as convincing as possible. Once you are satisfied with the sending profile, you can save it.

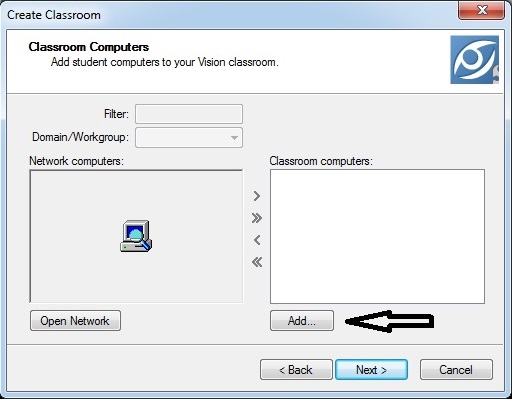
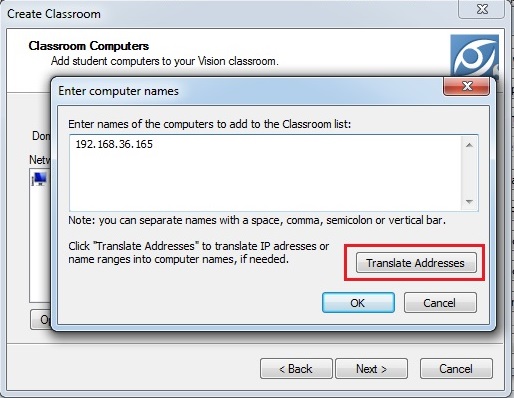
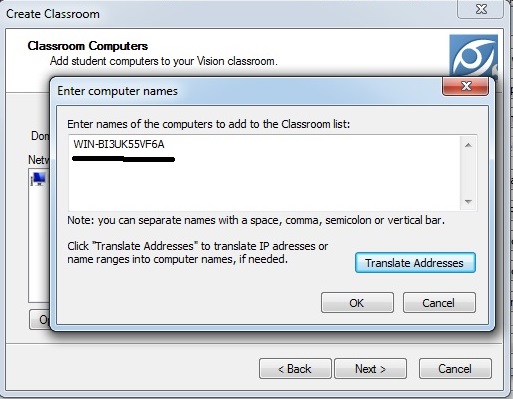
Next, we need to create Users and Groups. This is where we assign target users for of our phishing campaign.

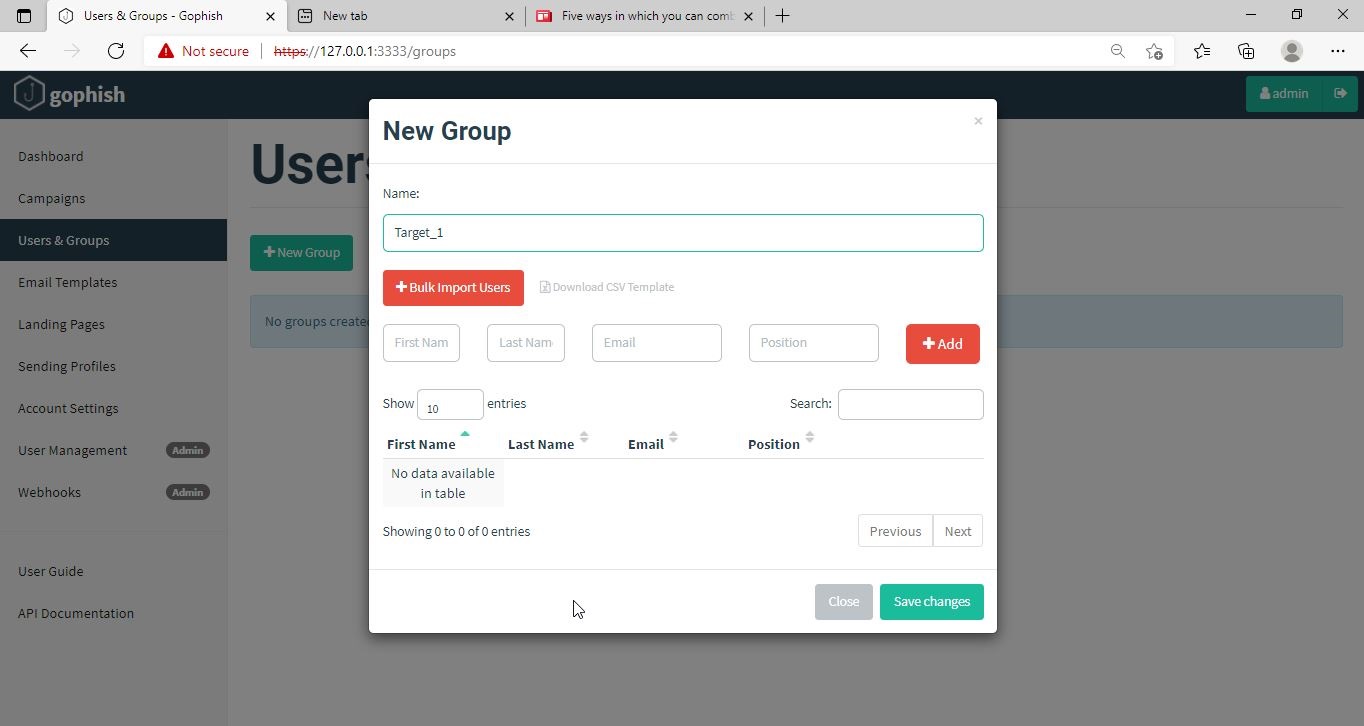
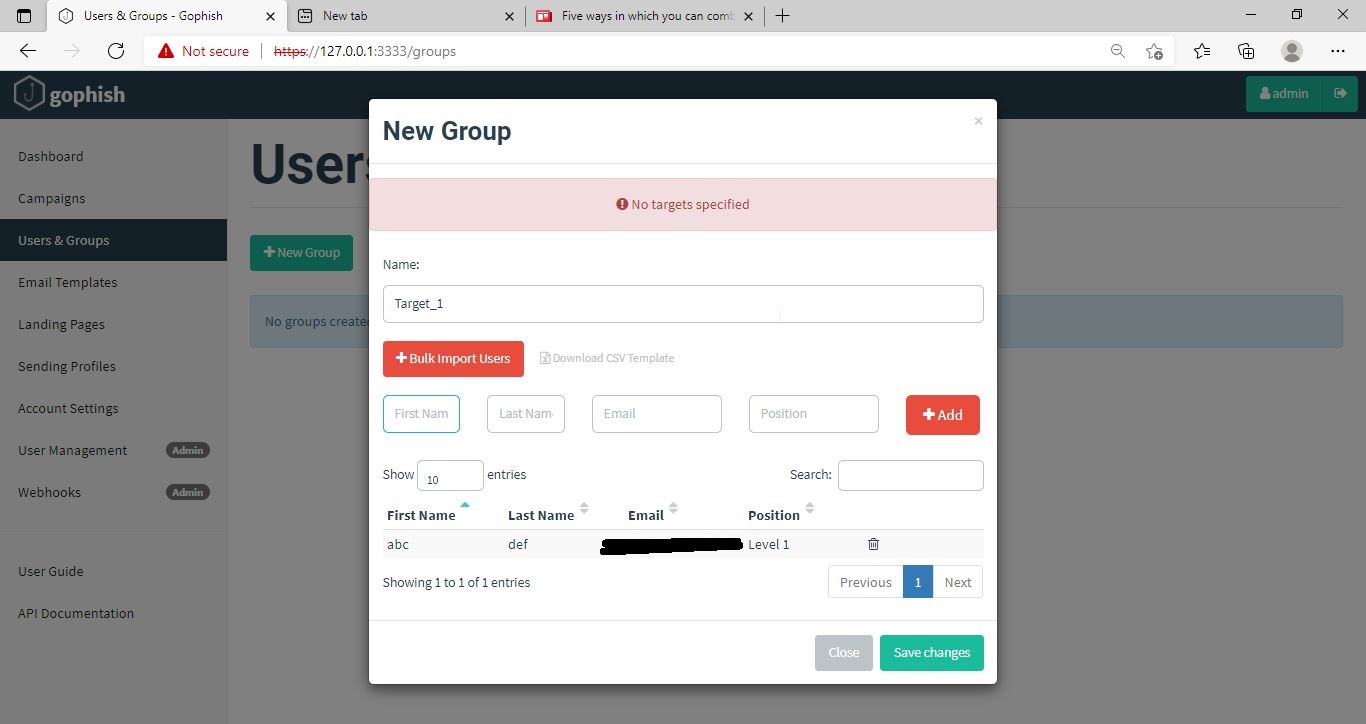
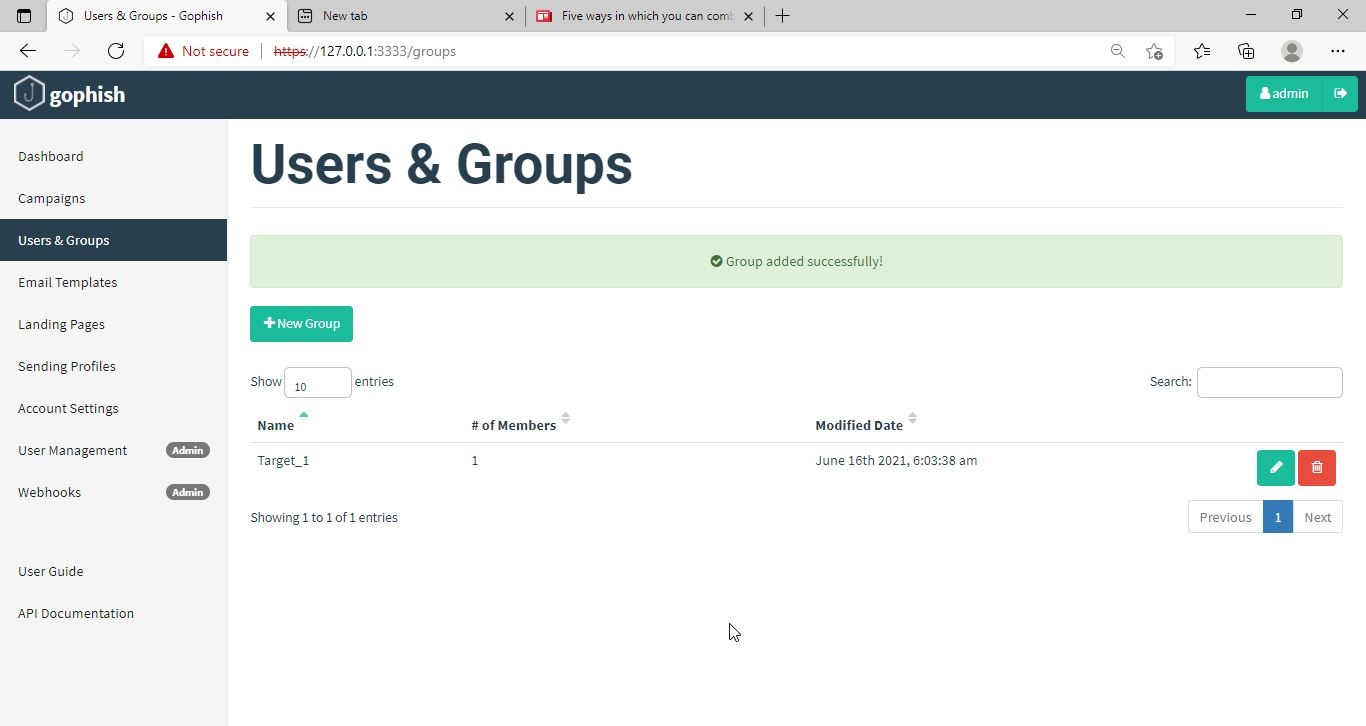
Click on “New Group” to create a new batch of recipients. I have named this group as Target_ 1.

For this tutorial, I’ll add only a single recipient.

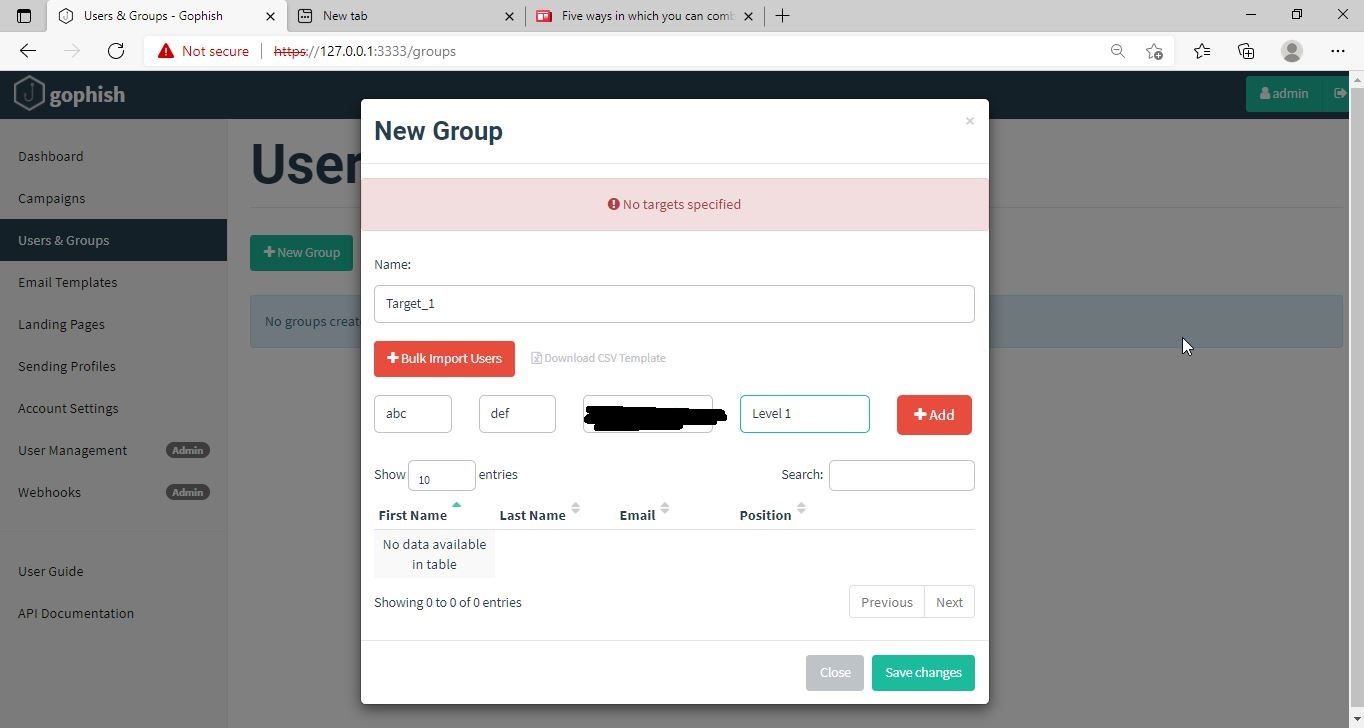
If you want to add a large number of users, you can save them in a CSV file and just import those users with the “bulk import users option”.

It’s time to create an email template. This is the most important part of a phishing email since it has the email body that convinces a victim to click or take any other action.

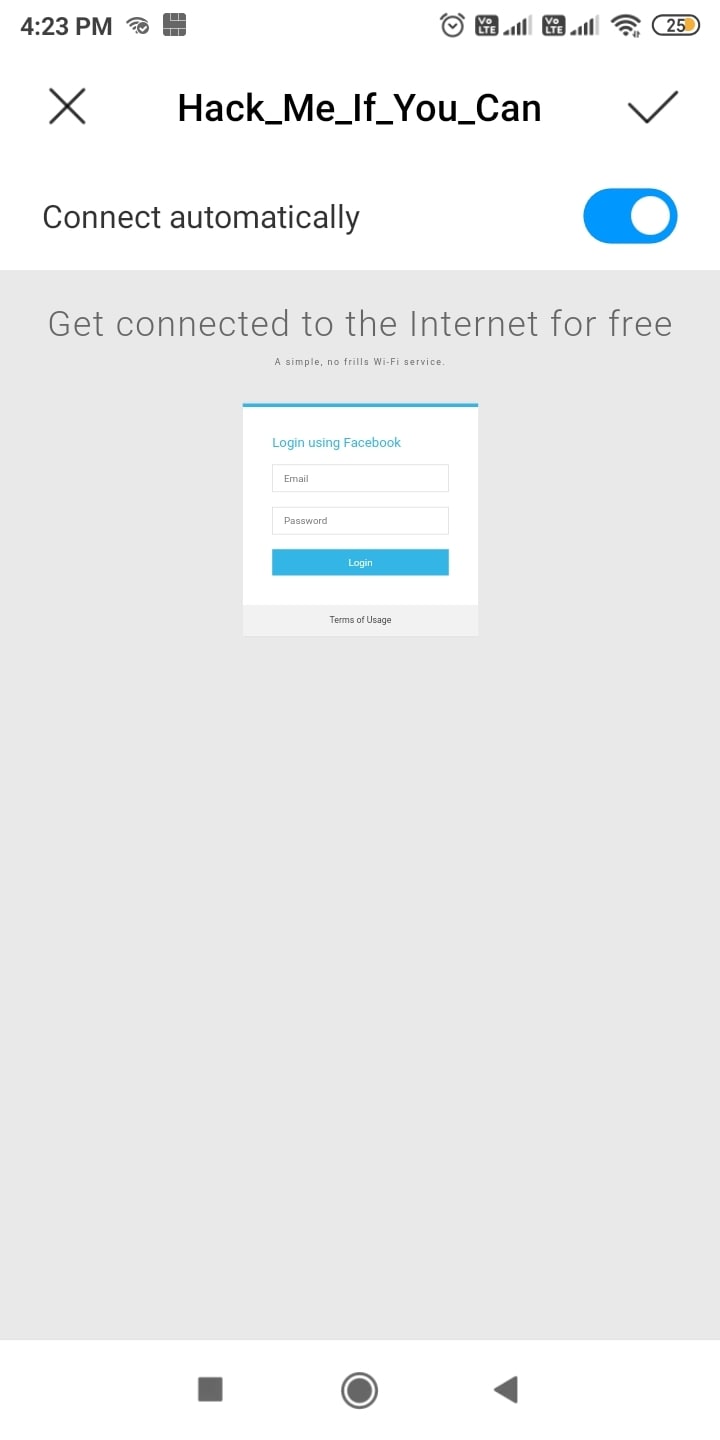
But before we compose the spear phishing email, let’s create a phishing website. For this tutorial, we will be capturing some credentials. Hence we will be using a fake website created using Social Engineering Toolkit in Kali Linux. We can also create a phishing website with Weeman.

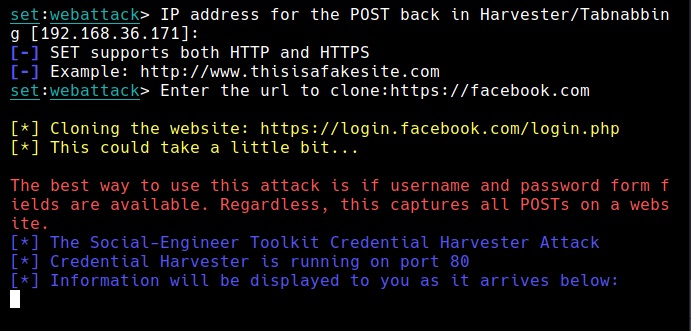
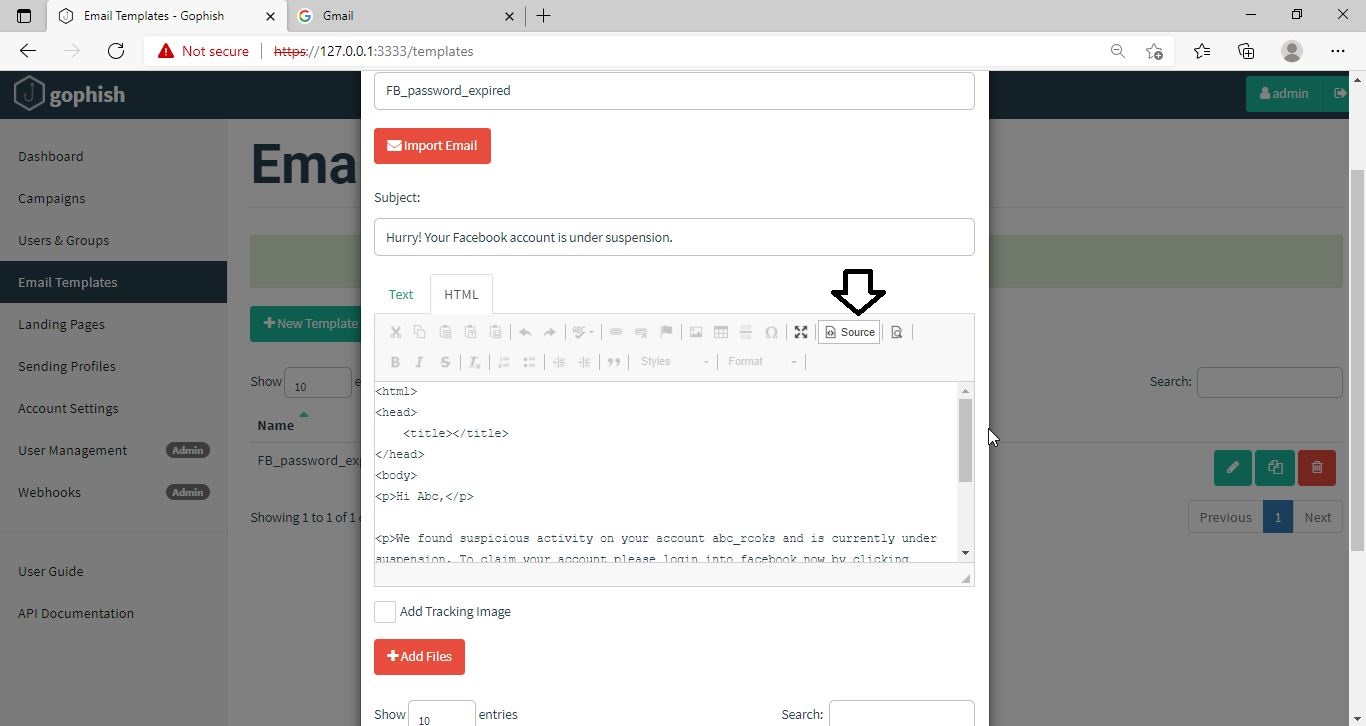
The phishing site is ready and will display any captured credentials on this terminal. Go back to Gophish. Click on “New Template” to create a new email.

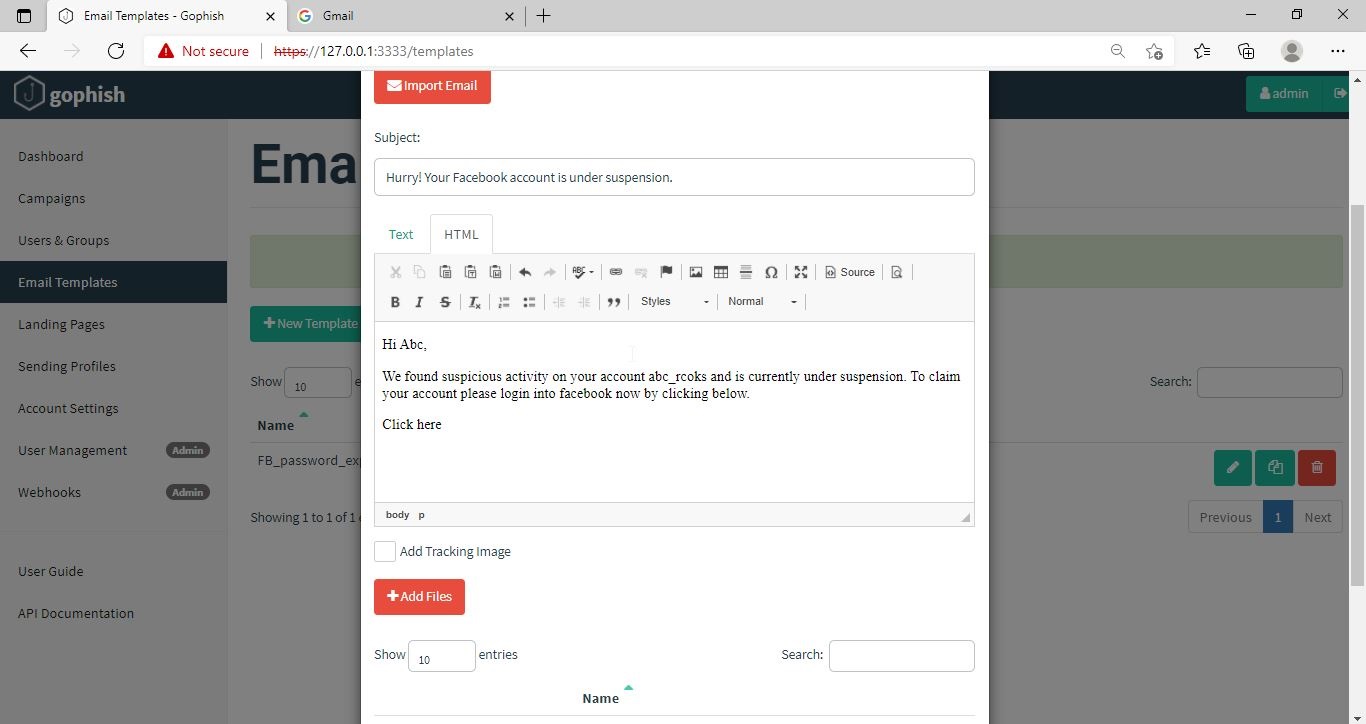
Remember what I said. This part is the most important and the content of the email should convince the user take whatever action you want him to take. We are just showing the age-old account suspension mail. Let’s have a look at some of the spear phishing emails used in real world hacking attacks.

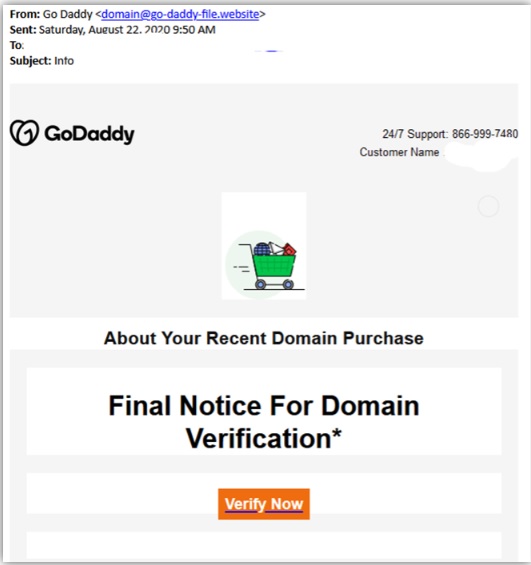
The above mail is sent to Godaddy customers. The Logo, Customer support number etc almost convince even me but just look at the Sender Email. The domain of Godaddy is godaddy.com but sender email is really phishy.

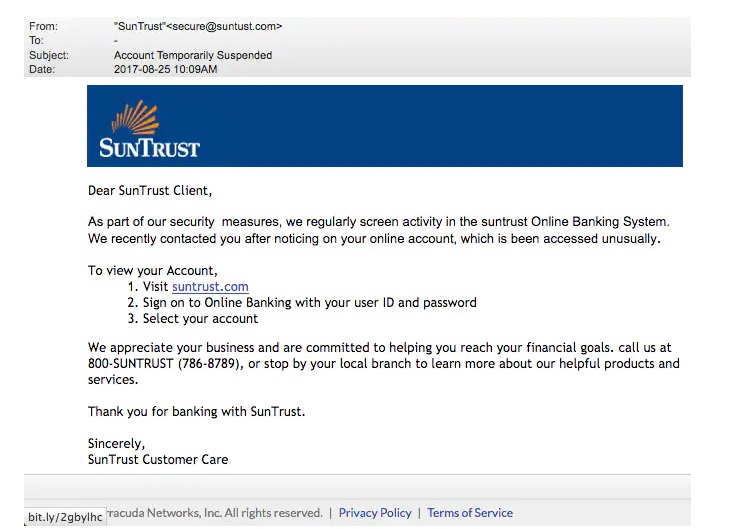
This above phishing email is a must read. Everything looks so convincing. Even I think I have a account at Suntrust. Only when we hover over the link that we can see it is suspicious.

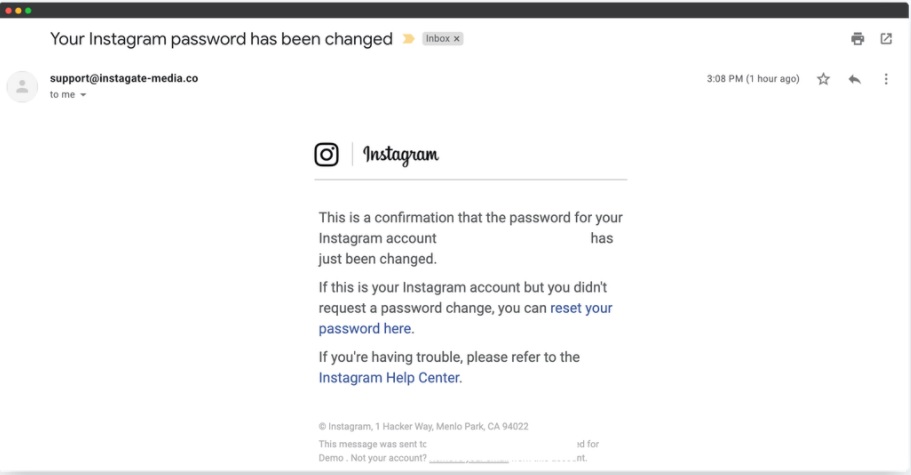
The above mail is directed towards Instagram users. Although sender email is phishy, have a look at the message of the mail. It says your Instagram password has been changed and if it is not you that changed the password, you are asked to click on the link they have provided to reset your password. It even provides a link to the Instagram Help Center to appear trustworthy.

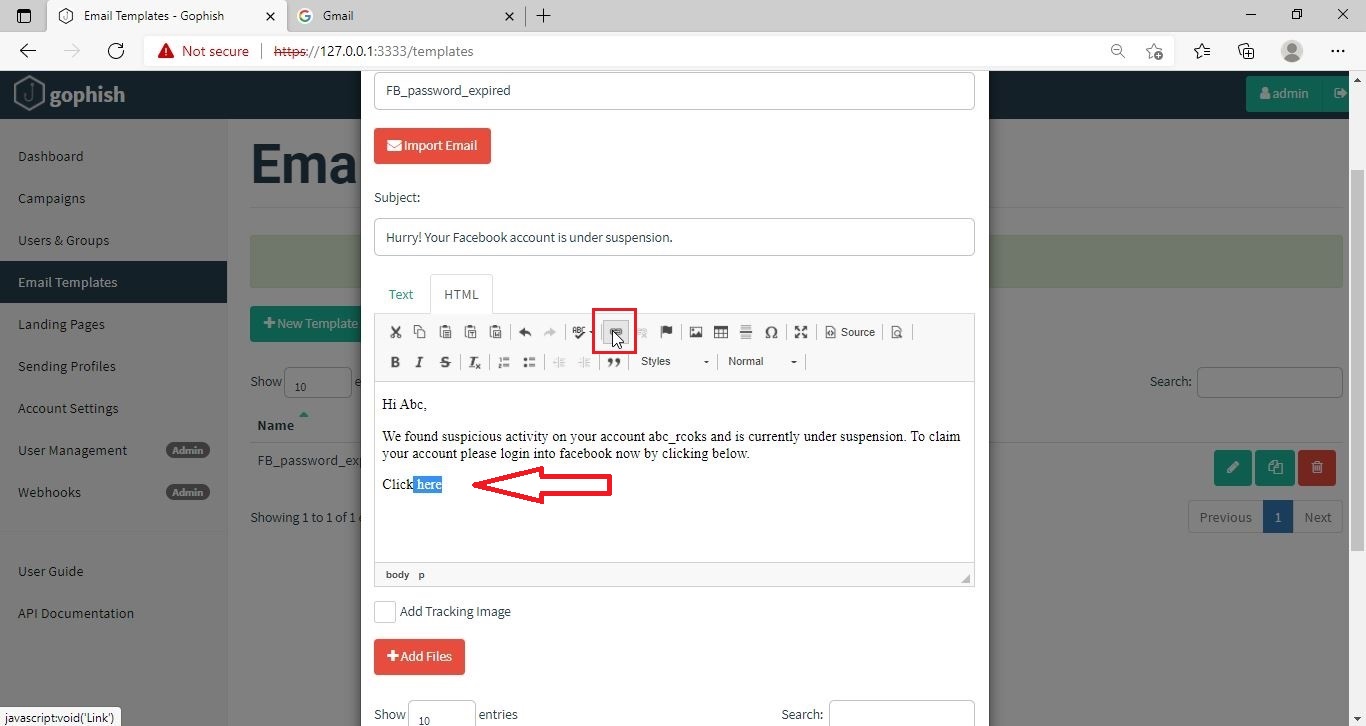
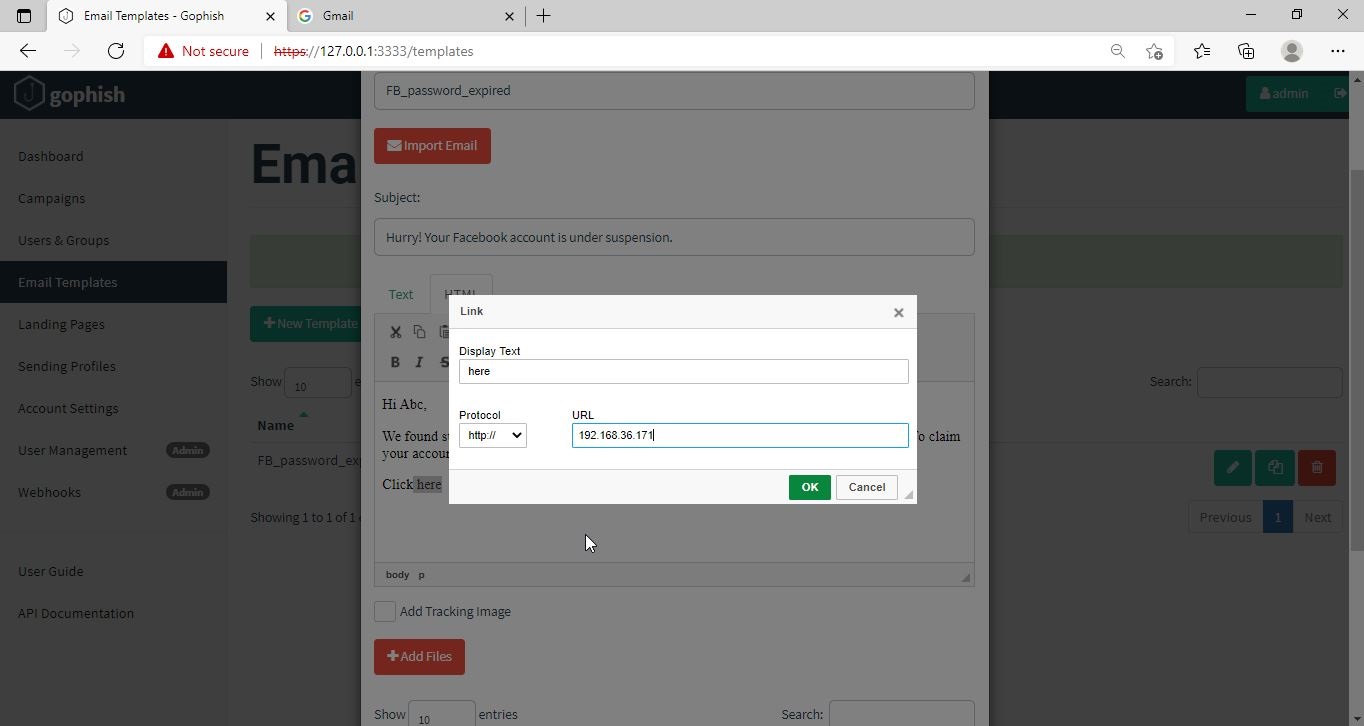
I am sure readers got an idea about how phishing emails look like. If you find an email suspicious, just hover over the links instead of clicking on them. Once, the body of the email is complete, let’s add a hyperlink to the email content. Click on “source”.

I want the users to be redirected to my Kali Linux attacker machine.

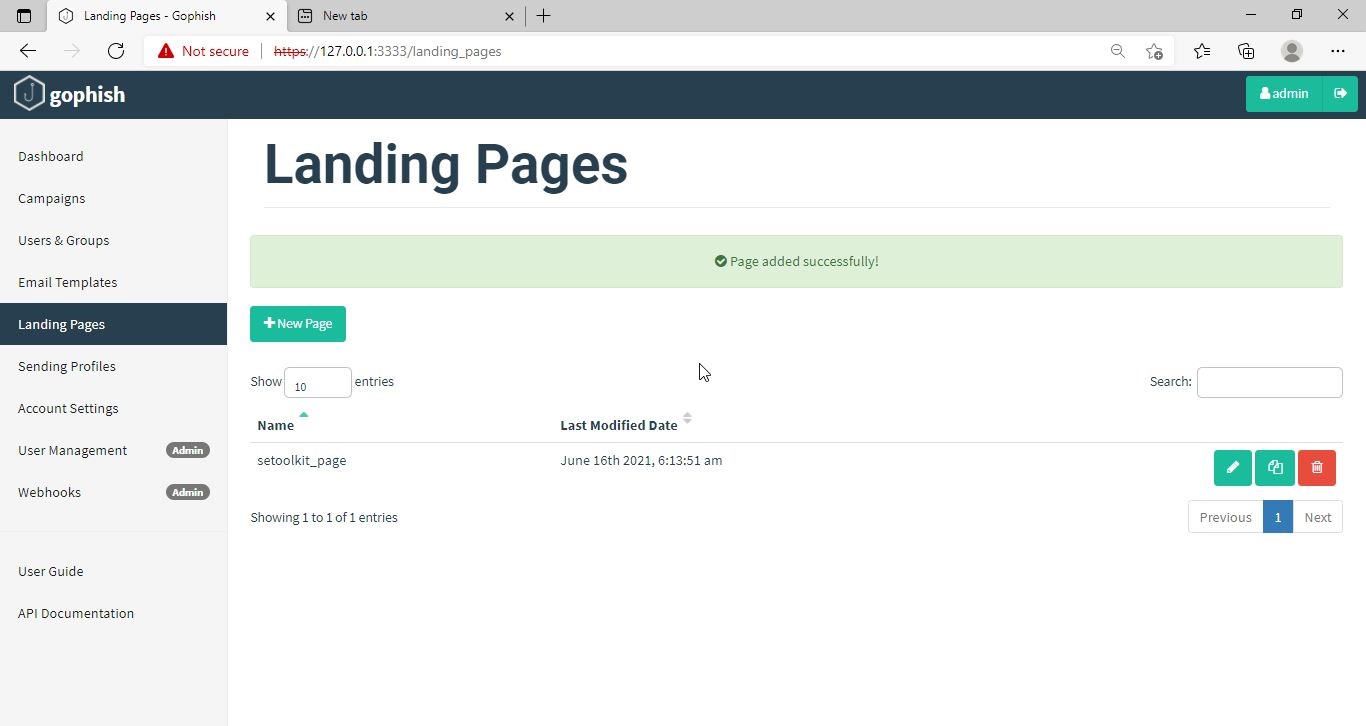
The Email template is ready. It’s time to set the landing page. Landing page in Gophish is the page where users will be redirected to after clicking a link in the email.

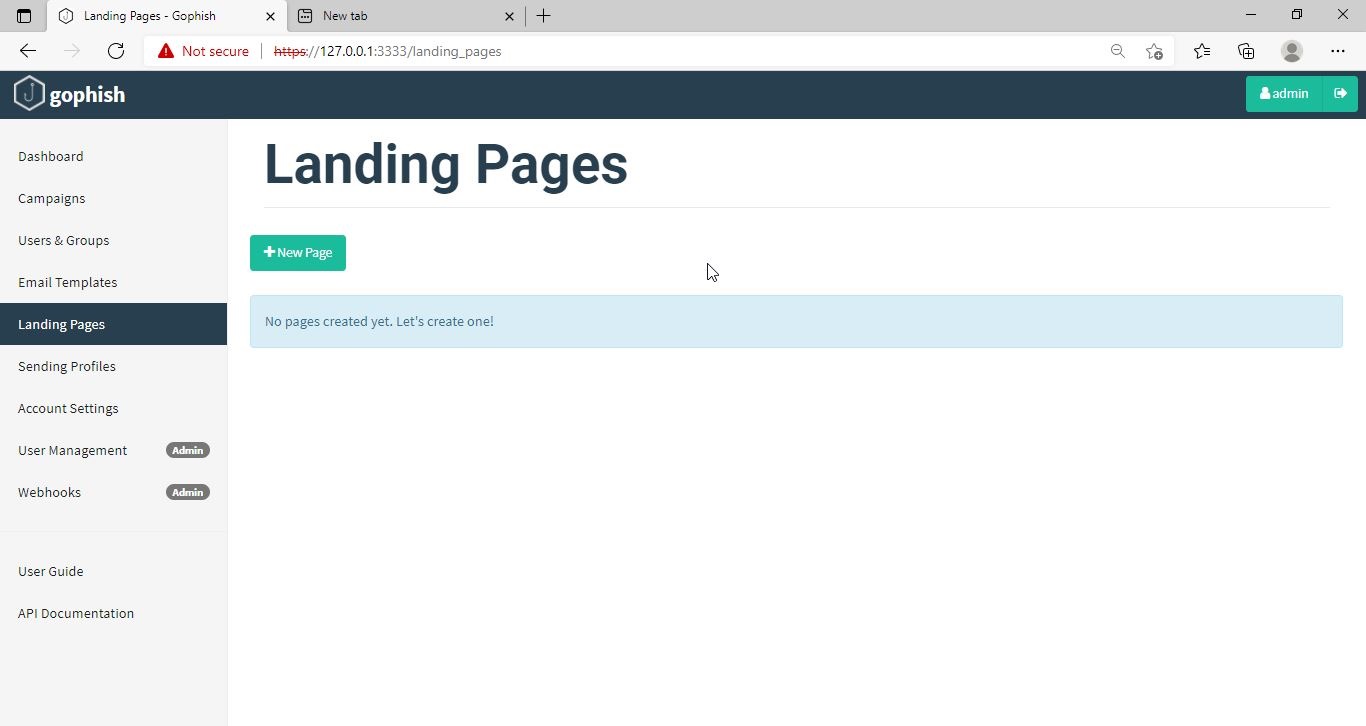
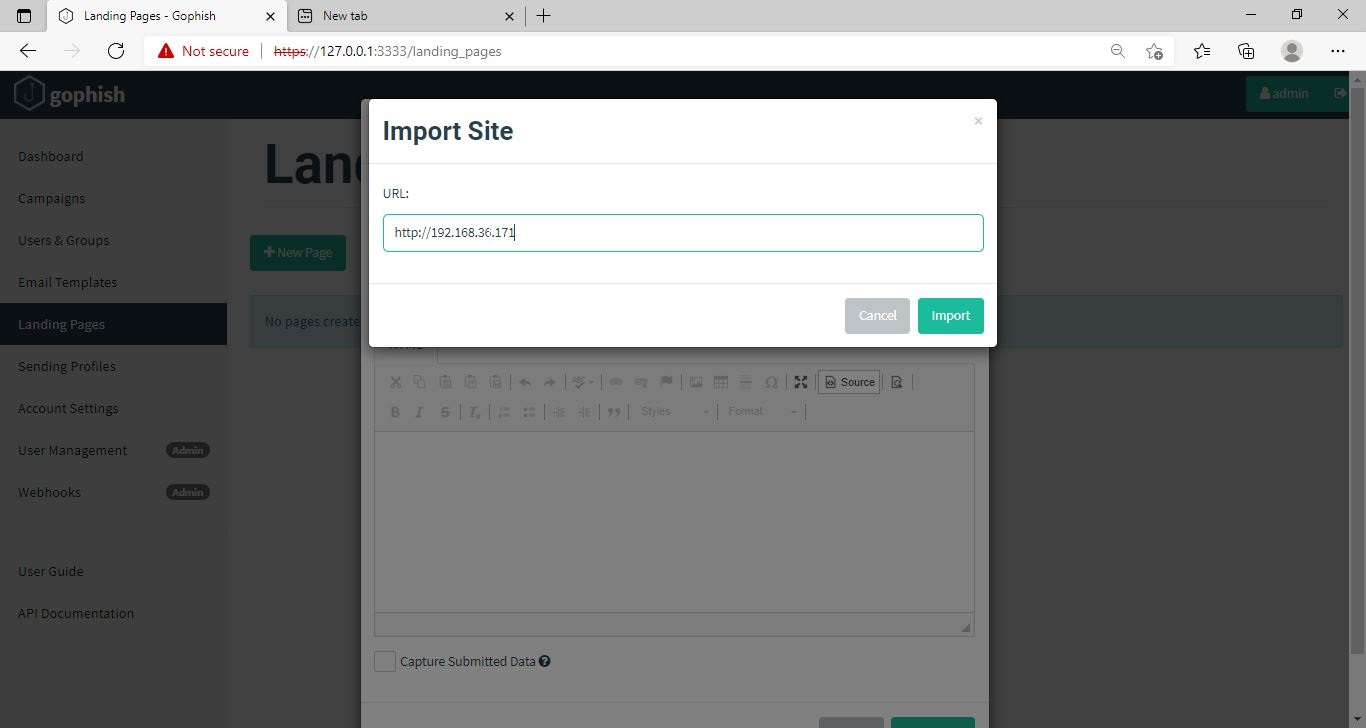
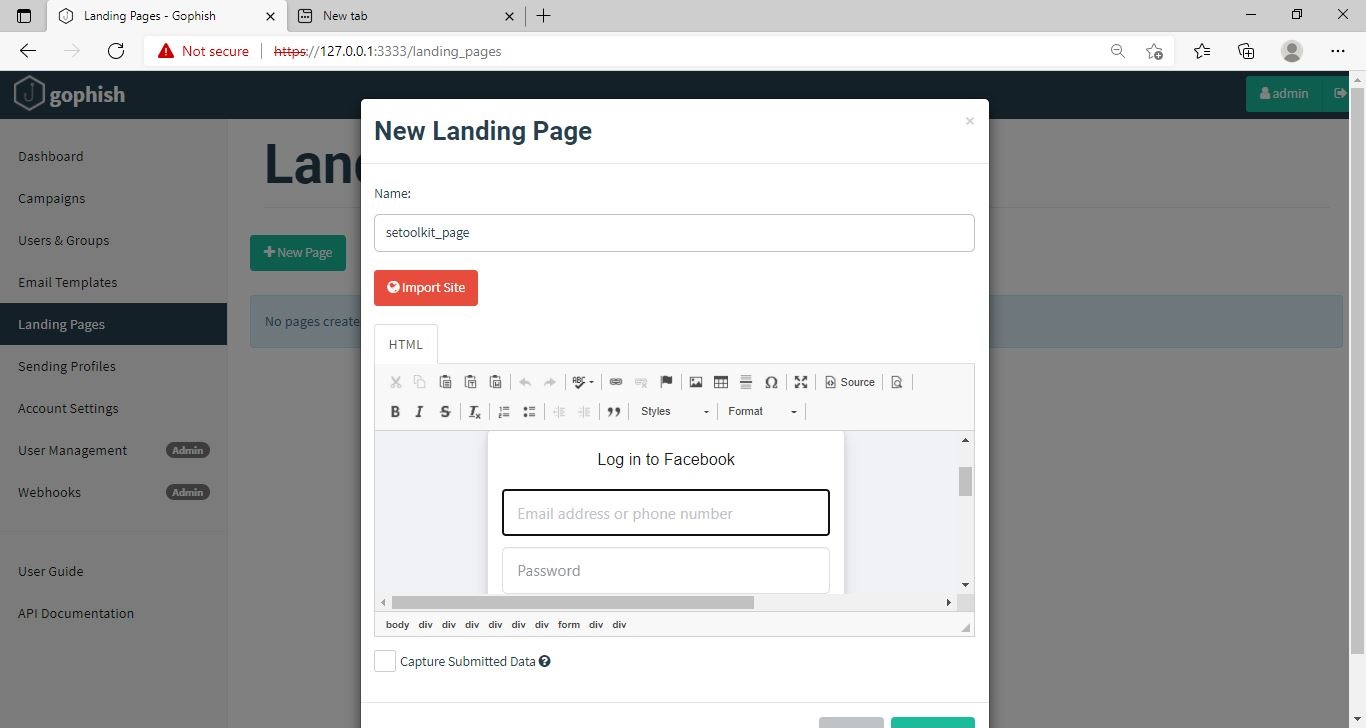
Click on “New Page”. You can create a new landing page or you can import an already created landing page. Let me import the phishing site I created in SE Toolkit on Kali Linux. After capturing credentials,

Just like any phishing website, we can redirect the users to another webpage after capturing credentials. I want the victims to be redirected to the genuine site of Facebook.

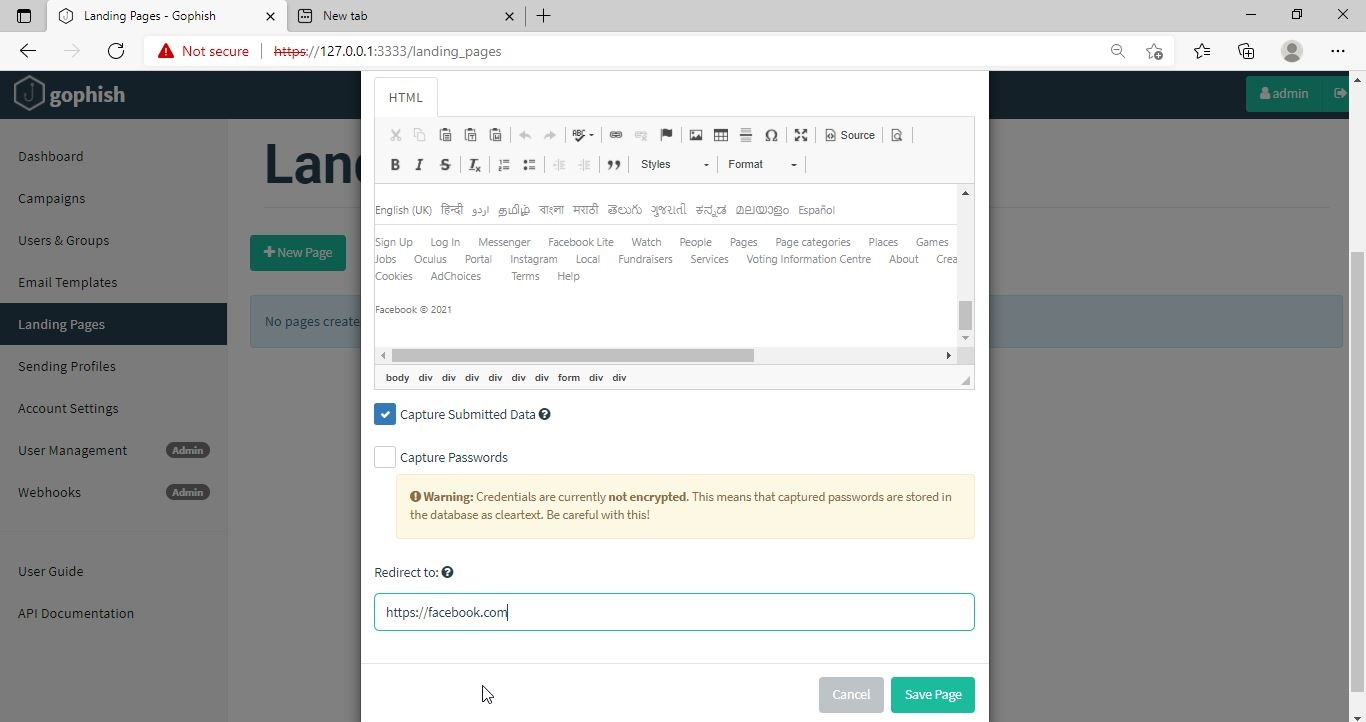
Save the landing page.

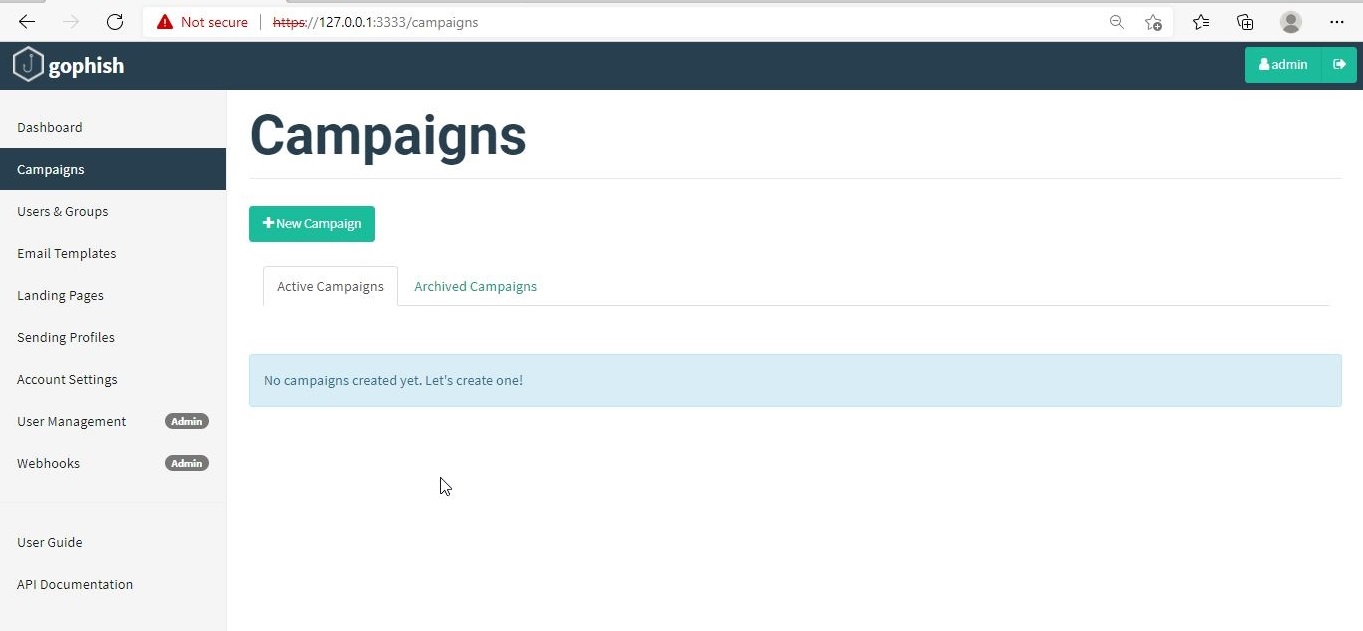
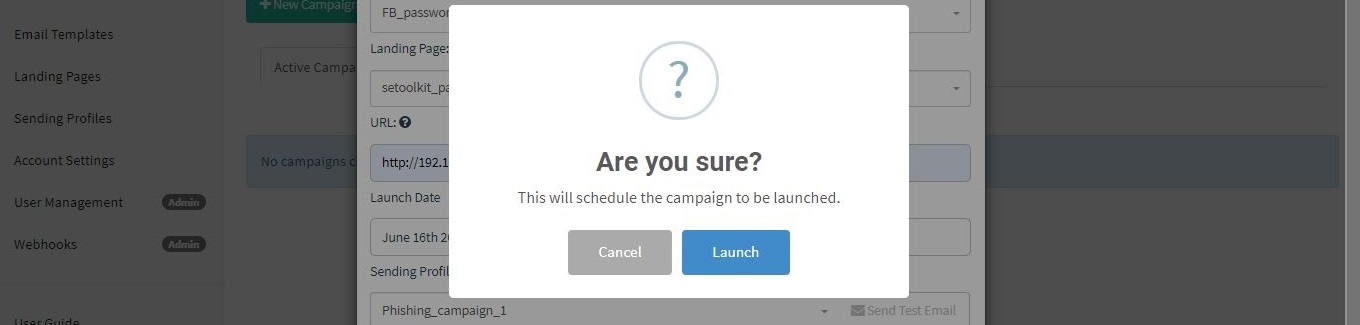
Everything is ready. It’s time to start the phishing campaign. Go to campaigns and click on “New Campaign”.

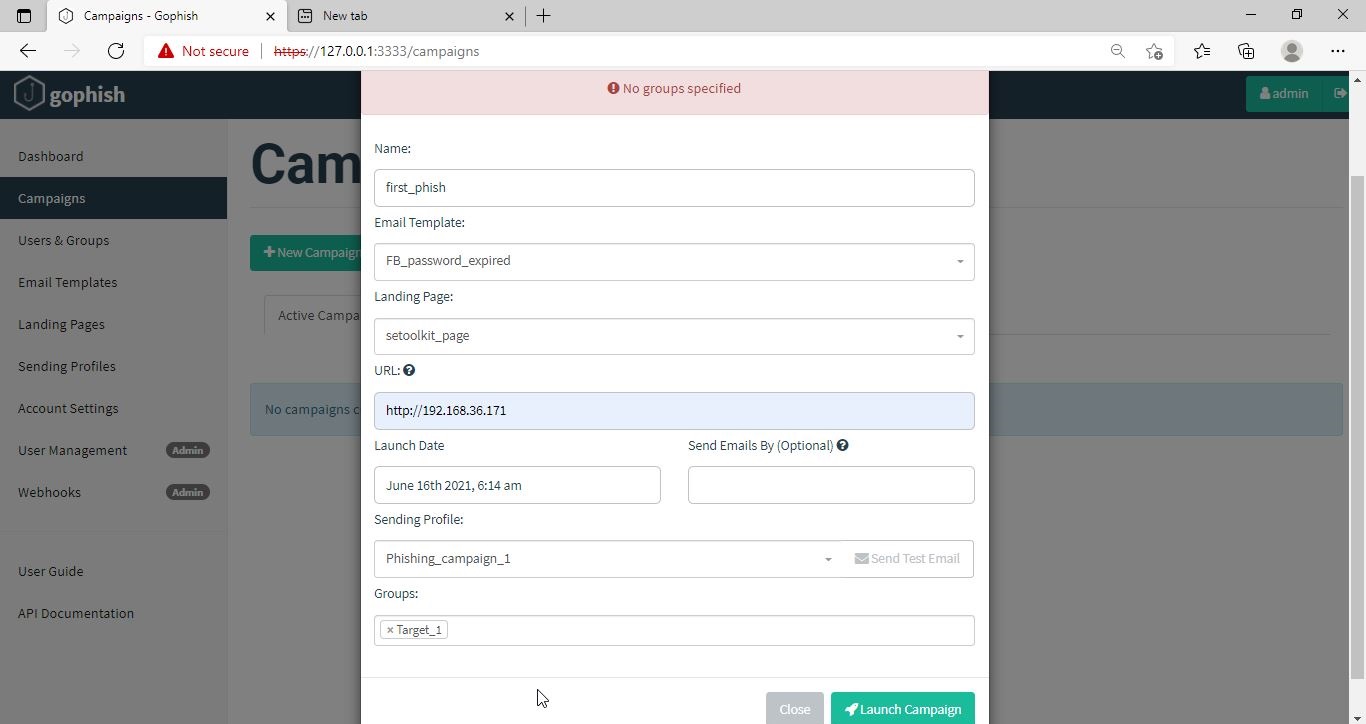
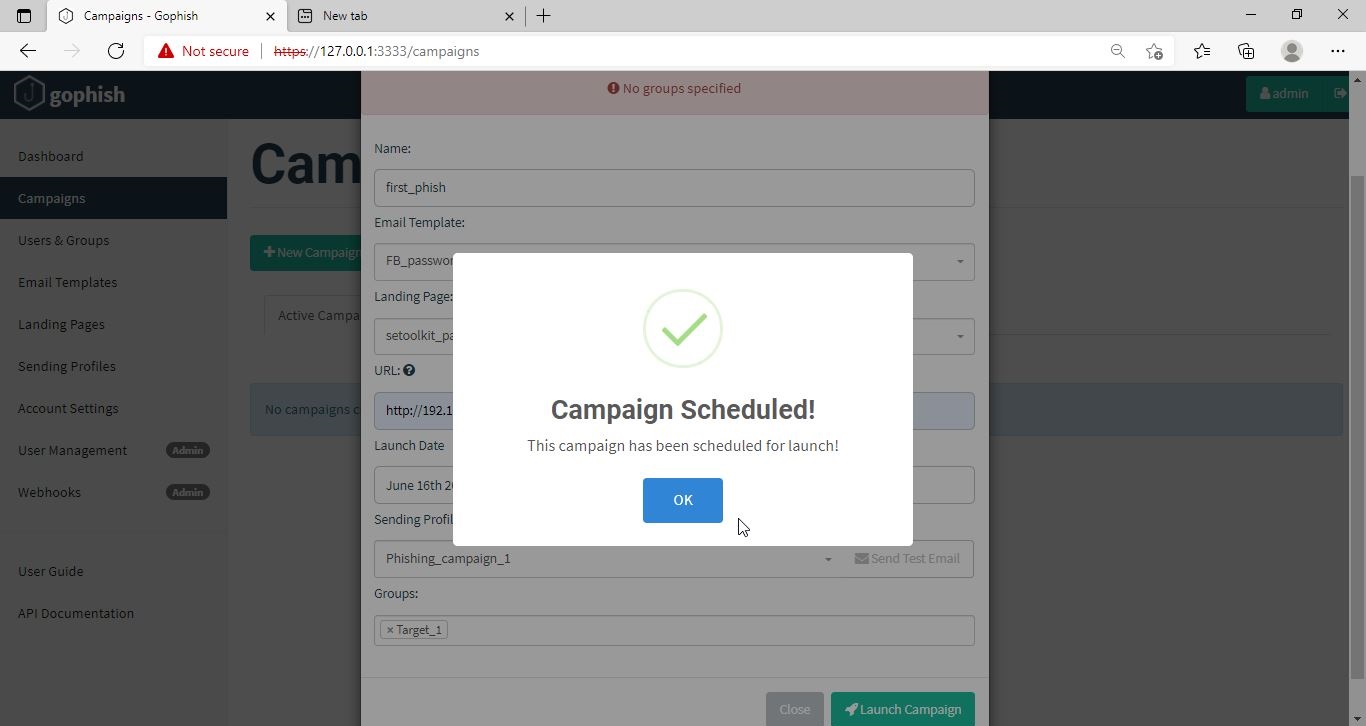
Specify all the options like URl, the recipients etc and click on “Launch campaign”. You can set the date and timing for the phishing campaign.

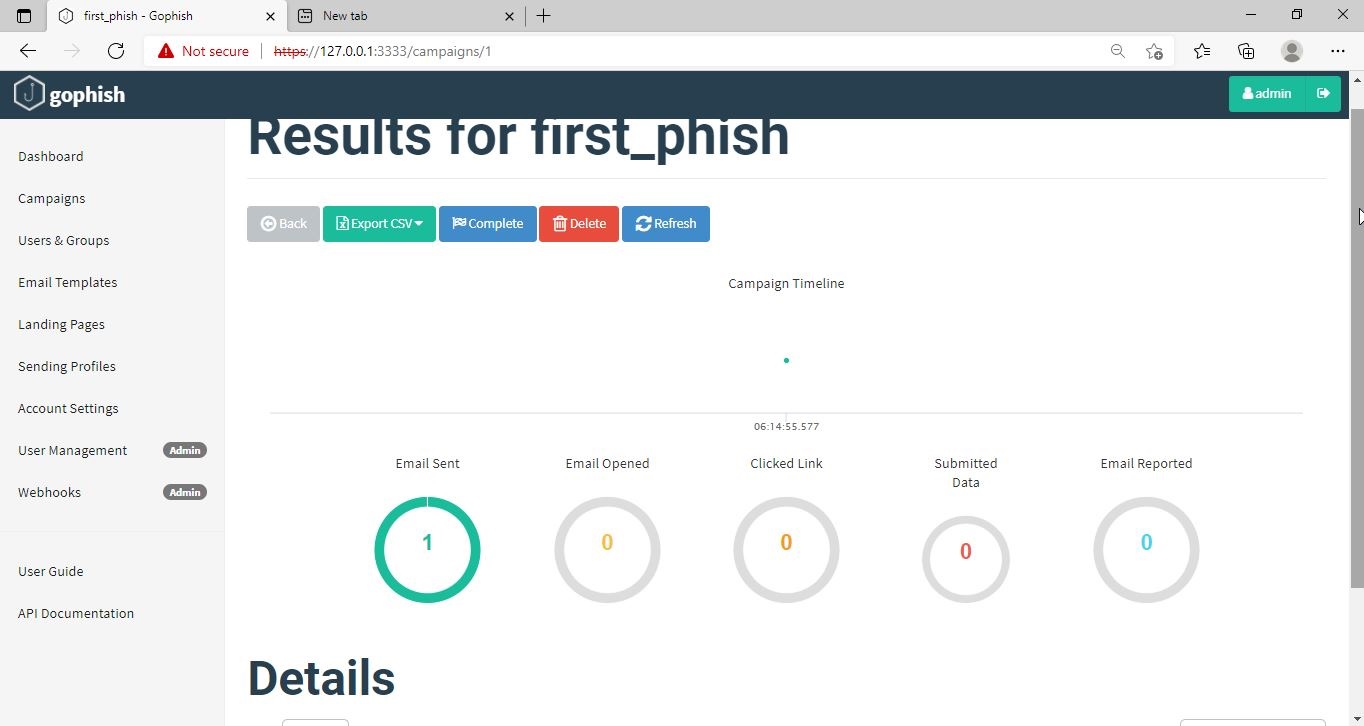
In the dashboard you can view result of the campaign. You can see how many victims read your email and how many fell to your phishing campaign.

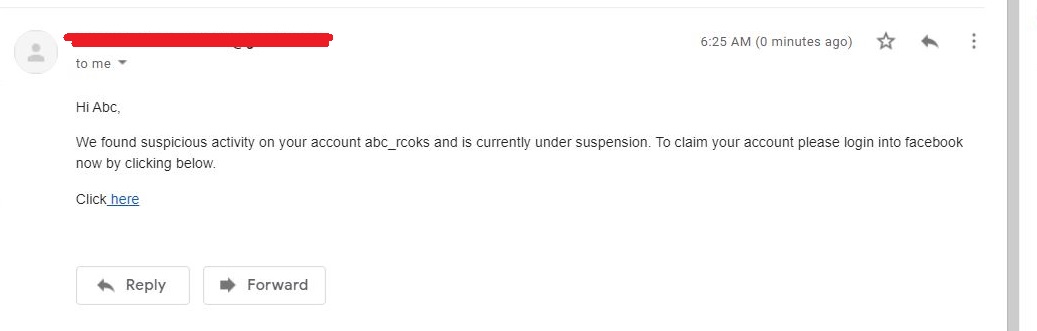
This is how the spear phishing email I created looks in Email Inbox.

Here is how the content of the email looks.

Here is the phishing site the user is redirected to once he clicks on the link.

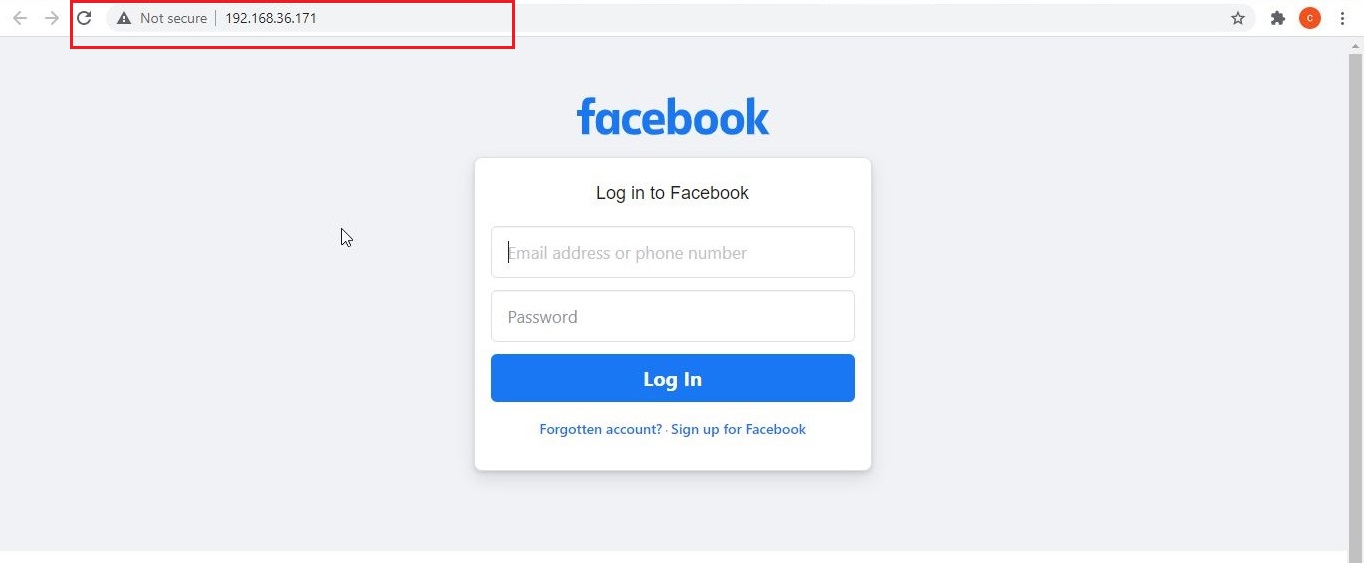
Once the victim fails to notice the signs of a phishing email, he enters his credentials.

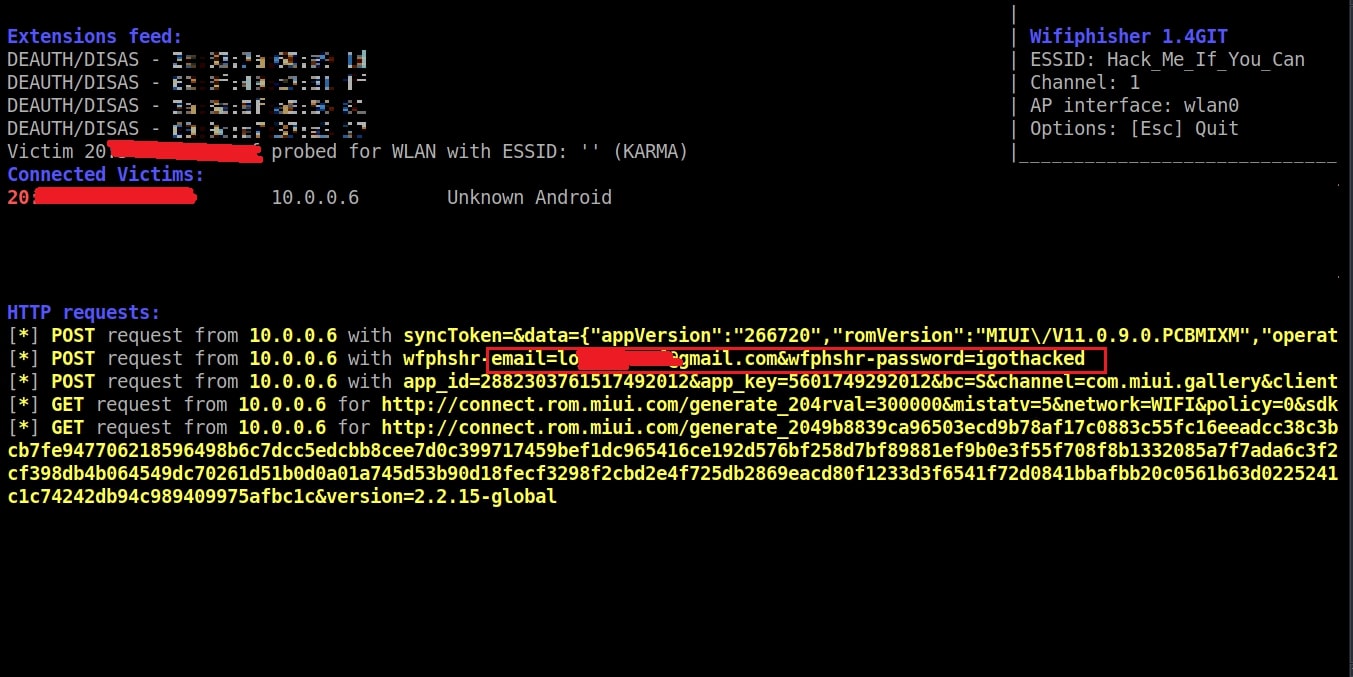
These credentials are captured in SETOOLKIT as shown below.

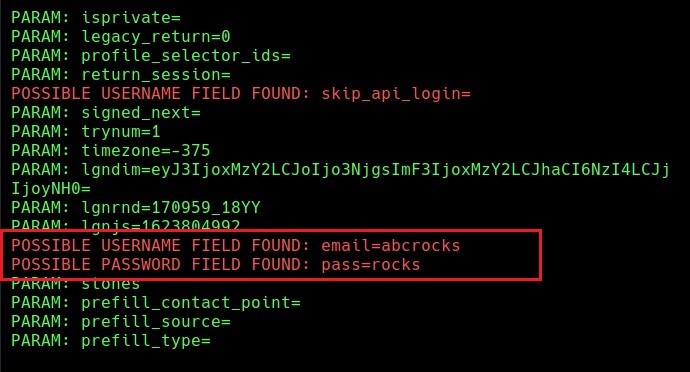
Credentials captured and our phishing campaign is successful. This is how a successful campaign is run.

Posted on

Nim Malware and AV Evasion

Hello aspiring ethical hackers. In this article, you will learn about Nim malware and how hackers are using it to bypass Antivirus solutions.

“Cyber Security researchers at ProofPoint were tracking a hacking operation they named as TA800. TA800 had a common mode of operation. They send personalized phishing emails containing a link to a supposed PDF document. Users who visited that link, downloaded malware with a fake PDF icon. This Malware is a loader which once opened provides attackers control of victim’s Windows Systems. These hackers have been using a loader named Baz Loader since 2020. However, researchers noticed a new loader being used by these hackers on February 3, 2021. This loader which researchers named as Nimza Loader was built in Nim programming language.”

Nim is a programming language designed and developed by Andreas Rumpf. Originally named as nimrod (it was renamed Nim in 2008), Nim was created to be a language as fast as C, as expressive as Python and as extensible as Lisp.

Often, the most common programming languages used to make malware are C, C++, Java and Visual Basic. But Malware authors often use a new programming language to beat Anti-Malware. Python Inspired syntax and a feature to compile directly to C , C++ etc makes Nim easy to use for developers and malware authors alike. It also has cross platform support. By writing malware in Nim, hackers can make it difficult for Anti-Malware to be able to detect their payloads since they have no updated detection systems for these new programming languages.

In this tutorial readers will learn the process of creating Nim malware and test this malware to see if Anti Malware can detect these payloads or not. Unlike other popular programming languages, Nim is not installed by default in Kali Linux. It can be installed using the apt package manager as shown below.

sudo apt install nim

Nim is successfully installed. Just like any other programming language, Nim needs a compiler. Although it is compatible with many compilers, let’s install mingw-64 compiler as shown below.

sudo apt-get install mingw-w64

As Nim is installed, nimble will be available on the Kali Linux system. Nimble is the package manager of Nim language. To create malware using Nim we need some more libraries. Important among them is the Winim library, which contains Windows api, struct and constant definitions for Nim. This is important while creating Windows based malware. Zippy is used for compressing and decompressing payloads. Nimcrypto is Nim’s cryptographic library used to perform several cryptographic functions.

nimble install winim zippy nimcrypto

Since all the necessary libraries are installed, it’s time to create a payload using Nim. A Github repository named Offensive Nim has many Nim payloads. We will download one Nim payload from there and compile it. We download the keylogger.nim payload from the Git repository and use the syntax below to compile it.

The “-c” option specifies compiling the “-d” option is used to specify compiler. The “—app” option is used to specify the type of app to create. We can create four types of applications here: console, GUI, lib and staticlib. We will create a console app here. The “—cpu” option is used to specify the target processor. Since our target is a Windows system, we are specifying i386 option which can run on both 64bit and 32bit systems.

nim c -d=mingw –app=console –cpu=i386 <path to Nim payload>

This will create a Windows executable file with the same name as the .nim file. The payload is ready. Now lets test it. We copy it to the target system (Windows 7) running a third party Antivirus. As you can see, all the protection shields are active and the AV is updated.

As the payload is successfully copied to the target system, the Antivirus failed to detect it.

nim malware

Let’s try executing our payload and see the response of the Anti Virus. Even as our payload is running, the Antivirus failed to detect it.

This is good. But let’s try something meaningful. Let’s try to get a reverse shell on the target system. We downloaded a simple Nim reverse shell from here.

We change its LHOST and LPORT values and compile it in the same manner as above.

We start a Netcat listener on the Attacker system and execute the reverse shell payload on the target system.

As readers can see, we got a successful reverse shell connection and the Antivirus didn’t even blink.

Posted on

MiTM Attack: Sniffing Images In a Network

Hello aspiring ethical hackers. In this article you will learn how to sniff images in a network using MiTM attack. In our previous article, readers have learnt how plaintext credentials passing through the network can easily be captured by attackers using Wireshark.

In this article, readers will learn about a different type of sniffing. i.e capturing images being transmitted through the network. As good as Wireshark is, it cannot be used to sniff images being sent through the network.

For this tutorial, we will be needing any program that requires images to be transferred in a network. For this purpose, we will use Netop Vision Pro Classroom Management Software (https://www.codework-systems.com/products/netop/netop-vision-pro/). As its name implies, this is a classroom management software used for distance learning. It has two modules: the Teacher module and Student module. The Teacher module is installed on one system and the student module is installed on all the student systems. The computer running the Teacher module has complete control over the computer running the student module and the student has no or very small limited role. The Teacher can view the Desktop of the Student’s Desktop to make sure the student is on track.

Remember the sniffing lab we used in one of our previous article. In the same Sniffing Lab, we will add three systems: two Windows 7 systems with Netop Vision Student Module installed on one system and Netop Vision Teacher Module installed on another Windows 7 system. The third system is Kali Linux which is the attacker system and used for sniffing images. Let’s setup the Lab first. Download the Netop Vision Pro software onto the first Windows 7 system and click on it. Select the “Run Installer” and click on “Next”.

Click on “I Accept The Terms in the license agreement” and click on “Next”.

Select the Vision Student Module and click on Next.

Select the option as a Windows Startup Service and click on Install.

Check the IP address of this system and restart it.

Here’s the Student’s Windows system. There is some program running on it.

Now, in the second Windows 7 system, install the Teacher module of Netop Vision.

When it prompts for the license key, click on “Next”.

Click OK to restart the computer.

After the computer (on which Netop Vision’s Teacher Module) reboots, open the Netop Vision application. This should open the class room manager window automatically. If that did not happen, open it from the File menu. Create a new classroom. Click on “New”.

Click on “Next”.

Add the student system. Click on “Add” and add the IP address of the student system as shown below. Then click on “translate addresses”. You will get the IP address translated to the name of the computer. Click “OK”.

Click “Next”.

Click on “Finish” to finish the installation.

We have set up a new classroom. From the classroom manager, open the new classroom you just created.

We can see the Desktops of connected Student computers. Since we have connected only one student computer, only one system is shown.

The target is ready. On the Kali Linux system, install the Driftnet tool as shown below.

mitm attack

Check the name of the network interface.

Now all we have to do is to start the driftnet tool on that interface.

A small window will open as shown below.

When you maximize the window, you can see the live capture of the images of the Student’s Desktop. These images of the student computer are being captured by the teacher module. As already said, the feature is available in Netop Vision classroom management software to monitor student computers. These images are captured at regular short intervals and transmitted in real time to the Teacher computer.

But how are these images being sniffed by Driftnet? Just like in the case of plain text protocols, these images are being transmitted in the network without any encryption. Hence, driftnet has been able to capture them by sniffing on the network.

Posted on

WPS pin is cracked but WPA key is not shown

Hello aspiring ethical hackers. In this article, you will learn how to solve a problem that you experience while cracking WPS pin. We have seen how to retrieve WPA key by cracking WPS pin with both Bully and Wifite. Well, If you get WPA key as soon as you crack WPS pin, you are lucky. However, sometimes the WPS pin is cracked but the WPA-PSK key is not shown. For example, see the image below.

In the above image, we can clearly see that the Wifite cracked WPS pin successfully but failed to get the WPA key. To get the WPA key in such cases, open a new terminal and type the command shown below.

sudo systemctl stop NetworkManager

Then using your favorite text editor open the file wpa_supplicant.conf located in /etc directory.

You should see the contents of the file as shown below.

If there is any data more than this, delete it and just leave the above three lines. Then, run the command shown below.

sudo wpa_supplicant -i wlan0 -c /etc/wpa_supplicant.conf

Leave this terminal open and open another new terminal window and run the command as shown below.

sudo wpa_cli

It goes into interactive mode.

While interactive mode is active, type the following command as shown below.

status

Many events will take place but what we are looking for is an event that says “connected”. Once that happens, check the wpa_supplicant.conf file and you should be seeing WPA-PSK key of the wireless network as shown below.

wps pin
Posted on

Evil Twin Attack

Hello aspiring ethical hackers. In this article, you will learn about Evil Twin Attack. Till now in our blog, readers have learnt about various wireless hacking tutorials like cracking WEP, cracking WPA/WPA2 and cracking WPS. Almost all of these hacking methods involved brute forcing or password cracking. What if there was another easier way to hack wireless networks without the need of brute forcing.

Well, Evil Twin Attack is one such attack. An evil twin attack is a wireless attack in which a fake Wi-Fi access point is set up with the same SSID as that of the original one. This fake access point appears to be legitimate but is actually set up to eavesdrop on wireless communications of the original one. The evil twin is the wireless LAN equivalent of the phishing scam.

Since it has the same name, it’s called twin and as it is malicious it can be termed Evil Twin. The aim of this attack is to confuse users trying to connect to the target Wi-Fi network and make them connect to the Evil Twin instead and thus capture sensitive data. Let’ s see it practically. There are many tools that can be used for this attack but let’s use a tool called Wifiphisher because it’s the simplest one. Our Attacker system is Kali Linux. Wifiphisher can be installed on Kali Linux as shown below.

Once installation is finished, Wifiphisher can be started using command.

sudo wifiphisher

Then the tool will prompt you to select the Wi-Fi Access Point of which you want to create an Evil twin.

For this tutorial as always (OK, most of the time) I will select the Wi-Fi network “Hack_Me_If_You_Can” as my target.

The tool will prompt you the available phishing scenarios available. For this case, OAuth Login Page attack is available.

The OAuth Login Page attack creates a fake login page asking for credentials of the users who want to connect. Note that while creating a fake access point, it is created as an open network unlike the one we are targeting. I select the OAuth Login Page attack and the attack starts.

So just imagine while we are running this Fake access point, some mobile user is looking for available Wi-Fi networks to connect to. He will see two networks with the same name and gets confused. Once he selects our Evil Twin to connect to, he will be prompted with a login page as shown below.

evil twin attack

Here, he is being asked to submit his Facebook credentials of course by dangling the carrot of free internet. The login page is so believable even to me. And if the user falls for the trick (or carrot) and submits his credentials as shown below.

On Kali Linux, the activity is recorded as shown below.

and the credentials are captured successfully.

That looked simple enough. But where can Evil Twin Attack become successful? In many areas but especially where there are free Wi-Fi access points. Imagine creating an Evil twin with the same name as the original.